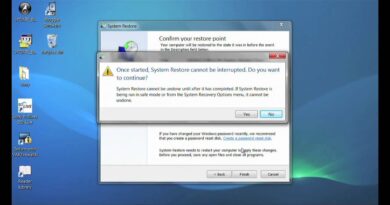
FIX Windows 10 Startup Problems 2020
It’s just a matter of time before your device gets stuck loading or won’t start at all. Instead of spending time trying to find out the problem, Windows 10 includes the Startup Repair feature designed to quickly fix most common issues that may be preventing your computer from loading correctly.
In this Windows 10 video guide, I’ll walk you through the steps to fix boot problems on your device.
To use the Startup Repair feature to fix boot issues with Windows 10, you’ll need to access the Advanced startup settings, which you can do in at least three different ways depending on your situation.
ACCESSING ADVANCED STARTUP WHEN PC ISN’T LOADING
If your device isn’t loading or stuck during boot, you can use this method to access the recovery environment:
1. Turn on your PC.
2. As soon as the Windows logo appears on your screen, press the power button. (This will immediately interrupt the boot sequence.)
3. Repeat steps 1 and 2 two more times.
After the third interruption, Windows 10 will open into the Advanced Startup environment, and then you can continue with the steps below to use the Startup Repair tool to fix booting issues with Windows 10.
ACCESSING ADVANCED STARTUP USING BOOTABLE MEDIA
Alternatively, in the case your device isn’t starting at all, you can use a USB installation media to get to the Advanced settings environment. Here’s how:
1. Start your device using a USB bootable media.
QUICK TIP: Quick Tip: If your computer isn’t starting from the USB flash drive, you’ll need to change your system’s BIOS settings to make sure it can boot from USB. Usually, you can access the BIOS by powering up your device and pressing one of the functions, Delete, or ESC keys, but make sure to check your manufacturer’s support website for more information.
2. Click Next.
3. Click the Repair your computer link in the bottom-right corner.
After completing the steps, you can now continue with the steps below to fix loading problems with your device using the automatic repair feature.
USING STARTUP REPAIR TO FIX ISSUES
While in the Advanced startup environment, use the following steps to use Startup Repair:
1. Click the Troubleshoot button.
2. Click the Advanced options button.
3. Click the Startup Repair button.
4. Select your account.
5. Type your account password.
6. Click the Continue button.
Once you’ve completed the steps, the Start Repair feature will proceed to scan, detect, and fix any problems that may prevent your device from loading correctly.
Also, the repair process creates a SrtTrail.txt file in the “C:WindowsSystem32Logfiles” folder with log information that you can view to have a better understanding of the diagnostics.
USING THE COMMAND PROMPT TO FIX PROBLEMS
1. Click the Troubleshoot button.
2. Click the Advanced options button.
3. Click the Command Prompt button.
4. Select your account.
5. Type your account password.
6. Click the Continue button.
7. Commands used in the video:
bootrec /scanos
bootrec /fixboot
bootrec /fixmbr
bootrec /reuildbcd
how to repair windows 7


Didn’t work plz help I just got this pc for Christmas
Helpful video 😀
You got any social media platform where I can contact you up ?
Great Job Done !
Best Issue !!
Good afternoon Windows Love This video will help a lot who is with this problem congratulations for your work.