Fix Unallocated Hard Drive without losing Data in Windows 10
[ad_1]
An Unallocated disk or drive is one that hasn’t been assigned any drive letter. To install an operating system on brand new hard drives, you will be required first to partition it because you can’t write data on an unallocated hard drive.

Sometimes, your existing hard drive points out an unallocated space on it. This means the space on the hard drive does not belong to any partition, so data can’t be written to it. To solve this, you will have to create a new partition or expand the current partition. But before you do that, right-click on the Unallocated disk and see if you can Change Drive Leter and Paths.
In sporadic cases, an entire functioning hard drive becomes unallocated! When this happens, all your files and folders stored on it become inaccessible. In this article, you will see a few causes and how to fix it.
Why do drives become Unallocated?
Different reasons may cause your Hard Drive to be Unallocated. A few are listed below-
- An error in your file system, or a corrupted or damaged file system
- Internal error.
- Hardware failure in the hard drive.
- An outdated hard drive driver.
- The presence of a virus or malware in the hard drive.
- The hard drive was ejected improperly the last time.
- Due to poorly created or modified partition
- The external hard drive was physically damaged.
- Due to wrong operations.
So many other reasons could cause this error; those listed above are the most common causes of an unallocated hard drive.
Fix Unallocated Hard Drive without losing Data
You can fix this error in three ways. Nevertheless, it would be best if you tried recovering your data from the drive with a good data recovery tool. If you can’t recover your data from the hard drive, use the following methods to do repair the drive.
- Fix it with the CHKDSK command.
- Update your hard drive driver.
- Create a new volume using Command Prompt.
1] Fix it with the CHKDSK command
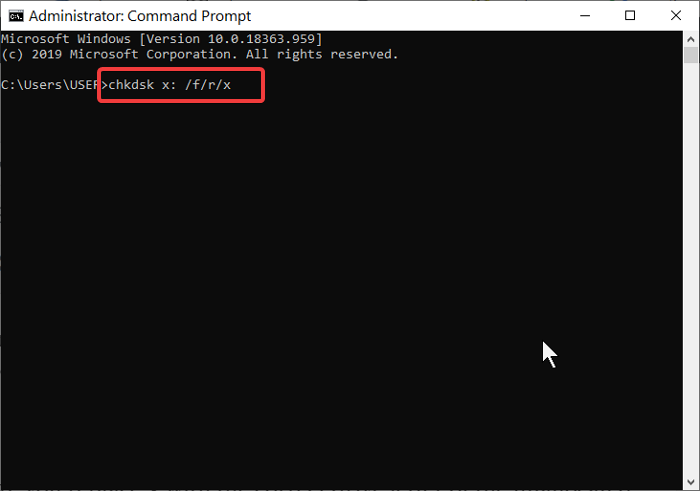
You can use the Chkdsk command by running it through the Command Prompt. Open your Command Prompt as an administrator then input the following command and hit Enter:
chkdsk x: /f/r/x
Note: In your Command Prompt, ensure you replace x with the correct drive letter of the unallocated hard drive.
The command above represents:
- x = the hard drive that is unallocated (check for the drive’s letter)
- /f = repairs drive errors.
- /r = recovers data in the bad sector
- /x = unmounts the drive to start the process
2] Update your hard drive driver
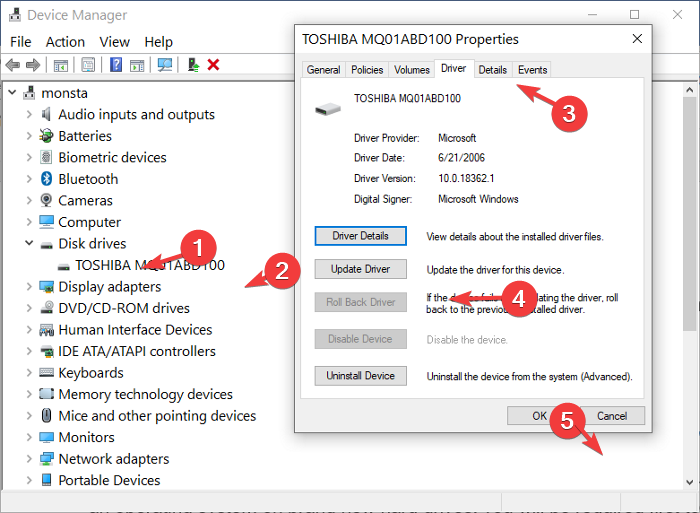
You can solve this error by updating your hard drive’s driver. Open your Device Manager, right-click on the unallocated hard drive found under the Disk drive section.
From the right-click menu, select Properties > Driver > Update. Here, follow all on-screen instructions and Restart your PC after the update.
3] Create a new volume using the DISKPART tool
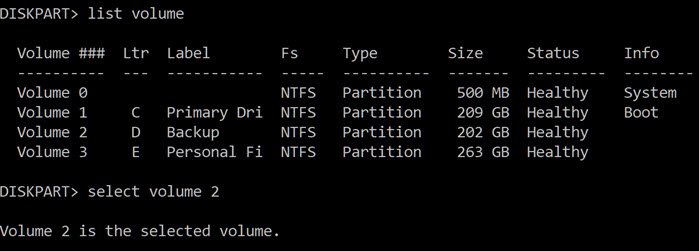
You can also create a New Volume from your PC’s command prompt. Open the Command Prompt and input diskpart, then hit Enter. Type in list volume then strike the Enter key.
Chose the unallocated driver’s letter with the following command: select volume x (replace x with the unallocated driver’s letter).
Next, type the following; delete volume and list volume. At this juncture, Diskpart should create a new volume.
If Diskpart fails to create a new volume key, you’ll have to do it manually. Carefully follow the instructions below:
- Input the following commands in Command Prompt one after the other and hit Enter after each.
- Search for Disk Management from the Windows Start menu, then select Create and format hard disk partitions from the results given.
- Right-click on the unallocated hard drive and select New Simple Volume > Next.
- Set the new Simple Volume size in MB then Next.
- Select the Format this volume with the following settings
- Make the File System to NTFS, and the Allocation unit size should be set at default, then name the Volume label.
- Mark the Perform a quick format checkbox then click Next > Finish.
Ensure you follow the settings carefully to create the new volume.
Related read: Fix Unallocated Space error on USB drive or SD card.


