How to change Name, Color, Location of your OneNote notebook
[ad_1]
In OneNote, users can use Properties to customize the notebooks displayed name, location, and color. The Properties feature is displayed whenever you click the drop-down arrow on the notebook in the backstage view.
How do I change notebook location in OneNote?
Yes, you can change the notebook location in OneNote. The existing notebook can move to OneDrive or SharePoint, where you can input a name for the notebook and select create.
Can you rename notebooks in OneNote?
Yes, you can rename notebooks in OneNote; it is easy and simple to do. You can right-click on the notebook and select Properties or click on the notebook in the backstage view and choose Properties, where you can rename your notebook.
How to change Name, Color, Location of your OneNote notebook
To update your notebook using the Properties feature, follow the steps below.
- Launch Outlook
- Click the File tab
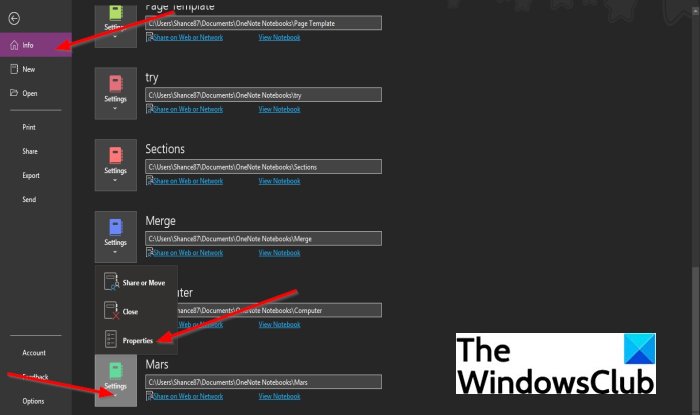
- On the backstage view, click Info
- Click the drop-down arrow of one of the notebooks settings
- Select Properties
- Change the Displayed name
- Change the Color
- Change the Location
- Click OK
Launch OneNote.
Click the File tab on the menu bar.
On the backstage view, click Info on the left pane.
Click the drop-down arrow of any one of the notebooks settings you want to change.
Select Properties from the drop-down list.
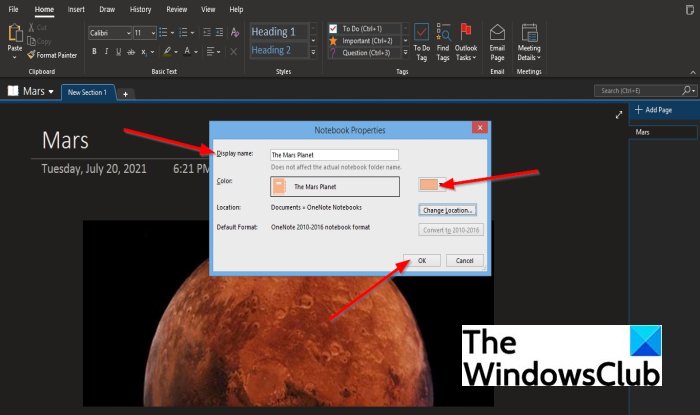
A Network Properties dialog box will pop up.
In the dialog box; Change the Displayed name.
Change the Color of the notebook.
Then click OK.

The name and the color of the notebook will change.
There is another option to open the Network Properties dialog box to customize the notebook
The notebook name is displayed on the left of the window.

Right-click the name of the notebook and select Properties.
The Network Properties dialog box will appear.
Now change the Location of the notebook file.
We did not change the location in the first method because if we did, the name and the color of the notebook would not change.

To Change the Location of the notebook file, click the Change Location button.

A Choose a sync location for this remote notebook dialog box will pop up.
Choose the sync location where you want to place the notebook, then click Select.
A message box will pop up stating, ‘ Your notebook is syncing to a new location.’
Click OK.
We hope this tutorial helps you understand how to update your notebook using the Properties feature in OneNote.


