How to make Instagram Carousel in Photoshop: Beginner-friendly tutorial
[ad_1]
Instagram carousels allow you to post multiple images up to 10 in a single post. Content creators have taken the carousel feature to the next level with great designs that excite and inspire the consumer.
You might have come across posts on Instagram with “Swipe left to see more” written on the images. When you swipe left, you see carefully designed, coherent images uploaded one after another.
Designing Instagram carousels on Adobe Photoshop is a no-brainer. You can design a carousel as easily as you retouch or create a poster. Let’s see how we can design a simple carousel in Photoshop. This guide helps you even if you are a Photoshop beginner.
Make Instagram Carousels in Photoshop
To get started, Open Adobe Photoshop on your computer and click on Create new on the opening screen.

Now, you have to enter the resolution to create images. The recommended image size on Instagram is 1080px by 1080px. To create a carousel, you have to multiply the width with the number of images you want to create in the carousel and set the height to 1080px.
For example: Here, We are creating a carousel with 4 images. So, 1080px multiplied by 4 is 4320 which would be the width of our image.
After entering the values of width and height, click on Create.

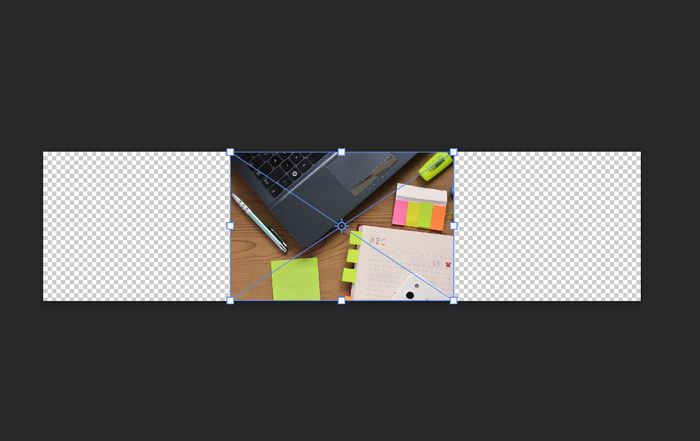
Once you have created the file, import the background for your carousel. The background may be of a single image or multiple images or a solid color, whatever you deem fit. Here, we are importing a single image. To place the image directly on the file, click on File in the menu and then select Place Embedded from the options.

The image/images you select will be imported into the file. Resize the image to ft with the file.

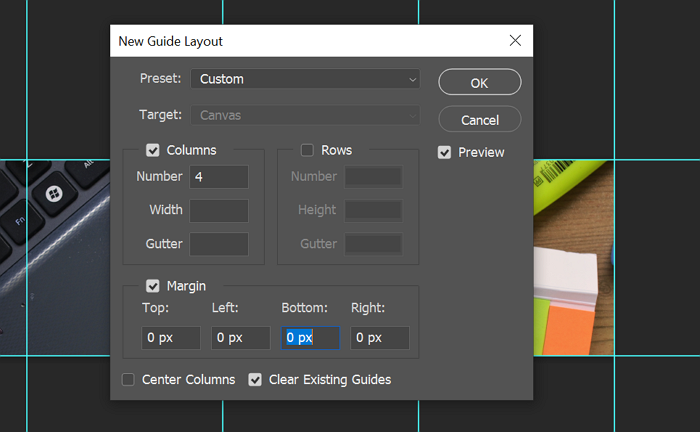
After resizing the image, you need to create guides to get the exact idea of the Instagram carousel you are creating. To create the guides, click on View in the menu and then select New Guide Layout from the options.

It will open New Guide Layout dialog box. As we are creating 4 images, enter 4 in the columns Number box and click OK.

You will now see Guides dividing the image you are creating into 4 boxes. Each box represents an image in the Instagram carousel. Design your carousels considering the guides.
Read: How to set up, record, edit, publish Instagram Reels.
When you are done with the design, you need to slice the images. To slice them, click on the Slice button on the side toolbar and select Slice Tool.

You will see slicing options under the main menu. Click on Slice From Guides to slice them according to the guides you have created earlier. It will slice the images but you can’t see them sliced. The slices will help you export the single image as four.

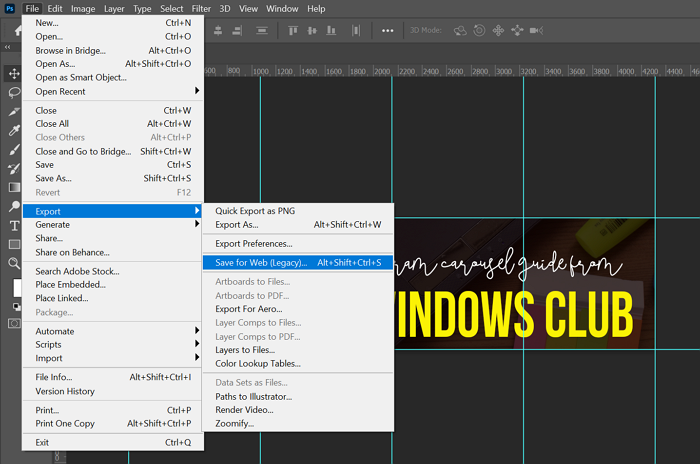
Now, you are ready to save the Instagram carousel you have just designed. Click on File in the main menu, select Export and then select Save for Web (Legacy).

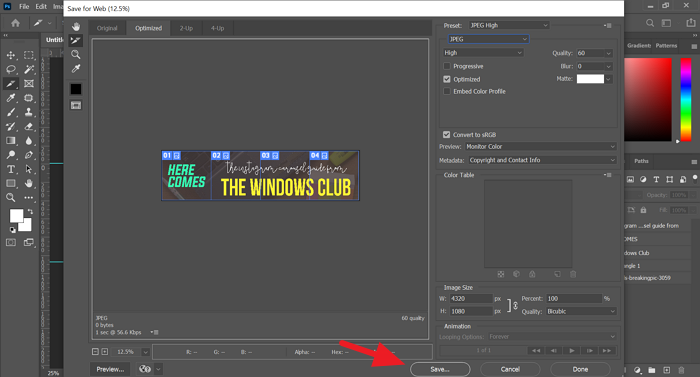
It will open the Save for the Web dialog box. Select the image format on the right side of the dialog box and then click on Save.

The image you designed for the Instagram carousel will now save as 4 images on your computer.

See, creating an Instagram carousel on Photoshop is an easy task. All you need to have is a design in mind and Photoshop on your computer.
Hope this guide helps you in creating wonderful carousels.


