How to use the Notebook Recycle Bin in OneNote
Working on a Notebook page or section but accidentally delete it and want it back? OneNote has a feature called the Notebook Recycle Bin, which stores deleted pages in it. Onenote kept the deleted page or section after 60 days and then automatically removed it from the program.
How to use Notebook Recycle Bin in OneNote
This feature views or empty the recycle bin.
In this tutorial, we will explain how to recover a page using the Notebook Recycle Bin feature, how to empty the Notebook Recycle bin and how to disable the history for the Notebook using the Notebook Recycle Bin feature.
How to recover a page using OneNote Notebook Recycle Bin
If you accidentally delete a page.

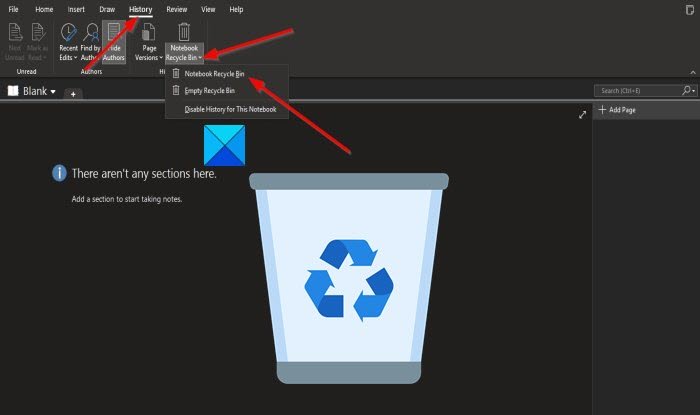
Click the History tab on the menu bar.
Then click the Notebook Recycle Bin button in the History group.
In the list, click the Outlook Recycle Bin option.
The page you just deleted will pop up as a tab click on it, you will see the page.
How to empty OneNote Notebook Recycle bin
On the History tab in the History group, click the Notebook Recycle Bin button.
Then click the Empty Recycle Bin option from the list.
A Microsoft OneNote message box will appear asking; if you are sure you want to permanently delete all items in deleted notes for this notebook.
Click Delete.
Disable History for the Notebook, using the Notebook Recycle Bin feature
On the History tab in the History group, click the Notebook Recycle Bin button.
Then click the Disable history for This Notebook option from the list.
A Microsoft OneNote message box will appear asking; if you want to delete all of the Notebook history and permanently delete all items in deleted notes for this notebook.
Click Yes.
We hope this tutorial helps you understand how to use the Notebook Recycle Bin in OneNote.
Now read: How to add Date and Time in OneNote.


