The New Storage Pool Wizard did not successfully complete
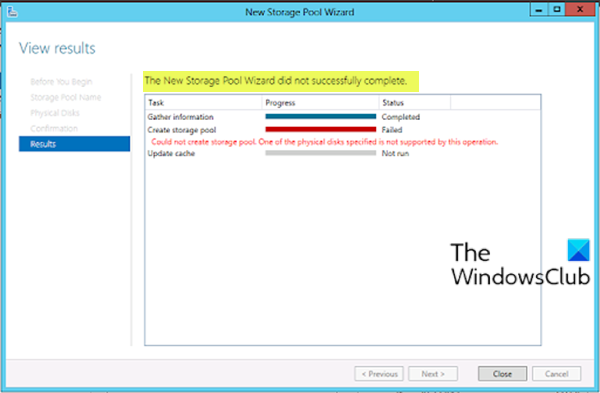
If when you attempt to create a storage pool for Storage Spaces on your Windows 10 device, but you encounter the error message The New Storage Pool Wizard did not successfully complete – then this post is intended to help you. In this post, we will provide the most suitable solutions you can try to resolve the issue.

The New Storage Pool Wizard did not successfully complete, Could not create storage pool, One of the physical disks specified is not supported by this operation.
When you encounter this issue, there may be a description of why the operation didn’t complete successfully. This description may vary, nevertheless, they are all instances of the same error – the solution that is presented in this post applies to all.
The New Storage Pool Wizard did not successfully complete
If you’re faced with this issue, you can try the suggestions below to resolve the issue.
- Verify attached disk meets storage pool requirements
- Initialize the disk
Let’s take a look at the description of the process involved concerning each of the listed solutions.
1] Verify attached disk meets storage pool requirements
According to Microsoft documentation, you can use commodity drives attached via Serial-Attached SCSI (SAS), Serial ATA (SATA), or USB. Storage layers that abstract the physical disks are not compatible with Storage Spaces. This includes VHDs and pass-through disks in a virtual machine, and storage subsystems that layer a RAID implementation on top of the physical disks.
Refer to Storage Spaces: Frequently Asked Questions (FAQ) for more.
2] Initialize the disk
This solution requires you to initialize the attached disk(s) you are trying to create a storage pool for and make sure the disks are listed as Unallocated in the Disk Management tool.
To initialize the drive manually, using the WinX menu, you can open the Disk Management tool. Here you can find the non-initialized disk.
Right-click on the disk and select Initialize Disk option.
In the next step, you need to select the partition style. It is suggested to use MBR instead of GPT or GUID Partition Table. After clicking the OK button, your disk should initialize.
You can now attempt the storage pool creation again, the process should complete without any error.
Hope this helps!


