How to Merge Videos in Windows 10 using Photos app or VLC
At times, you might have to combine multiple videos due to any reason. If you do not want to install heavy video editing software, you can merge videos using the Photos app or VLC media player. The Photos app is an in-built image viewer for Windows 10. VLC is a standard media player people use to play video, audio, etc.
Creating a video using the Photos app is not much time consuming as it requires no installation. As the Photos app has evolved a lot over the years, you can find tons of features in it to get things done. From resizing images to adding effects, you can do almost every essential thing in the Photos app.
On the other hand, VLC does more than playing a media file even after being a media player. For instance, it records desktop screens, converts videos, and much more. Apart from those, both apps can also help you combine or join multiple videos in Windows 10.
Whether you use the Photos app or the VLC media player, make sure your files are in the same place. Although it doesn’t matter a lot, it makes things easier and less time-consuming.
How to merge videos using Photos app
To merge videos in Windows 10 using the Photos app, follow these steps-
- Open the Photos app on your PC.
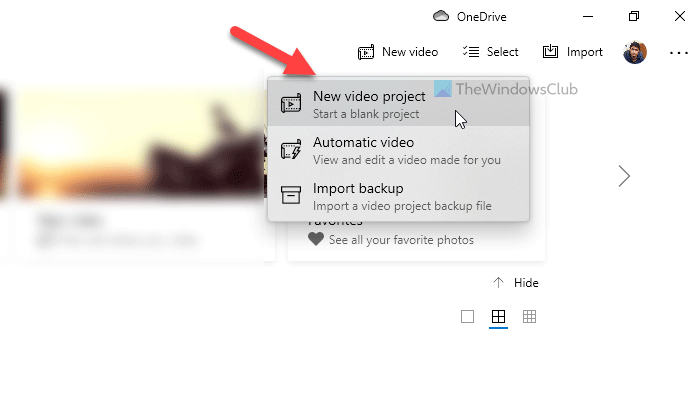
- Click the New video > New video project.
- Enter a name for your video project.
- Click the Add button.
- Choose the location of your files and select them.
- Drag them to the Storyboard.
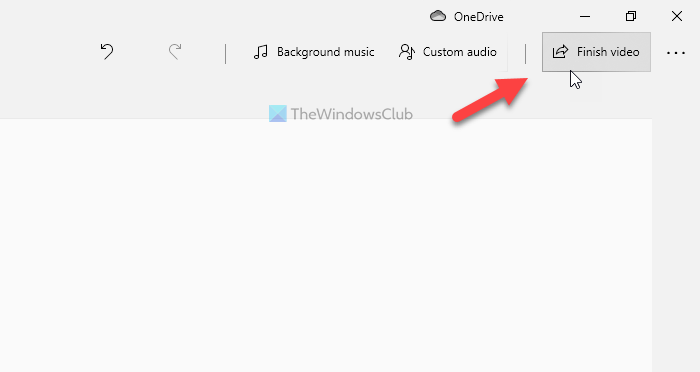
- Click the Finish video option.
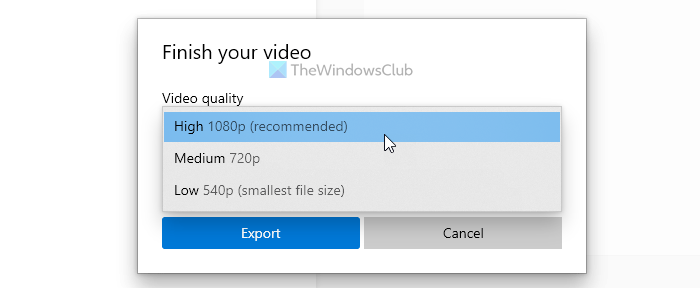
- Choose a Video quality.
- Click the Export button.
- Choose a location, enter a name, and click the Export button.
Let’s check out these steps in detail to learn more.
At first, you have to open the Photos app on your computer. If it is already opened, click the New video button and choose the New video project option from the list.
Next, enter a name for your video project to recognize it later. Following that, click the Add button under Project library, and choose the location of your files.
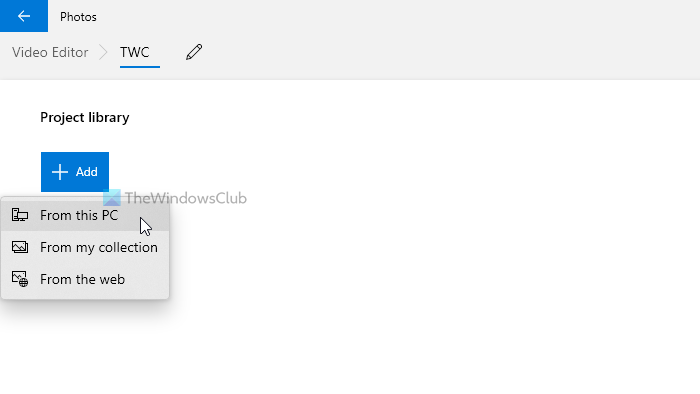
If they are on your hard drive, choose From this PC. Otherwise, choose an option according to your requirement. After importing your video files, select them, and drag them to the Storyboard.
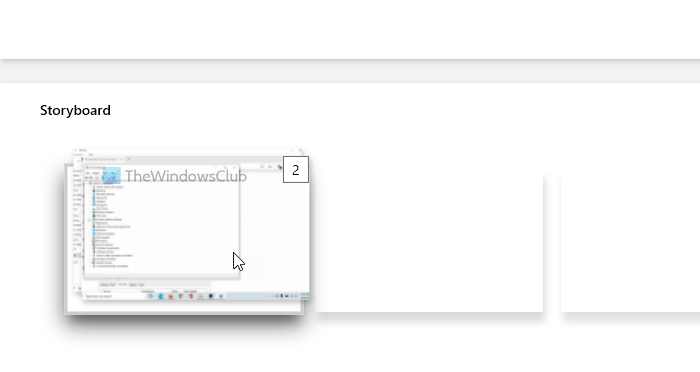
For your information, you can place them one after one as well. Now, you can add effects, text, motion, change speed, and do all the things you wish to apply. Once done, click on the Finish video button visible in the top-right corner.
Then, choose a video quality from the drop-down list, and click the Export button.
Next, you can choose a location where you want to save the file, enter a name, and click the Export button.
Before using the VLC media player, you should know that all your source video files must be in the same format and have the same frame rate. Otherwise, you will encounter errors. To confirm that, you can convert all your videos into the same format using the VLC media player itself.
How to merge videos using VLC
To merge videos in Windows 10 using VLC, follow these steps-
- Open VLC media player on your PC.
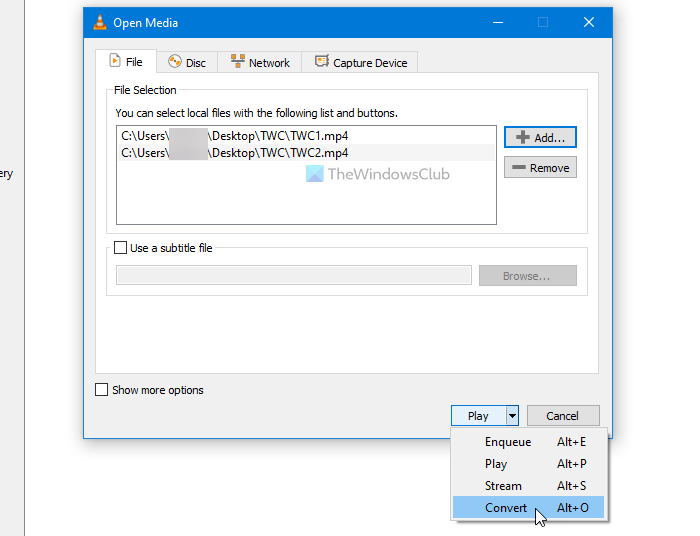
- Click on Media > Open Multiple Files.
- Click the Add button and choose your files.
- Expand the drop-down list and choose the Convert option.
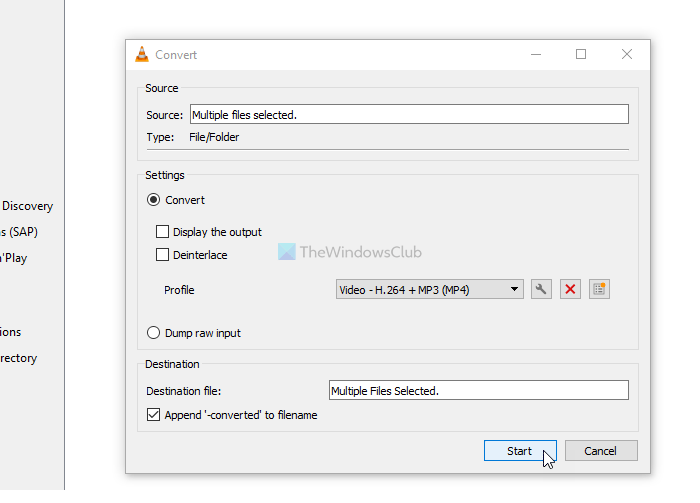
- Select MP4 as the video profile, and tick the Append ‘-convert’ to filename checkbox.
- Click the Start button.
- Open Command Prompt in the video folder and enter the command.
To learn more about these steps, read on.
At first, open the VLC media player on your computer and click on the Media > Open Multiple Files option.

It opens a pop-up window where you can click the Add button and choose your video files. Now, expand the Play drop-down list, and choose the Convert option. Alternatively, you can press Alt+O.
Make sure you have selected MP4 as the Profile and checked the Append ‘-converted’ to filename box. If so, click the Start button.
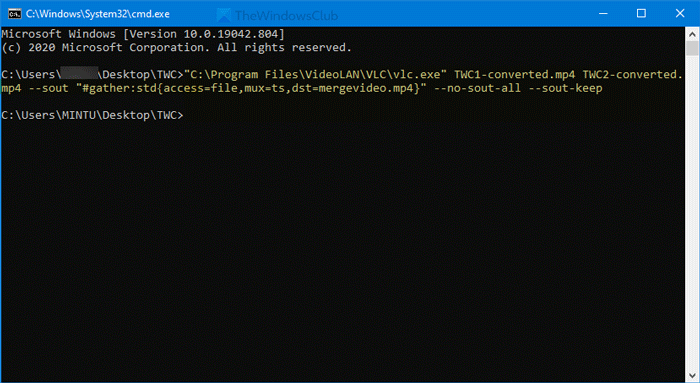
You can see the converted video files with -converted text in the name. Now, you have to open the Command Prompt in the video folder. For that, open the folder where you have placed your converted videos, type cmd in the address bar, and open the Command Prompt.
Enter the following command-
"vlc-path" video1.mp4 video2.mp4 --sout "#gather:std{access=file,mux=ts,dst=mergevideo.mp4}" --no-sout-all --sout-keep
Before pressing the Enter button, you need to make a few changes to the command.
Vlc-path: Enter the original VLC media player path. To find it, search for VLC in the Taskbars search box, right-click on the result, and choose the Open file location option.
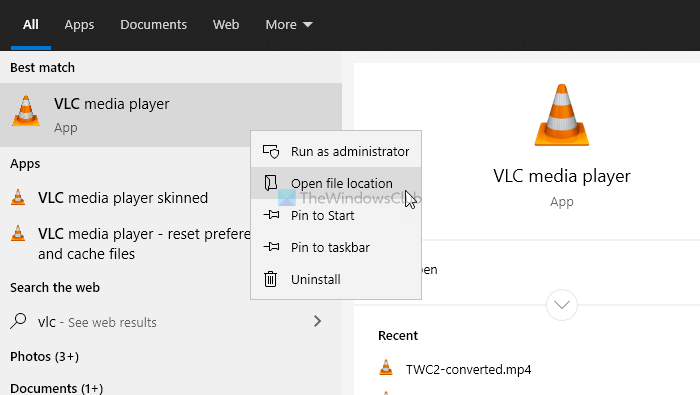
Right-click on the VLC media player and select the Properties option from the context menu. Then, copy the file path.
Video1.mp4/video2.mp4: You need to replace these file names with the original names of converted files.
mergevideo.mp4: It is the name of the output file or the merge video file.
Once done, you can see the merged video in the same folder where you opened the Command Prompt.
That’s all! Hope these guides help.