How to use Scoop package management tool on Windows 10
Package managers like Chocolatey, Ninite, Windows Package Manager (WinGet), to name but a few are perhaps the most popular package managers, and an efficient way to download programs without having to visit the software vendor site manually, download the files, and run the installer. In this post, we take a look at a similar app – Scoop, on how to use the package management tool on Windows 10.
How to use Scoop package management tool
Scoop installs programs from the command line with less hassle. The tool offers the following benefits:
- Permission popup windows.
- GUI wizard-style installers.
- Path pollution from installing lots of programs.
- Unexpected side-effects from installing and uninstalling programs.
- The need to find and install dependencies.
- The need to perform extra setup steps to get a working program.
We will discuss this topic under the following sub-headings:
- Download and install Scoop
- Use Scoop package management tool
- Install or uninstall programs using Scoop
1] Download and install Scoop

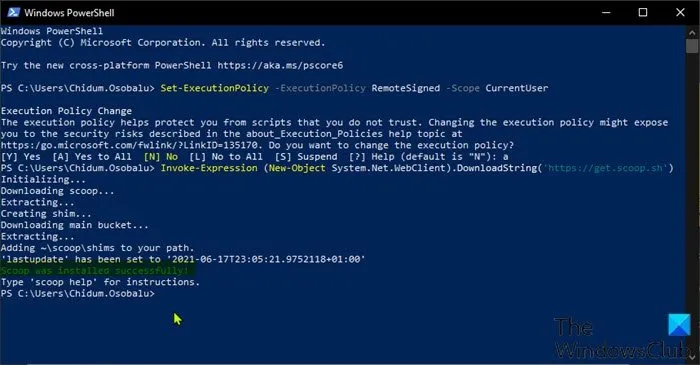
To download and install Scoop on your Windows 10 device, do the following:
- Press Windows key + X to open Power User Menu.
- Then tap i on the keyboard to launch PowerShell.
- In the PowerShell console, type in or copy and paste the command below and hit Enter.
Set-ExecutionPolicy -ExecutionPolicy RemoteSigned -Scope CurrentUser
This command is necessary because if you try to run the script required to download and install Scoop before running the command above, you may encounter the error message “PowerShell cannot be loaded because running scripts is disabled“. You can also turn on or off Windows PowerShell script execution via Group Policy or Registry Editor.
- Next, once the command executes, tap A on the keyboard and hit Enter.
- Now, you can run the command below to download and install Scoop.
Invoke-Expression (New-Object System.Net.WebClient).DownloadString('https://get.scoop.sh')
Scoop installs to your User folder C:UsersUSERNAMEscoop – and applications that are downloaded and installed by the utility can be found in the C:ProgramDatascoop directory. By default, Scoop downloads portable versions of programs.
2] Use Scoop package management tool

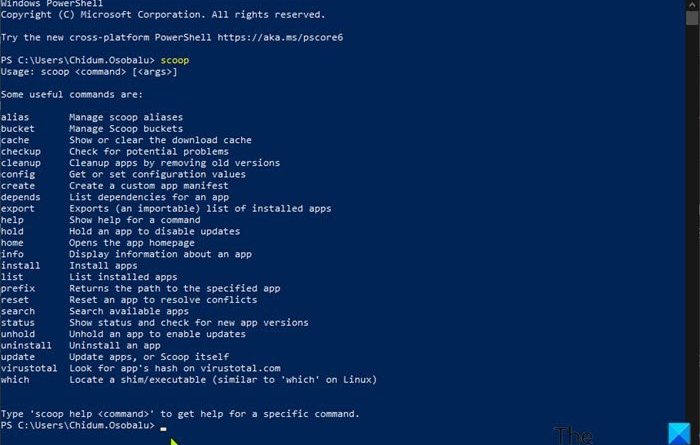
Now that you have Scoop installed on your Windows 10 device, in PowerShell, type the command below and hit Enter to see the list of commands that are supported by the program.
scoop
To use one of the commands, type the syntax below and hit Enter:
scoop CommandName
If you need help with a particular command, you can view its help section by typing the syntax below and then hit Enter:
scoop help CommandName
3] Install or uninstall programs using Scoop

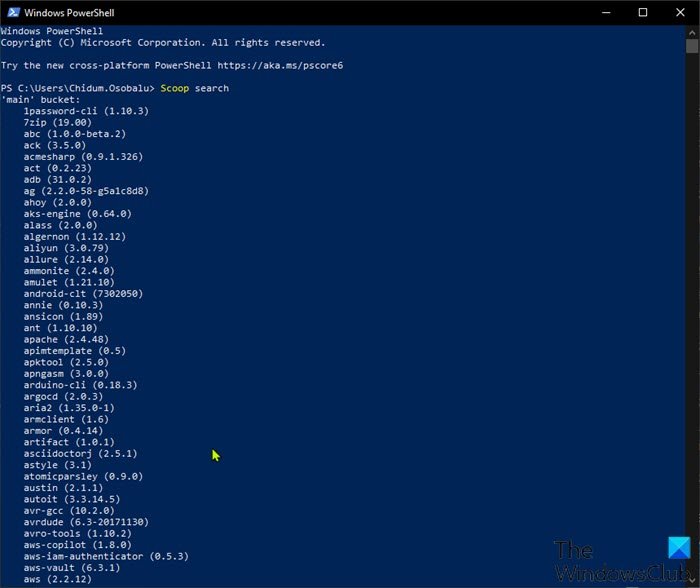
Before installing programs on your Windows 10 device using Scoop, you need to know the list of applications that are available for download. To do that, type the following command and hit Enter:
scoop search
As you can see from the image above, the tool will fetch the names and version numbers of all supported programs in its main list. Scoop’s lists are called buckets. If you want to add more buckets, you can run the command below:
scoop bucket add BucketName
Visit this GitHub page to view a list of available buckets.
Now that you have seen the list of available programs in a given bucket, to install any of the program, simply run the command below:
scoop install ProgramName
The list of available programs can be quite lengthy. So, you can find specific applications using the search command below:
Scoop search ProgramName
To update applications you will need to run the command below:
scoop install git
The command will fetch the bucket lists (used for comparing the version that is available on your computer) and save it as a local manifest on your computer.
To uninstall a program, run the command below:
scoop uninstall ProgramName
To remove a bucket with all its programs, run the command below:
scoop bucket rm BucketName
That’s it on how to use the Scoop package management tool on Windows 10!


