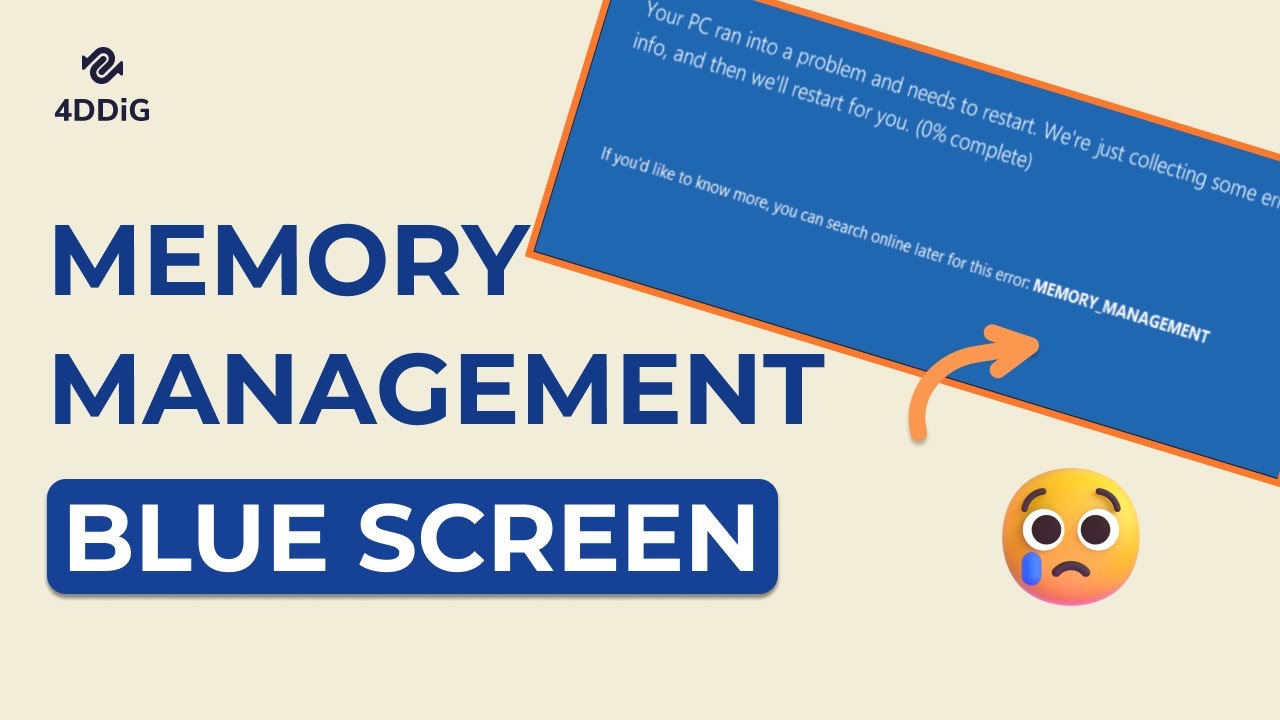
MEMORY_MANAGEMENT | How To Fix Blue Screen Of Death Stop Code: Memory Management In Windows 10/11
Blue Screen STOP CODE: MEMORY MANAGEMENT error is a common issue. Don’t worry, we will introduce 3 methods to 100% fix it. For the most helpful method, try 4DDiG Windows Boot Genius:
https://bit.ly/3sWQFAt
#stopcodememorymanagement #bluescreenofdeath #4ddig
📌Timestamps:
00:00 Intro
00:23 Method 1: Run Windows Memory Diagnostic
00:41 Method 2: Run Start-up Repair
01:16 Method 3: Use 4DDiG Windows Boot Genius
📎Related Article:
Memory Management Blue Screen on Windows 10/11? 7 Effective Solutions!
https://4ddig.tenorshare.com/windows-fix/fix-memory-management-blue-screen.html
🔎Related Guide:
https://4ddig.tenorshare.com/windows-boot-genius-guide.html
🎥Related Video:
[2023 Solved!] How to Fix Memory Management Blue Screen on Windows 11/10
🎁How To Fix STOP CODE: MEMORY MANAGEMENT Error?
🎨Method 1: Run Windows Memory Diagnostic.
Type Windows Memory Diagnostic in the search bar, open it.
Then click Restart now and check for problems.
It will restart your PC and run the Diagnostic Tool screen.
If there is no error, after the test, you PC will restart again.
🎨Method 2: Run Start-up Repair
First, type Reset in the search box.
Then, select Recovery.
Find Advanced startup, and click Restart Now.
Then, PC will show the Advanced Option screen.
Choose Troubleshoot.
And click Advanced Options.
Finally, choose Start-up Repair.
Now, PC starts to check the system files, and repair them if there are corrupted files.
🎨Method 3: Use 4DDiG Windows Boot Genius.
Download and install 4DDiG WIndows Boot Genius.
Launch 4DDiG Windows Boot Genius on PC.
Insert a USB Drive.
Select your USB Drive to be a boot disk to repair your dead computer.
Click Create Now and Continue.
Now, we can wait for it to finish downloading.
Then, insert this boot disk to your dead computer.
Follow the instruction, invoke the computer into the boot menu.
For my computer, it’s DELL.
So, quickly press F12 again and again, on Windows logo screen, untill you get into boot menu.
Then, click your USB from the left UEFI Boot Devices.
After loading, you can use 4DDiG Windows Boot Genius to repair your computer.
Click Automaticed repair.
Choose the operating system partition.
Now, we only need to wait for it to finish, and your issue will get fixed.
——————————————– Follow Us —————————————-
Facebook: https://www.facebook.com/4DDiG/
Twitter: https://twitter.com/Tenorshare4DDiG
Quora Space: https://tenorshare4ddigdatarecovery.quora.com/
Pinterest: https://www.pinterest.com/4DDiG/
Instagram: https://www.instagram.com/tenorshare_4ddig/
Subscribe to our YouTube channel and there are more tech tips and tricks for you.
how to repair windows 7