AWS 175-[SCAL]-Lab – Using Auto Scaling in AWS (Linux)
#AWS 175-[SCAL]-Lab – Using Auto Scaling in AWS (Linux)
Check out my GitHub Repository – https://github.com/MFMKURIA/More-AWS-reStart-Labs-for-AWS-Services
Portfolio
1. http://markfrancismk.sciawareness.com.s3-website-us-east-1.amazonaws.com/index.html#sec2
2. https://d2taxcp5hluc5o.cloudfront.net/
Detailed Step-by-Step Guide for AWS Cloud Computing Lab: Using Auto Scaling in AWS (Linux)
Lab Overview
In this lab, you will use the AWS Command Line Interface (AWS CLI) to create an Amazon EC2 instance to host a web server and create an Amazon Machine Image (AMI) from that instance. You will then use that AMI as the basis for launching a system that scales automatically under a variable load using Amazon EC2 Auto Scaling. You will also create an Elastic Load Balancer to distribute the load across EC2 instances created in multiple Availability Zones by the auto-scaling configuration.
Objectives
– Create an EC2 instance using an AWS CLI command.
– Create a new AMI using the AWS CLI.
– Create an Amazon EC2 launch template.
– Create an Amazon EC2 Auto Scaling launch configuration.
– Configure scaling policies and create an Auto Scaling group to scale in and out the number of servers based on a variable load.
Task 1: Creating a New AMI for Amazon EC2 Auto Scaling
Task 1.1: Connecting to the Command Host Instance
1. Access the EC2 Management Console:
– In the AWS Management Console, use the search bar to enter and select EC2.
– In the navigation pane, choose Instances.
2. Connect to the Command Host Instance:
– From the list of instances, select the Command Host instance.
– Click on Connect.
– On the EC2 Instance Connect tab, choose Connect.
This instance will be used to run AWS CLI commands.
Task 1.2: Configuring the AWS CLI
1. Confirm the Region:
– Run the following command to confirm the region in which the Command Host instance is running:
“`sh
curl http://169.254.169.254/latest/dynamic/instance-identity/document | grep region
“`
– Note the region information (e.g., `us-west-2`).
2. Configure the AWS CLI:
– Run the following command:
“`sh
aws configure
“`
– At the prompts, enter:
– AWS Access Key ID: Press Enter.
– AWS Secret Access Key: Press Enter.
– Default region name: Enter the region name from the previous step (e.g., `us-west-2`).
– Default output format: Enter `json`.
3. Navigate to the Scripts Directory:
– Enter the following command to navigate to the directory where the scripts are located:
“`sh
cd /home/ec2-user/
“`
Task 1.3: Creating a New EC2 Instance
1. Inspect the UserData Script:
– Run the following command to inspect the `UserData.txt` script:
“`sh
more UserData.txt
“`
– This script updates installed software and installs a PHP web application.
2. Copy Required Values:
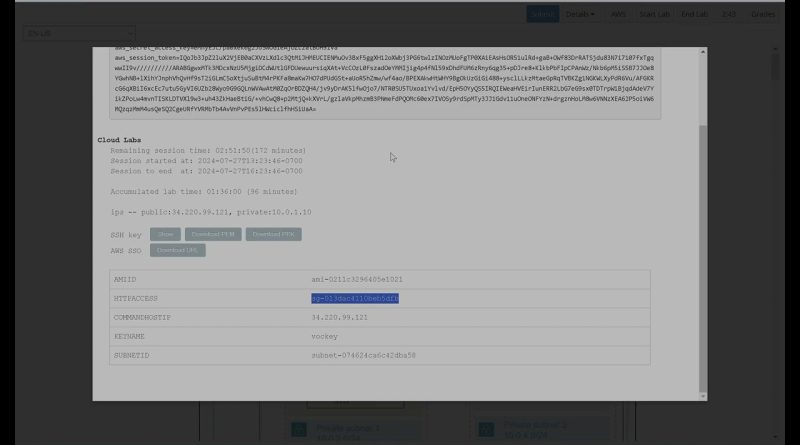
– At the top of the lab page, choose Details, then choose Show.
– Copy the `KEYNAME`, `AMIID`, `HTTPACCESS`, and `SUBNETID` values into a text editor.
3. Run the EC2 Instance Creation Command:
– Replace the placeholder values in the following script with your copied values:
“`sh
aws ec2 run-instances –key-name KEYNAME –instance-type t3.micro –image-id AMIID –user-data file:///home/ec2-user/UserData.txt –security-group-ids HTTPACCESS –subnet-id SUBNETID –associate-public-ip-address –tag-specifications ‘ResourceType=instance,Tags=[{Key=Name,Value=WebServer}]’ –output text –query ‘Instances[].InstanceId’
“`
– Run the modified script in the terminal.
4. Monitor Instance Status:
– Copy the `InstanceId` from the output and save it.
– Use the following command to monitor the instance status, replacing `NEW-INSTANCE-ID` with your `InstanceId`:
“`sh
aws ec2 wait instance-running –instance-ids NEW-INSTANCE-ID
“`
5. Obtain the Public DNS Name:
– Run the following command to get the public DNS name of the instance, replacing `NEW-INSTANCE-ID` with your `InstanceId`:
“`sh
aws ec2 describe-instances –instance-id NEW-INSTANCE-ID –query ‘Reservations[0].Instances[0].NetworkInterfaces[0].Association.PublicDnsName’
“`
– Copy the output without quotation marks as `PUBLIC-DNS-ADDRESS`.
6. Test the Web Server:
– In a new browser tab, enter the copied `PUBLIC-DNS-ADDRESS`:
“`sh
http://PUBLIC-DNS-ADDRESS/index.php
“`
– Wait a few minutes for the web server to install.
Task 1.4: Creating a Custom AMI
1. Create a New AMI:
– Run the following command to create a new AMI based on the instance, replacing `NEW-INSTANCE-ID` with your `InstanceId`:
“`sh
aws ec2 create-image –name WebServerAMI –instance-id NEW-INSTANCE-ID
“`
Task 2: Creating an Auto Scaling Environment
Task 2.1: Creating an Application Load Balancer
1. Access Load Balancers:
– In the EC2 Management Console, in the left navigation pane, locate the Load Balancing section, and choose Load Balancers.
2. Create a Load Balancer:
– Choose Create load balancer.
– For Application Load Balancer, choose Create.
3. Configure Basic Settings:
– For Load balancer name, enter `WebServerELB`.
– In the Network mapping section, configure:
by Mark Mungai Kuria
linux web server


