Backlit keyboard not working in Windows 10
When you are working in low-light environments you can turn on the backlit function on the keyboard. This helps you get your work done comfortably but, on a few occasions, the function may fail to respond or work weirdly. For help with your backlit keyboard not working, read this post.
Backlit keyboard not working in Windows 10
If you have Windows 10 installed on your PC and all your hotkeys work fine except the backlit keyboard, you can try the following methods. There’s no need to buy a USB snake light that lights up only one area.
- Adjust the brightness level
- Enter BIOS Setup Utility
- Check Backlit timeout settings.
Let’s cover the above methods in a bit of detail.
1] Adjust the Brightness level

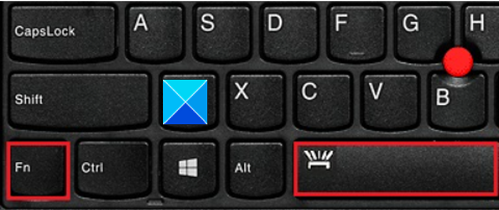
If the backlit function is not working, chances are you might have set the brightness to an extremely low level. To adjust the brightness of the backlight, press the key with the backlight icon two or three times in a row. The keyboard backlight dims and brightens. You might need to press the Fn (function) key at the same time to activate the backlight key.
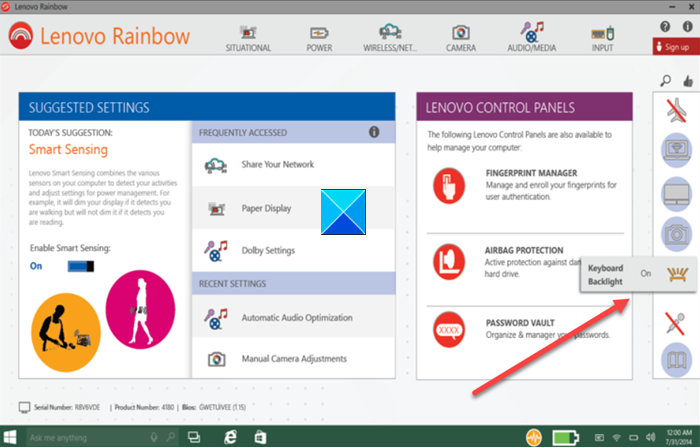
If you are using a Lenovo computer or PC, open Lenovo Vantage. For Windows 10, Lenovo Settings has been replaced with Lenovo Vantage. It offers an easy-to-use interface to one easy-to-use interface to Personalize your settings, run device diagnostics, and more.
Open Lenovo Vantage.

From the left panel of the homepage, look for the keyboard backlight icon.
When found, tap or click to change it.
2] Enter the BIOS set up utility

Firstly, make sure the computer has the latest System Setup (BIOS) and is configured correctly.
Enter the BIOS setup or BIOS Setup Utility, and then use the arrow keys to navigate to the System Configuration tab.
Under it, locate Action Keys Mode. Make sure to enable this mode if it is not enabled already.
3] Check Backlit timeout settings
If the backlight stays on for only a few seconds, the backlight timeout settings might need configuring in the BIOS.
Hope this helps.


