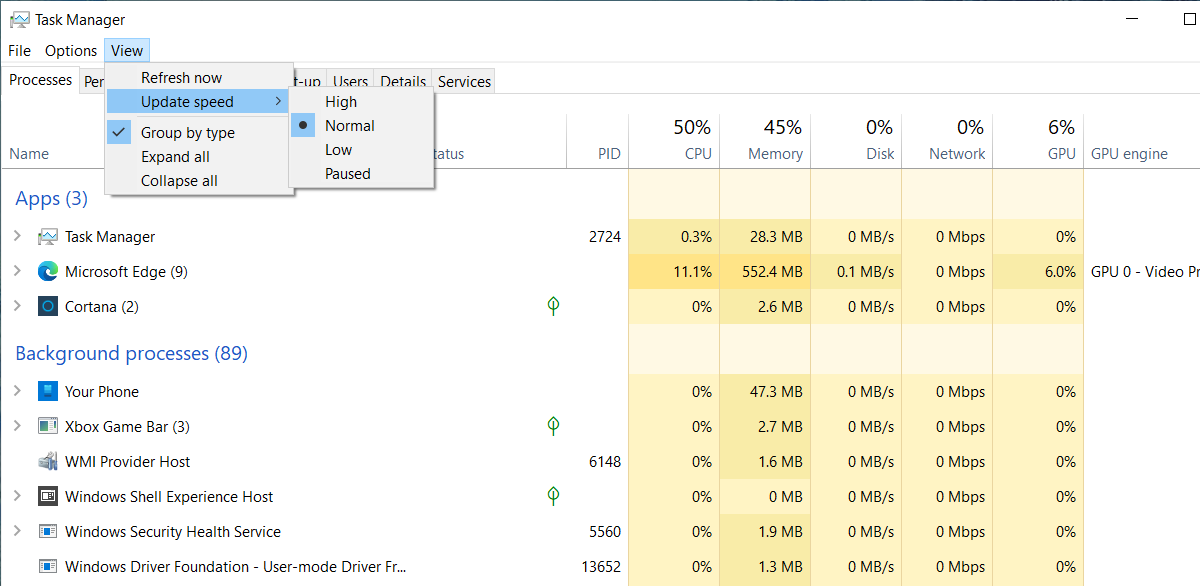
Change Task Manager Data Update speed in Windows 10
Windows Task Manager lists down processes along with their CPU, Memory, Disk, Network usage. It also lists down performance, app history, Startup, and more. While there is a lot, have you ever wondered how often this usage is updated? Sometimes you might want to get updated faster and sometimes slower than usual. This post will guide you on how you can change the Windows Task Manager update speed.

Change Task Manager Data Update speed
To change Task Manager Data Update speed in Windows 10:
- Open Task Manager using Ctrl + Shift + Esc.
- Open the Processes Tab.
- Click on the View menu item
- Select Update Speed
- Choose between High, Low, and Paused.
As soon as you make the change, it will instantly reflect. That said, what do these options mean?
- High: This will update the percentages every half-second. You can use it for resource-hungry processes such as gaming and video rendering.
- Normal: Here, the update speed is once every second. This is the default setting.
- Low: If you need to keep an eye on the percentage, but it changes too often, you can slow it down using this. It will update once every four seconds. This gives you enough time if you want to take a screenshot with a slower update.
- Paused: This will freeze everything on the list until you change it to other options. It comes in handy when you need to take a screenshot.
While this method may not be consumer-centric, it is an excellent feature for IT or a Tech person. When a process takes too much resource, and you need to figure it out, this comes in handy. Some processes might be increasing their resource usage slow like a spike, while others are too quick. So this feature does have its place to catch an annoying one.
Read next: How to check if a process is running with admin rights?


