Connect app missing in Windows 11; How to install it?
If the Connect app is missing in Windows 11, here is how to get it back. As Windows 11 doesn’t come with this application by default, you must install it manually from the Optional features panel. Here is how you can do that to enable and use the Connect app in Windows 11.

Connect app missing in Windows 11
If the Connect app is missing in Windows 11, do the following:
- Press Win+I to open Windows Settings.
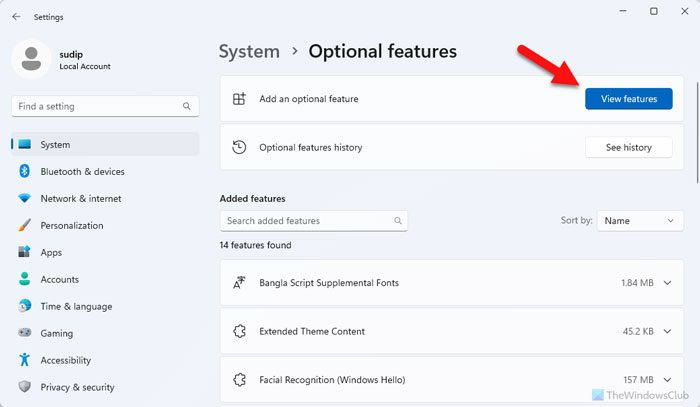
- Go to System > Optional features.
- Click on View features.
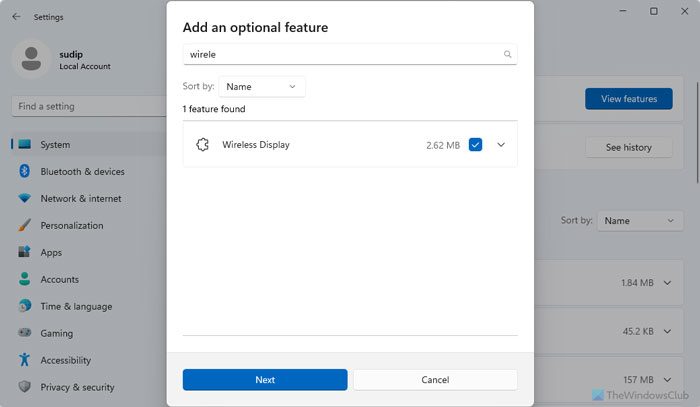
- Search for Wireless Display.
- Tick the checkbox and click the Next button.
- Click the Add button.
- Let it be installed.
- Restart your computer.
How to install Connect app on Windows 11 PC?
First, you need to open the Windows Settings panel by pressing Win+I. Then, go to System and click on the Optional features menu. Alternatively, you can search for “optional features” in the search box of the Windows Settings panel and click on the individual search result.
Here, you can find an option called Add an optional feature. To access it, click on the View features button.
Then, search for Wireless Display, tick the respective checkbox, and click the Next button.
On the next screen, click the Add button.

It will start the installation process of this particular optional feature. Let it be finished. For your information, it might take a few minutes to finish the installation. After finishing, you need to restart your computer.
Once done, you can find the Wireless Display in the Added features list. If it is available, you can search for the Connect app in the Taskbar search box and open it accordingly.
Install the Connect app using Command Prompt or Terminal
You can install the Connect app using Command Prompt or the Command Prompt instance in Terminal. For that, you need to use the DISM tool. As it is an optional feature, you need to use the DISM tool to get it on your Windows 11 PC.
To install the Connect app using Command Prompt or Terminal, open it with administrator privileges and enter this command:
DISM /Online /Add-Capability /CapabilityName:App.WirelessDisplay.Connect~~~~0.0.1.0
Once done, restart your computer and then, you can search for the Connect app in the Taskbar search box. If you want to remove the Connect app, enter this command:
DISM /Online /Remove-Capability /CapabilityName:App.WirelessDisplay.Connect~~~~0.0.1.0
Read: How to add and remove Wireless Display feature in Windows
How to enable Connect app Windows 11?
To enable the Connect app, you need to install the Wireless Display functionality on your PC. Go to System > Optional features in the Windows Settings panel and click on the View features button. Then, search for Wireless Display, tick the checkbox, and click the Next button. Finally, click the Add button to start the installation.
What happened to Connect in Windows 11?
The Connect app is now integrated into the Wireless Display. That said, in Windows 10, you can find the app by default. However, in Windows 11, you need to install the app manually. You can use the Windows Settings panel or the Command Prompt or Terminal for that. In the former case, you must enter this command: DISM /Online /Add-Capability /CapabilityName:App.WirelessDisplay.Connect~~~~0.0.1.0. In both cases, you must restart your computer.


