Create VM using VMware Workstation Pro and Fusion Pro for free
Broadcom has announced that their flagship products, VMware Workstation Pro and Fusion will be available for free. In this post, we will see how you can install and use them without spending any money.
You might be wondering why they are giving it away for free. Well! the official answer from VMware by Broadcom is what is stated in the VMware blog post:
Our goal with these changes has been to simplify how we bring VMware Desktop Hypervisor apps to market, while maintaining our support of the broader community of VMware Workstation and Fusion users of both free and paid products.
However, one would still require a paid license or subscription if they are looking to use the tools for professional use as they are free for personal use only.
What’s the difference between VMWare Workstation Pro and Fusion Pro?
VMWare Workstation Pro is a hypervisor tool for Windows and Linux devices, whereas, VMWare Fusion Pro is for devices running on macOS. However, both of them offer seamless VM creation and resource management. And if you are wondering, Broadcom is offering both of them for free. Hereinafter, we will discuss this in detail and see how you can create virtual machines using both the tools for free.
How to create VM using VMWare Workstation Pro
VMware Workstation Pro is a powerful tool that allows professionals to run similar technologies as ESXi on a Windows 11/10 computer. This virtualization tool can also install different operating systems on a single host computer. Since it is available for free, one must download it to learn or use virtualization.
Download VMWare Workstation Pro for free

First of all, we need to download VMWare Workstation Pro for free from support.broadcom.com. To do so, you might have to register yourself and create an account. Once done, again, come back to this link and open the download portal.
Go to VMWare Workstation Pro 17.0 for Personal Use. Since we are on a Windows computer, we will go with the same, but if you are using some other OS, select the respective option. We recommend you download the latest version from the list, as it will pack all the latest features, and the older versions might ask you to enter a key.
Install VMWare Workstation Pro

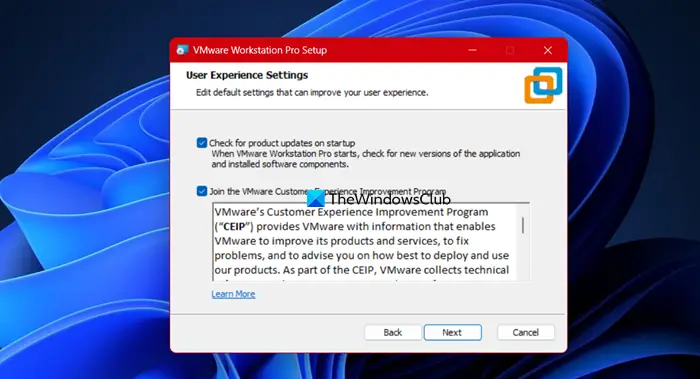
Now that we have the executable file, let us go ahead and install it on our system. To do the same, you need to go to the Download folder and double-click the executable file you downloaded. Then, follow the on-screen instructions and install it.
Launch VMWare Workstation and create a virtual machine

After installing the VMWare Workstation, you can search it out from the Start Menu and launch it. You will have the option to choose “Use VMware Workstation 17 for Personal Use”, so, select it and proceed.

In order to create a virtual machine in VMWare Workstation follow the steps mentioned below.
- click on Create a New Virtual Machine.
- Then, you pick the Typical if you just want to create a basic VM or Custom if you want to make all sorts of advanced changes.
- On the next page, you can either select Installer disk image file (ISO) or I will install the operating system later to create a VM with a blank hard drive.
- Select the platform and version of the operating system and click Next.
- Give your VM a name, set a location, and click on Next.
- Allocate system resources as you would like and click Next.
- Look at the summary and if everything checks out, click on Finish.

Your virtual machine is created!
How to create VM using VMWare Fusion Pro

VMWare Fusion is the Mac equivalent of VMWare Workstation. If you are a Mac user and want to use a flagship virtualization tool for free, go to support.broadcom.com. Once you go to the linked website, click on VMWare Fusion 13 Pro for Personal Use, select the latest version from the list, and download the tool.
After downloading the file, run the installer to install the application on your system.

To create a VM using VMWare Fusion, open the application, and then click on Create a custom virtual machine. Then, on the next page, select the desired operating system and click on Continue. If you are installing Windows, make sure to give UEFI and then continue. Finally, follow the on-screen instructions to complete the process.
So, that’s how you can install and use the latest version of VMWare Workstation Pro and/or VMWare Fusion Pro on your computer for free.
Read: How to enable Windows Sandbox in VMware Workstation?
Can I use VMware Workstation Pro for free?
Yes, Broadcom has announced that the latest iteration of VMware Workstation Pro, which is the 17th version, is free for all users. All you need to do is create a free account and then download the installer. However, the only catch is that, the tools are free only for personal use, for commercial usage, one needs to get a paid license.
Read: How to install Kali Linux on VMWare Workstation?
How do I create a VM in VMware Workstation Pro?
To create a new virtual machine in VMWare Workstation Pro, open the hypervisor app and click on Create a New Virtual Machine. It will launch a wizard where you can enter the details, allocate system resources, and follow the on-screen instructions to create a VM.
Also Read: Install Ubuntu in VMWare Workstation.


