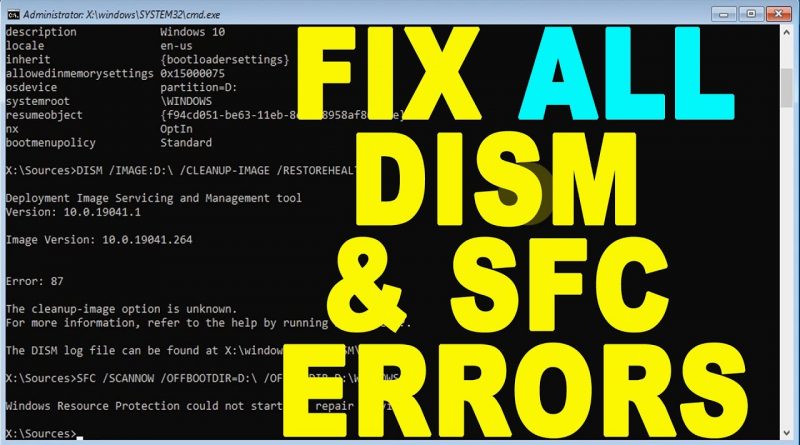
DISM /Cleanup-Image /RestoreHealth & SFC /ScanNow not Working Windows 10, 8 & 7 | Fix All Errors
On this video, I will show you how to fix most common errors of DISM and SFC tools when trying to fix corrupted system files.
Example of common errors that can be fixed using this video:
sfc scannow windows 10 not working
sfc /scannow fails to fix, fails to run or fails to start
Windows Resource Protection could not start the repair service
windows resource protection could not perform the requested operation
dism error 0x800f081f the source files could not be found
error 87 dism, dism error 2, dism error 50, dism offline
dism does not support servicing windows pe with the online option
dism does not recognize the command-line option
dism does not start or doesn’t work
dism error 2 unable to access the image
dism error 740 windows 10
dism failed. no operation was performed 0x800f0831, 0x800f0950,
error 0x8000ffff, error 0x800f0831, error 0x800f0900
error 0x800f0922 dism failed. no operation was performed
dism failed no operation was performed windows 7
0x8024402c
dism error: 1
dism error 0x80080005
dism error 87 windows 10, windows 8 or windows 7
___________________________
IMPORTANT LINKS:
HOW TO CREATE BOOTABLE USB:
In Android Mobile:
In computer:
HOW TO REPAIR WINDOWS RECOVERY ENVIRONMENT:
How to Boot into Advanced Recovery Environment :
HOW TO FIX AUTOMATIC REPAIR LOOP SRTREIL.TXT BLUE SCREEN:
Donation link:
Paypal.me/ValiumMediaTech
___________________________
Solutions:
The following commands will fix the simple errors, such as, sfc /scannow “system resource protection could not perform the requested operation”
Or
DISM /online /Cleanup-Image /RestoreHealth “not working”, or “Access is denied”
And similar errors.
Type BCDEDIT and press Enter to determine Windows partition.
In my PC, the D is assigned for windows partition.
Change CMD path to system32:
CD /D D:WINDOWSSYSTEM32
-reset system attributes of WinSxS folder to defaults:
ICACLS D:WINDOWSWINSXS* /T /Q /C /RESET
– full access to administrators:
ICACLS D:WINDOWSWinSxS* /T /Q /C /GRANT ADMINISTRATORS:F
– reset windows security settings to default:
SECEDIT /CONFIGURE /CFG D:WINDOWSINFDEFLTBASE.INF /DB DEFLTBASE.SDB /VERBOSE
– configure and to start trusted installer:
SC CONFIG TRUSTEDINSTALLER START= DEMAND
NET START TRUSTEDINSTALLER
DISM /IMAGE:D: /CLEANUP-IMAGE /RESTOREHEALTH
SFC /SCANNOW /OFFBOOTDIR=D: /OFFWINDIR=D:WINDOWS
__________________________
SECOND METHOD:
If you get the following errors:
“DISM error: 87
The cleanup-image option is unknown”
Or SFC SCANNOW, Windows Resource Protection could not start the repair service.
Boot from bootable USB .
Right-click on the WinSxS folder and select, Properties.
Navigate to this path to check windows 10 edition:
D:WINDOWSSYSTEM32LICENSESNEUTRAL_DEFAULT
If there is a folder called professional, then the edition is Pro. For Windows 10 Enterprise you may have both Enterprise and Professional folders. In Home edition you will have only Home folder.
change CMD path to System32 folder:
CD /D D:WINDOWSSYSTEM32
Execute this command to identify windows version:
WINVER
In my PC, the version is 2004, build number 19041.
Check the version of windows in the USB drive:
DISM /GET-WIMINFO /WIMFILE:H:SOURCESINSTALL.WIM
select the index number 6 in the USB to show its info:
DISM /GET-WIMINFO /WIMFILE:H:SOURCESINSTALL.WIM /index:6
To check the default UI language of installed windows:
DISM /IMAGE:D: /GET-INTL
Create new folder on the windows partition:
MD D:MOUNT
Extract index number 6 from the USB drive into Mount folder:
DISM /MOUNT-IMAGE /IMAGEFILE:H:SOURCESINSTALL.WIM /INDEX:1 /MOUNTDIR:D:MOUNT /READONLY
Create new folder inside system32 folder:
MD D:WINDOWSWinSxS.BACK
Copy WinSxS folder to the created folder:
XCOPY /H /S D:WINDOWSWinSxS* D:WINDOWSWinSxS.BACK
Now copy the files from MOUNT folder to WinSxS folder:
ROBOCOPY D:MOUNTWINDOWSWinSxS D:WINDOWSWinSxS /E /ZB /XN /XC
/E : to copy subdirectories including Empty ones.
/ZB : to use restartable mode; if access denied use Backup mode.
/XN : to eXclude Newer files.
/XC : to eXclude Changed files.
Rename the WinSxS folder in your windows folder:
REN D:WINDOWSWinSxS WinSxS.original
Then make a new folder named WinSxS:
MD D:WINDOWSWinSxS
remove new WinSxS folder:
RMDIR D:WINDOWSWINSXS /S
Then restore your original WinSxS folder:
REN D:WINDOWSWinSxS.original WinSxS
How to fix this error message:
“The process cannot access the file because it is being used by another process”
Execute this command then try again:
TAKEOWN /F D:WINDOWSWINSXS /A /R /D Y
how to repair windows 7


