Enable Rich Address Bar Autocompletion Suggestions in Chrome
Google Chrome is the world’s most popular web browsers that have lots of hidden features you may not know about. In the latest version, Google Chrome has introduced a new feature that supports autocomplete functionality, called Omnibox Rich Autocompletion. The address bar autocompletion suggestions improve the user experience and make the browser’s address bar even more helpful.
This feature is disabled by default but if you’re interested, you can manually activate it using a hidden option, flag. This feature works in Windows, macOS, and, Linux. But it is still unclear whether the company will provide the same feature to mobile users as well.

Enable Rich Address Bar Autocompletion Suggestions in Chrome
If you want to use Rich Address Bar Autocompletion Suggestions in the Chrome browser, follow the below suggestions:
Open the Google Chrome browser.
Type in the following in the address bar and hit enter to load the results.
chrome://flags
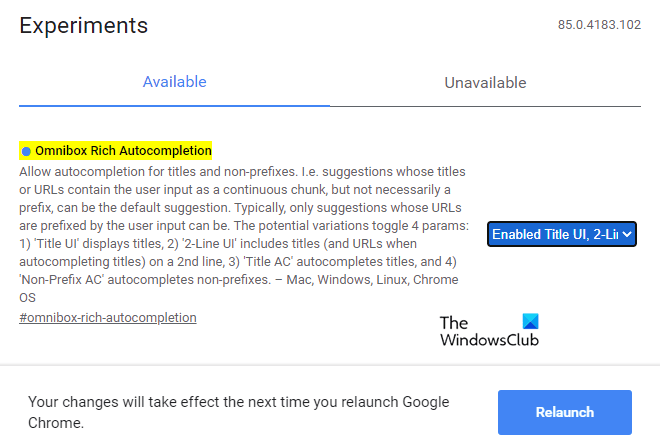
Now in the search bar, search for the flag named Omnibox Rich Autocompletion.
Alternatively, you can type the below text in the address bar and press enter to launch the flag.
chrome://flags/#omnibox-rich-autocompletion
Next to the Omnibox Rich Autocompletion, click on the drop-down menu and select one of the options.
In the drop-down list, the “Enabled Title UI” option displays titles.
And the option entitled “2-Line UI” shows titles on the 2nd line.
The “Enabled Title UI, Title AC, & Non-Prefix AC” option will display you the page URL and its title in the line.
In the same way, the “Enabled Title UI, 2-Line UI, Title AC, and Non-Prefix AC” option will display titles on the 2nd line and URLs while autocompleting titles.
You can select the other options that are available in the drop-down list. These are:
- Default
- Enabled
- Enabled Title UI
- Enabled Title UI & 2-Line UI
- Enabled Title AC
- Enabled Title UI & Title AC
- Enabled 2-Line UI & Title AC
- Enabled Title UI, 2-Line UI, & Title AC
- Enabled Non-Prefix AC
- Enabled Title UI & Non-Prefix AC
- Enabled Title UI, 2-Line UI, & Non-Prefix AC
- Enabled Title AC & Non-Prefix AC
- Enabled Title UI, Title AC, & Non-Prefix AC
- Enabled 2-Line UI, Title AC, & Non-Prefix AC
- Enabled Title UI, 2-Line UI, Title AC, & Non-Prefix AC
- Disabled
Once you choose the option, click on the Relaunch button so that the changes will take effect the next time you open the browser.
If you ever need to disable this feature, simply type the following text in Chrome’s address bar and press enter.
chrome://flags/#omnibox-rich-autocompletion
Then disable it using the drop-down menu and relaunch the browser to save the changes.
Let us know how you like this feature.
Read next: Useful Chrome Command Line Switches or Flags.


