Fix NVIDIA high definition audio Not plugged in error
If your Windows 10 computer audio does not detect the NVIDIA Output as plugged in, then this post will help you address the issue. This can happen for different reasons. For example, you might have outdated drivers, the output sound device is not set, or for any other reasons.
NVIDIA high definition audio Not plugged in
Here is a list of options to solve this NVIDIA Output Not plugged in problem:
- Update NVIDIA graphics driver
- Roll Back NVIDIA driver
- Run Playing Audio Troubleshooter
- Set Input and Output sound device
- Use NVIDIA Control Panel.
1] Update NVIDIA graphics driver

Outdated driver causes a lot of issues related to a particular device. The same might be the case that you’re seeing NVIDIA high definition audio not plugged in error. So, you can simply install the latest driver for your NVIDIA graphics card. Here are the steps:
- Open Device Manager
- Access Display adapters section
- Uninstall NVIDIA graphics card
- Open Official site of NVIDIA
- Download compatible driver for your NVIDIA graphics card
- Install it.
First, type device manager in the Search box and press Enter to open Device Manager.
In the Device Manager window, access the Display adapters section and expand it. You will see the NVIDIA driver. Right-click on that driver, select Uninstall device option, and complete the uninstallation process.
Now open the official website of NVIDIA and then access the download section. On that page, select product type, product series, download type, etc., so that you can download the driver which is compatible with your graphics card. Use the Search button and it provides a download link for that driver.
Download the driver and begin the installation process. During the installation, you should choose custom installation, and then select Perform a clean installation so that it will remove any old profiles and begin with a fresh start.
2] Roll Back NVIDIA Driver

If your graphics card is not working properly after installing the latest driver or updating the driver to the latest version, then rolling back the driver to the previously installed driver might be helpful. Here are the steps:
- Open Device Manager
- Access Display adapters section and expand it
- Right-click on the NVIDIA driver
- Select the Properties option
- Access the Properties window of the NVIDIA display driver
- Go to the Driver tab.
- There, click on the Roll Back Driver button.
3] Run Playing Audio Troubleshooter

The steps are as follows:
- Open Settings using Win+I hotkey
- Click on Update & Security
- Access Troubleshoot page on the left section
- Click on Additional troubleshooters on the right part
- Click on Playing Audio
- Use Run the troubleshooter
This audio troubleshooter will automatically detect problems related to audio and provide you the fixes. This might work to solve your NVIDIA high-definition audio plugged-in problem.
4] Set Input and Output Sound device

- Use Win+I hotkey to open the Settings app
- Click on the System category
- Click on the Sound page visible on the left side
- On the right-hand side, choose your output device for sound
- Choose your input device for sound.
Set it to your NVIDIA device and see if it helps.
Related: No Audio Output Device is Installed error.
5] Use NVIDIA Control Panel

An incorrect setting in the Control Panel of the NVIDIA driver for the HDMI port might also cause this problem. So, you need to set the correct HDMI setting and then set the NVIDIA output driver as default under Sound to show NVIDIA high-definition audio as plugged in.

In the first step, you need to open NVIDIA Control Panel. For this, right-click on the empty area on the desktop, and click on NVIDIA Control Panel option.
In that panel, expand the Display menu available on the left side, and then access the Set Up Digital Audio option.
On the right-hand side, use the drop-down menu for HDMI and select the device with which you are connected. The task is not completed yet.
Now open the Sound window by right-clicking on the volume icon in the system tray and using the Sounds option.
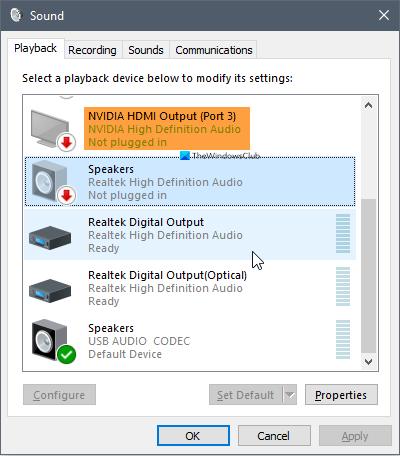
In the Sound window, go to the Playback tab. You will see NVIDIA as an output device that you need to set as default. If it is not visible for some reason, then right-click there, and tick mark Show Disconnected Devices and Show Disabled Devices options.
Now, your output device will visible. Select that output device and press the Set Default button. Press OK to save the changes.
Hope these options will be helpful.