Fortigate Free Radius MySql Part I : Install on Centos7
#################### PART I #######################
install Centos 7 Minimall on Virtualbox
– new – name – Linux – Red Hat (64bit)
– Memory size 2gb
– create a virtual hard drive now – VDI – Fixed Size
– 8gb
– setting network – bridge
– setting storage – ide – centos7.iso
– run and install centos 7
– Remote centos7 via Putty
—————————————-
Install basic tools
– yum install wget unzip net-tools -y
####################### Iptables Firewall #######################
config Firewal and Port
– systemctl stop firewalld
– systemctl mask firewalld
– yum install iptables-services -y
– vi /etc/sysconfig/iptables
– press i for edit
Add Port UDP 1812
-A INPUT -m state –state NEW -m udp -p udp –dport 1812 -j ACCEPT
– press esc exit edit
– press wq! and press enter (write quite)
– chkconfig iptables on
– systemctl restart iptables
####################### MySql Percona #######################
Install Mysql percona
– yum install https://repo.percona.com/yum/percona-release-1.0-3.noarch.rpm -y
– yum install Percona-Server-server-57 -y
– chkconfig mysqld on
– service mysqld restart
– cat /var/log/mysqld.log |grep generated
– mysql_secure_installation
– press enter
– mysql -u root -p -e ” CREATE DATABASE radius”
– mysql -u root -p
– GRANT ALL ON radius.* TO ‘radius’@’localhost’ IDENTIFIED BY “@Rad1234”;
– FLUSH PRIVILEGES;
– exit
####################### Free Radius #######################
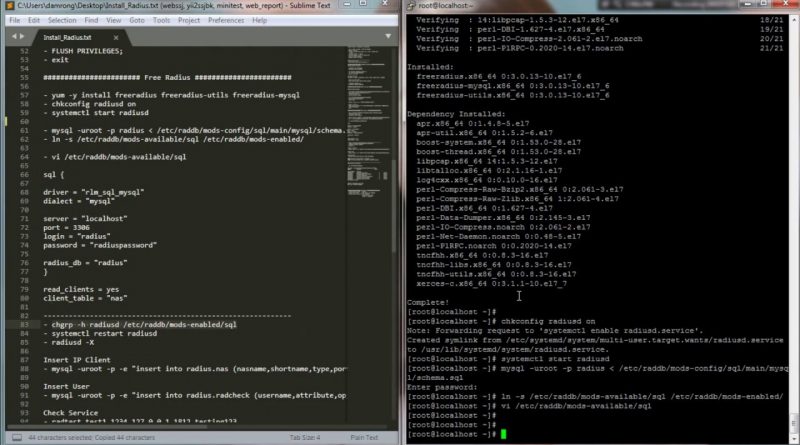
– yum -y install freeradius freeradius-utils freeradius-mysql
– chkconfig radiusd on
– systemctl start radiusd
– mysql -uroot -p radius (Please type Mark in video) /etc/raddb/mods-config/sql/main/mysql/schema.sql
– ln -s /etc/raddb/mods-available/sql /etc/raddb/mods-enabled/
– vi /etc/raddb/mods-available/sql
sql {
driver = “rlm_sql_mysql”
dialect = “mysql”
server = “localhost”
port = 3306
login = “radius”
password = “radiuspassword”
radius_db = “radius”
}
read_clients = yes
client_table = “nas”
———————————————————–
– chgrp -h radiusd /etc/raddb/mods-enabled/sql
– systemctl restart radiusd
– radiusd -X
Insert IP Client for fortigate
– mysql -uroot -p -e “insert into radius.nas (nasname,shortname,type,ports,secret) values(‘192.168.0.0/16′,’testrad’,’other’,’0′,’testing123′)”
Insert User
– mysql -uroot -p -e “insert into radius.radcheck (username,attribute,op,value) values(‘test1′,’Cleartext-Password’,’:=’,’1234′)”
Check Service
– radtest test1 1234 127.0.0.1 1812 testing123
#### Received Access-Accept is PASSSSSS ……..
#### if not pass please run : systemctl restart radiusd
———————————————————–
ADD Foritnet Dictionary
– vi /etc/raddb/dictionary
# include /usr/share/freeradius/dictionary.fortinet
VENDOR Fortinet 12356
BEGIN-VENDOR Fortinet
ATTRIBUTE Fortinet-Group-Name 1 string
ATTRIBUTE Fortinet-Client-IP-Address 2 ipaddr
ATTRIBUTE Fortinet-Vdom-Name 3 string
ATTRIBUTE Fortinet-Client-IPv6-Address 4 octets
ATTRIBUTE Fortinet-Interface-Name 5 string
ATTRIBUTE Fortinet-Access-Profile 6 string
END-VENDOR Fortinet
CENTOS & FreeRadius All done
Now let’s config fortigate
####################### fortigate #######################
– Create Radius Server : radserv
– Create User Groups : Add radserv to radgroup
– Create Policy out wan : User Identify
Authentication Rules
Groups – radgroup
#################### END PART I #######################
#fortigate #freeradius #radius #authen #mysql
centos 7


