How I Replaced My Garage Door Window!
Full video here: https://youtu.be/e8NxnmmgO0Q
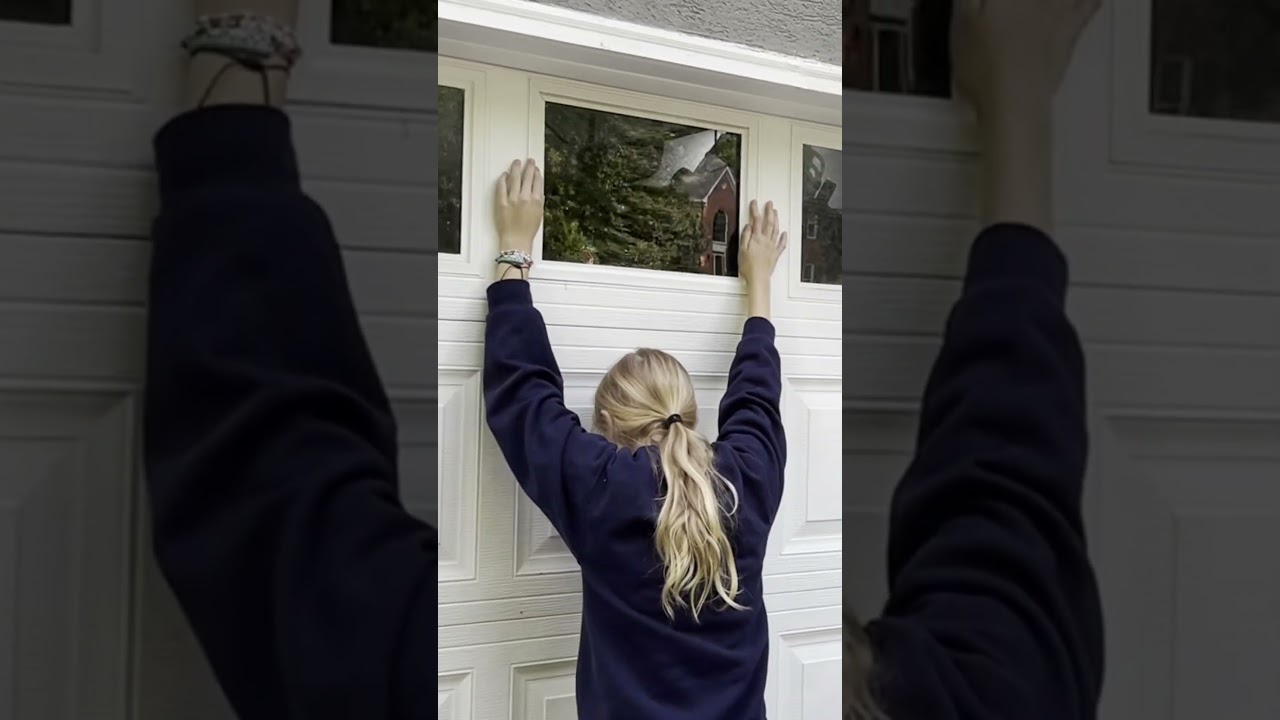
In this #Shorts video, DIYNate shares how he replaced his broken garage door window with Plexiglass.
DIYNate shares how he quickly fixed a broken garage door window using some spare plexiglass that he had laying around after his daughter threw a tennis ball through the window.
🪟 Need some plexiglass for the project (check your measurements but 1/4 inch thickness is typical)? https://amzn.to/3x9jOul
🛠️ Need a tape measure for your toolbox? Shop for one on Amazon: https://amzn.to/4aJVY6l or Milwaukee version https://amzn.to/4bX9K6u
🛒 Looking for some other project supplies on Amazon? Shop here: https://amzn.to/31mlhvl
🟧 Find other tools at DIYNate’s favorite hardware store – The Home Depot: https://homedepot.sjv.io/qPJ5Y
👍 SUBSCRIBE for more great videos! https://www.youtube.com/c/diynate?sub_confirmation=1
🌐 Check out DIYNate’s website: www.DIYNate.com
💲 Enjoy this content and want to support DIYNate’s efforts? Consider https://www.buymeacoffee.com/DIYNate or visit GoFundMe @ https://tinyurl.com/yauc4dtu
In this video, DIYNate walks through his broken garage door window solution and takes things step by step. His daughter was throwing a tennis ball against the house above the garage door when she accidentally threw the ball right through one of the garage door windows. To fix the problem, DIYNate first removed the remaining broken glass from the frame, then unscrewed the frame for the specific window. He then pulled a leftover piece of plexiglass he had laying around in his garage (remnant from a project he worked on during the pandemic) and was happy to see the height of the glass was very close to what he would need. He took the plexiglass and using a straight edge (12 inch level) and a box cutter / razor, he scored a deep line into the plexiglass to give him the ability to snap the plexiglass in two at around the 19 inch mark for the length of the window. Alternatively, other cutting tools could have been used (glass cutter, circular saw) and there are a variety of techniques on how to best cut plexiglass.
While the height size was close, it wasn’t an exact fit, and he could have used a size closer to the 13 inch dimension for a better fit instead of the 12 inch plexiglass he had on hand. To solve for the measurement difference, he used clear tape around the edges to hold the glass into the center of the rectangle opening. The tape acts as a shim to ensure the glass fully covers the square while the frame is placed around the plexiglass.
After cutting the plexiglass and taping it in position, he put the two frame pieces together (one piece on the outside and one piece on the inside – take note of the configuration when you take the frame off to begin with to save time and effort in figuring out how to reset the frame). He got some assistance from his daughter to hold the frame in position from the outside, while he put the screws in from the backside. The screws pull the frame together and form a seal around the garage door holding both the frame and plexiglass in position on the garage door.
Steps include:
1. Remove glass and exterior frame (unscrew)
2. Take measurements needed for plexiglass
3. Mark plexiglass dimensions to fit inside of frame
4. Score plexiglass multiple times ensuring a clean break (or use a power tool like circular saw to cut)
5. Place plexiglass in frame (consider using clear tape to hold in position while installing – optional but can help avoid dropping)
6. Reattach frame with plexiglass in between, placing screws back in original holes and ensuring a good fit for the frame and plexiglass
7. Enjoy the results!
Good luck and hope your day gets better! Nothing like dealing with a broken garage window but it feels a lot better when the project is done!
Warning / Disclaimer: Be careful removing broken glass and using cutting tools. Also, avoid breaking your glass/plexiglass while working on the project to avoid additional expense. Please use caution and consult a professional if you do not feel confident in making this repair. DIYNate assumes no liability and this video is for entertainment purposes only (not to be construed as advice).
For other ways to support DIYNate or see my other content and information, please check out my website: www.DIYNate.com
Thanks for watching and please like, subscribe, and comment if you found this video helpful.
Appreciate your support!
DIYNate
💬 Connect @
Facebook: DIYNate79
Instagram: DIYNate79
Twitter: DiyNate
Pinterest: DIYNate
www.DIYNate.com
Note: As an Amazon Associate, I earn from qualifying purchases. I may earn other referral fees for product promotion and placement with no added cost to purchasers. Recommendations and purchase suggestions are strictly my opinions with no expressed or implied warranty.
how to repair windows 7