How to add Guides in PowerPoint
The Guides purpose in PowerPoint is to help the user move things around and align and spacing them into the slide. The Guides feature in PowerPoint will bring a professional look to your slides and helps to remove bad alignments. Guides are a feature that displays adjustable lines to which you can align objects on the slide.
In this tutorial, we explain how to add Guides to PowerPoint slides, add more Guides, add colors to Guides and how to delete Guides.
How to add Guides in PowerPoint
Open PowerPoint.

On the View tab, in the Show group, click the Guides checkbox.
Two Guides will appear in the slide, one vertical and one horizontal.
You can drag the lines around the slide, and there is an indicator on the line depending on the line you drag that will show the length of how far you pull it.
How to add more Guides to the PowerPoint slide

To add more Guides to your slide, place your cursor on the Guide, press Ctrl, then click and drag the Guide, and you will see another Guide.

There is another way to add a Guide to your PowerPoint slide.
Right-click the Guide, a short-cut menu will appear, displaying some options.
You can choose to add a Vertical Guide or a Horizontal Guide.
How to add colors to Guides to your PowerPoint slide

Right-click the Guide, a short-cut menu will appear with options.
Select Color and choose a color.
Choose a color for all the Guides.
How to delete Guides in PowerPoint
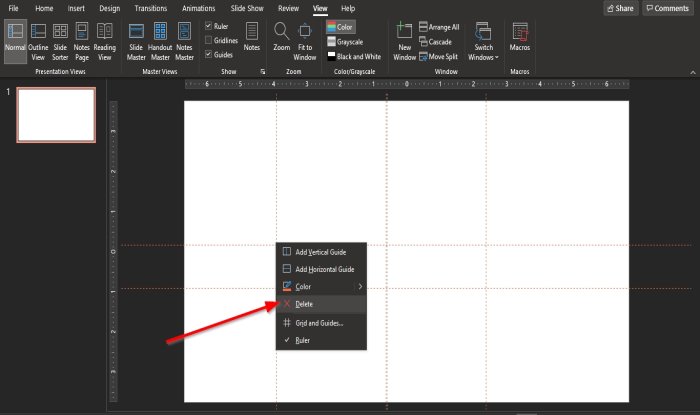
Right-click the Guide, a short-cut menu will appear with options.
Select Delete.
The other method to delete the Guide is to drag the Guideline out of the slide.
The Guide is deleted.
We hope this tutorial helps you understand how to add Guides to the PowerPoint slide.
Read: How to make a Glint or Sparkle Text animation in PowerPoint.