How to apply Themes and change the appearance on an Excel Workbook
In Excel, a Theme is a collection of default Colors, Fonts, and Effects that can be added to a workbook or items in a workbook, for instance, Tables and Charts. Each Theme gives a unique Color, Font, and Effects, which provides the document with a consistent professional look. When a new Theme is selected, the new style will replace any styles from the workbook.
The tools for creating Themes are available in the Page Layout tab in the Theme Group. These tools are Themes, Colors, Font, and Effect.
- Themes: Themes give your workbook a consistent, attractive style
- Color: change the color in your document by clicking a color palette
- Font: Changes the text in your workbook by choosing a font set. It changes your document text at the same time.
- Effects: It changes the look of objects in the workbook. It uses Visual Effects.
Hovering over the Theme’s Tools in the Themes Group will give you a preview of how they will look on your worksheet.
In this tutorial, we will explain how to choose and customize your workbook in Excel.
How to Add Themes to your Excel Workbook
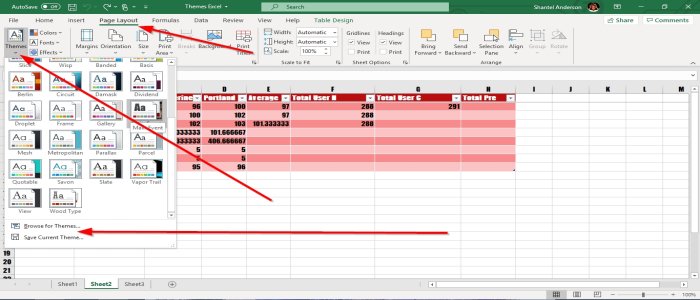
To add Themes to your workbook, ensure that the data is in a table and the style is normal because you will not see the Theme Palettes when selected applied to our worksheet.
First, go to the Page Layout tab on the top left of the Page Layout Window select Themes. In the Theme Group, a drop-down list will show select your desired Theme. When the Theme is selected, you will notice how the style and color change within the worksheet table.
You can also browse for a theme. Select Browse for Themes, your File Explorer window will pop up. Choose a Theme that you downloaded and add it to your table. Then OK. You can also save your Theme by selecting Save Current Theme. The Theme will be saved to the File Explorer, name your Theme, choose the Folder you want your Theme to be in, then Save.
Add Theme Colors to your Workbook
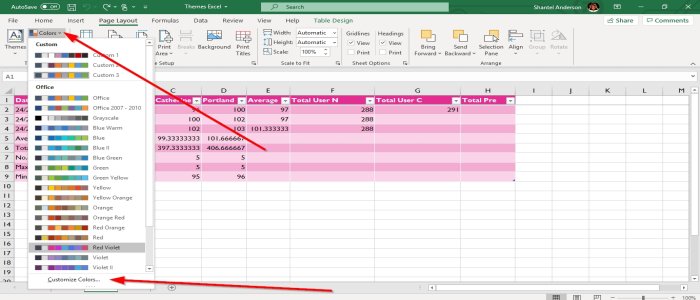
Go to the Themes Group on the Page Layout tab and select Colors, a list of Color Palettes will appear, then select the Color Palette you want; notice only the colors within the table in the worksheet changes.
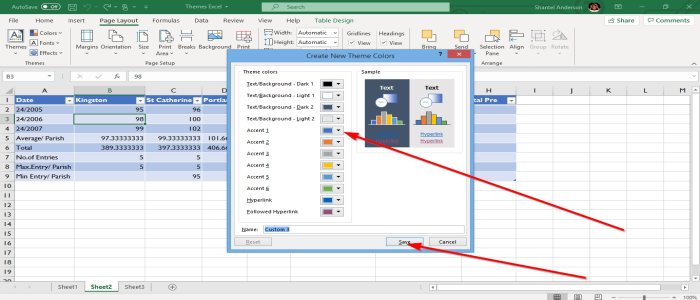
You can also customize your colors by selecting Customized Colors. A dialog box called Create New Theme Colors will appear; choose your Colors or Text/ Background Colors, then OK. The Theme within the table shown in the pictures will change.
Add Fonts to your Excel Workbook
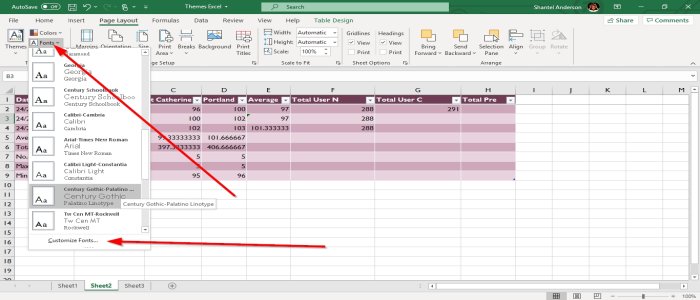
Go to the Page Layout tab in the Theme Group. Select Fonts, Select your desired Font. Notice that the Font Style in the Table changes.
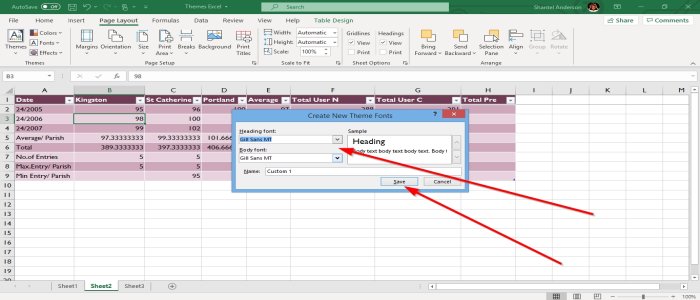
You can also customize your Font by clicking Customized Fonts. A dialog box will appear called Create New Theme Fonts. Click the drop-down arrow of the Heading and Body Font. You will see Fonts Styles you can download from the Microsoft Store. Select your desired style, then name your style, then OK.
Add Effects to your Workbook Object
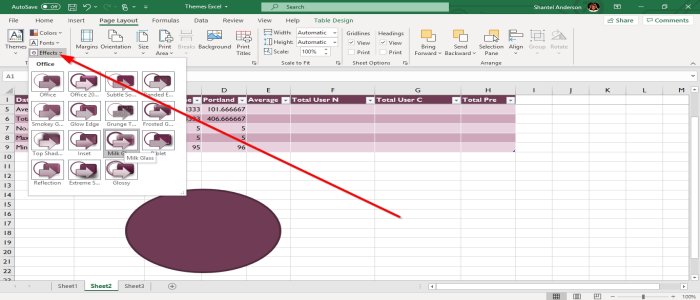
In the Themes Group, select Effect on the Page Layout tab, a list of Effects will appear. Choose the Effect you want, then OK. Notice that your object will change.
We hope this post helps you change the appearance of your workbook.


