How to Crop and Rotate a Picture in Paint.NET
You may place an image into Paint.NET but want to crop and rotate the image to have a tilted look. Paint.net has tools that allow the user to crop and rotate the image according to the user’s wants. In this tutorial, we will explain how to Crop Images and Rotate images in Paint.net.
- Crop means the removal of unwanted areas from a photo or image.
- Rotate means to change the orientation of a layer of the image in Paint.net, you can change the orientation to Horizontal, Vertical, Rotate ninety degrees clockwise, Rotate ninety degrees counter-clockwise, and Rotate one Hundred and eighty degrees.
How to Crop a Picture in Paint.NET
Open Paint.net.
Open your image.

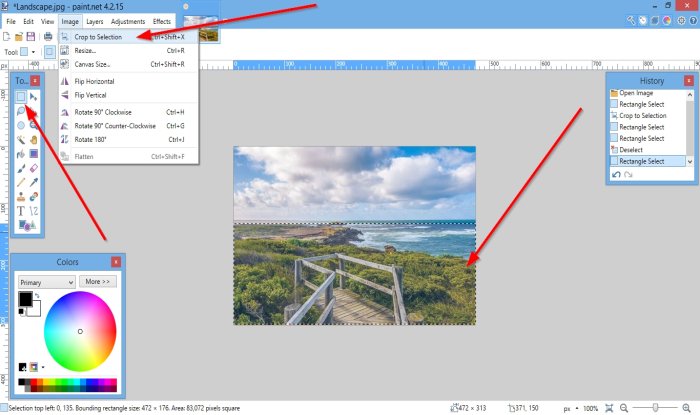
Go to the tools box on the left and click Rectangle Select.
Draw the Rectangle Select tool over the area of the image you want to crop.
Then click Image on the menu bar.
In the drop-down list, click Crop to Selection.

The Image is Cropped.
Read: How to create and add Drop Shadow effect to an image in Paint.NET.
How to Rotate a Photo in Paint.NET

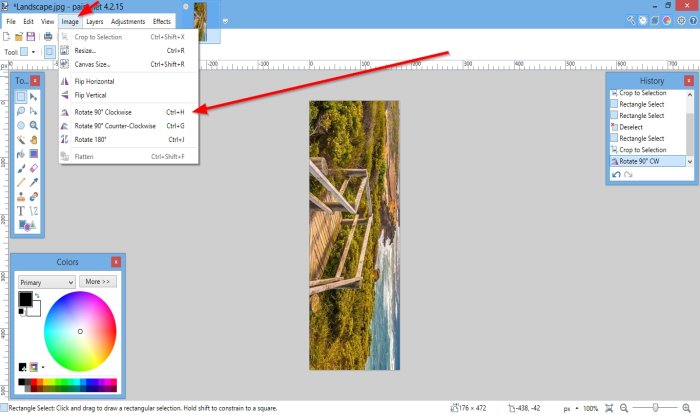
Click Image on the menu bar.
In the drop-down list, click any one of the Rotations you would want to rotate your image.
According to the selection that you choose, you will notice that the orientation of your images changes.

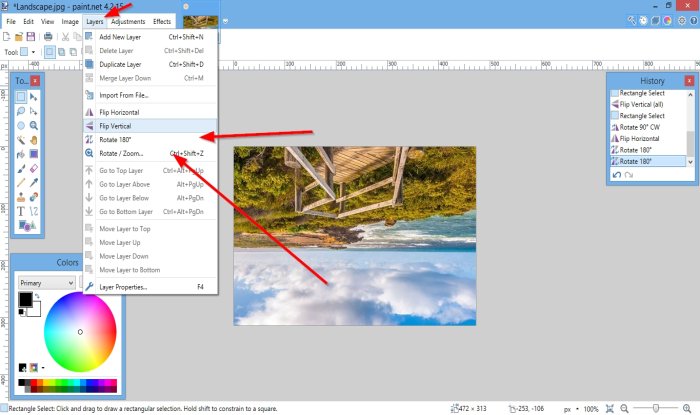
You can also click Layers on the menu bar.
You will see the different ways you can rotate the image in the drop-down list, such as Horizontal, Vertical, and Rotation One Hundred and Eighty Degree.
You can choose to select Rotate and Zoom.

A Rotate and Zoom dialog box will open.
In the Rotate and Zoom dialog box, where you see Roll or Rotate if you use the slider on the slide bar, the canvas’s image will change orientation.
Pan displays the image on the canvas. If you click on drag the image, the image will move on the canvas.
You can also use the Zoom slider to zoom the image.
You can check the checkboxes for Tiling and Preserve Background.
Then Press OK.
I hope this helps; if you have questions, please comment below.


