How to crop, rotate, and change Image size in GIMP
If you are new to GIMP, then we suspect you may have problems performing basic tasks. For example, you might be wondering if it’s even possible for users to crop, rotate, and resize a photo. Well, the answer to that is a simple yes.
Crop, rotate and change Image size in GIMP
We are going to explain how to do each in as much detail as needed without going too deep into all the things GIMP is capable of. And believe us when we say that this open-source image editing tool has been around for quite some time.
GIMP is one of the best in the business, though not the easiest. And while it works quite well on Windows 10, we’ve found that it performs much better on Linux; but we won’t dig into that today. In this GIMP tutorial, we will cover the following topics:
- How to crop an image
- How to rotate or flip a photo
- Change the dimension and scale of a picture
- Change the file size of a JPEG photo
Let us talk about this in more detail.
1] How to crop an image
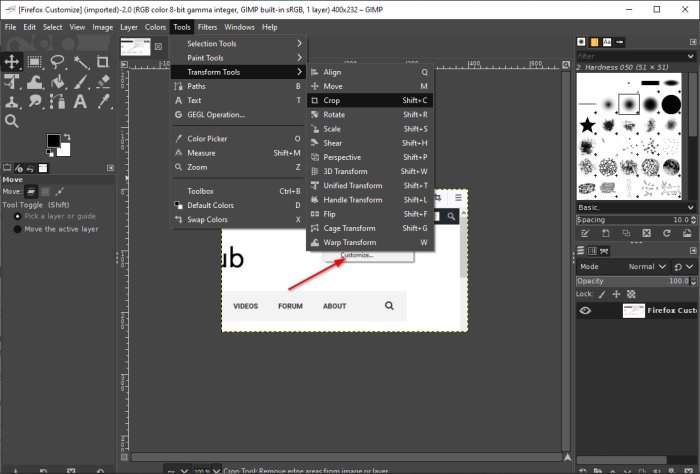
Folks have a million and one reasons for needing to crop an image. Luckily, this is possible using GIMP, so let’s take a look at what needs to be done.
Once you’ve added the photo to the work area, please click on the Crop tool via the tools palette or take the alternate route by navigating to Tools > Transform Tools > Crop.
After you’ve done that, the mouse cursor will change, indicating the Crop feature is activated.
Now, to crop the image, press the left-click then drag the mouse in the right area to adjust the image.
2] How to rotate or flip a photo

Cropping is just one aspect of image manipulation in GIMP. One of the others is rotation or flipping.
Say for example you took a photo with a smartphone, but it is upside down or in the wrong orientation. With this tool, you can set the angle to the correct one, and it is not hard to accomplish either.
OK, so when it comes down to rotating or flipping, please add your image to the workspace, then click on Image > Transform. From here, you can select from any of the options available to rotate and or flip your photo.
Read: How to create Animated GIF from a video file using GIMP.
3] Change the dimension and scale of a picture
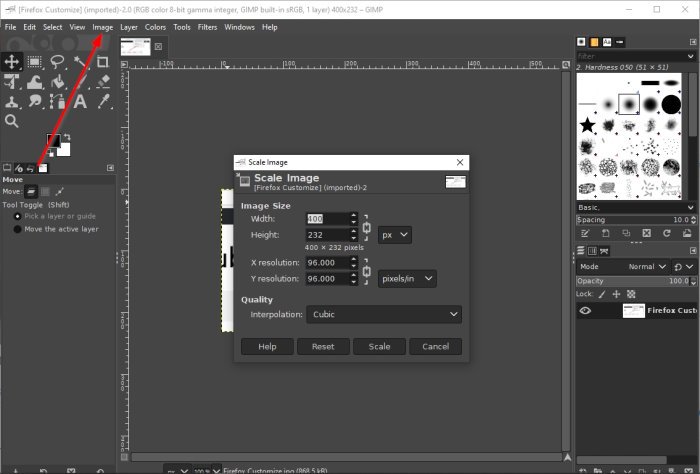
One of the easiest things to do in GIMP is to change the dimension and scale of a photo. Maybe the photo is too large for the purpose it is needed for. In a situation like this, you will want to change the dimension by scaling it down to the right size.
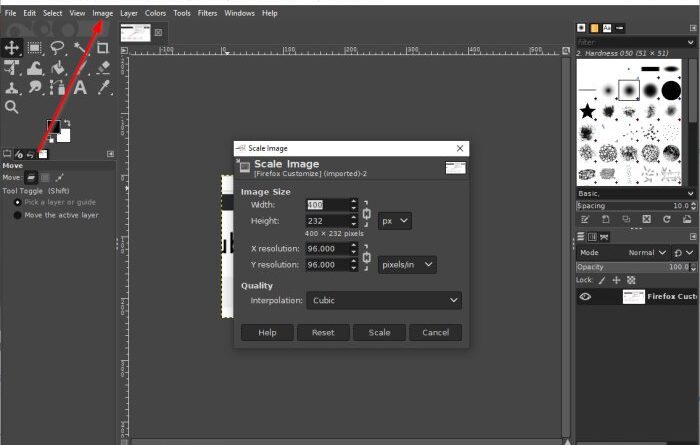
Alright then, to change a photo’s dimension, please add the content to the work area, then select Image > Scale Image. Right away the scale image dialog box should appear. From here, set the width and height of the photo to scale it to the right dimension.
When you’re done, hit the Scale button at the bottom, then complete the task by saving the photo.
Read: How to create rounded circular images using GIMP.
4] Change the file size of a JPEG photo
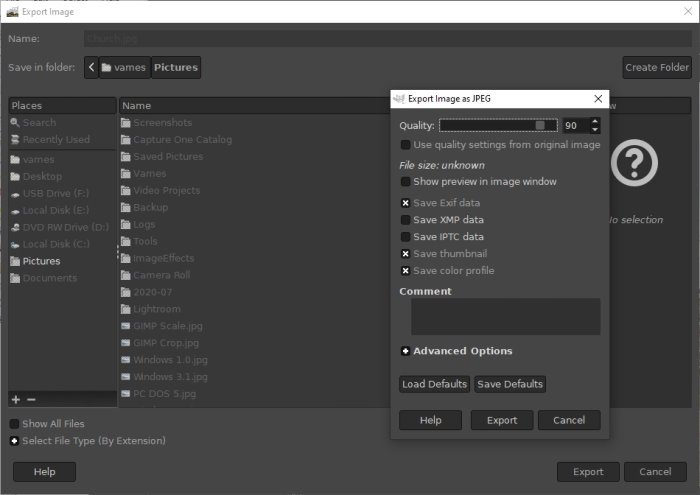
Scaling an image is one thing, but is it possible to reduce the file size? Well, yes, it is possible, and we are going to discuss how to do it right now.
To make a photo smaller, you must first make sure it is in the JPEG file format. Once that is confirmed, select File > Export, then add the name of the file. After doing that, click the Export button at the bottom of the box.
You should now see a small dialog box with the options to increase or reduce the image quality. If the picture has never been compressed before, then the quality will be at 100. If that is the case, drag the button down to reduce the size, and up to increase.
Bear in mind that if the size is reduced, then it means the picture is compressed and will lose quality.

