How to customize Spelling and Grammar Checking Settings in Outlook
Spelling and Grammar is a great feature to make changes to your text, and it is available in all Microsoft Office applications, such as Word, Excel, PowerPoint, Publisher, and Outlook. It allows the user to correct spellings and pronunciation errors in your document. The type of suggestions displayed when there is an error is:
- When there is a spelling error, it is signified by a red squiggle.
- When there is a grammar error, it is signified by a double blue underline.
- When there is a refinement error, it is signified by a purple underline.
Customize Spelling & Grammar Settings in Outlook
Open Outlook.
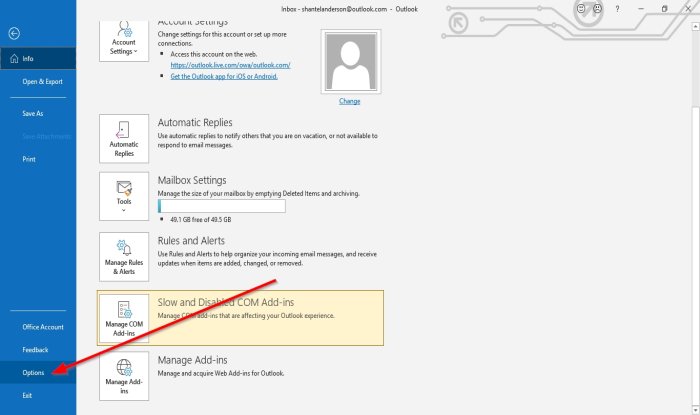
Click the File tab.

On the Backstage View, click Options.
An Outlook Options dialog box will appear;
Inside the Outlook Options dialog box, click the Mail tab.
On the Mail page in the Compose Messages section, click the Spelling and Autocorrect button on the right.
An Editor Options dialog box will appear.
Inside the Editor Options dialog box, on the Proofing page on the When correcting spelling in Microsoft Office programs section.
You can select the spelling correction options and choose the dictionaries you want to use.
You can click the Suggest from the main dictionary only check box or click the Custom Dictionaries button to create your dictionary.
In the When correcting spelling in Outlook section, you can choose any of the grammar or spelling checking options you want.
You can select them by clicking the checkboxes.
You can also customize the Checks Editor will perform for Grammar and Refinement by choosing from the Write Style list box.
You can choose to select either Grammar and Refinement or Grammar.
A Grammar Settings dialog box will appear if you choose to click the Settings button on the left of the Write Style list box.
Inside the Grammar Settings dialog box, you can choose which commands you want the Grammar and Refinement or Grammer to perform. Then, click OK.
After you finish customizing the spelling and grammar settings in the Editor Options dialog box, click OK.
I hope this helps; if you have questions, please comment below.
Now read: How to add Expiration Date to Emails in Outlook.


