How to delete all emails before or after a date in Outlook
If you want to delete emails selectively from a specific folder based on the timestamp on Outlook.com, this article will guide you through all the steps. It is possible to delete emails that are certain days old. Here is how to do it.
Outlook is one of the best free email service providers you can use. It offers 50 GB of free storage to store your emails. If you are using it for a very long time and it is almost full, it will create problems in the future. Users cannot send or receive emails when it reaches the ultimate storage level. To continue sending and receiving emails, you have to clean up your emails.
Outlook lets you delete emails from a specific folder at once, but you may lose some important ones that were sent to you in recent times. This article helps you delete emails by timestamp so that you can retain your recent emails stored in any folder, using the Storage settings provided by Outlook.
Delete all emails before or after a date in Outlook
To delete all emails before or after a date in Outlook.com, follow these steps-
- Open Outlook.com and log in to your account.
- Click on the Settings gear icon on the top menu bar.
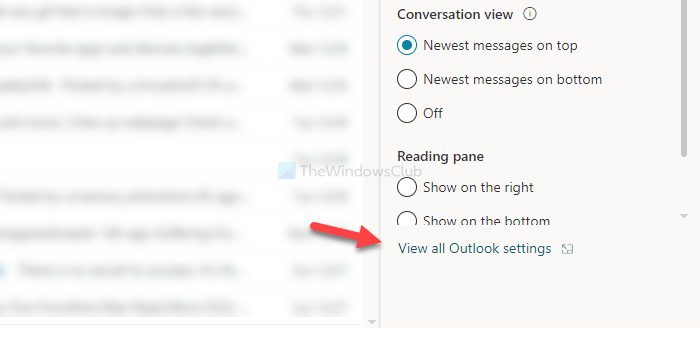
- Select the View all Outlook settings option.
- Go to General > Storage.
- Select the folder.
- Click the Empty option.
- Select a time range.
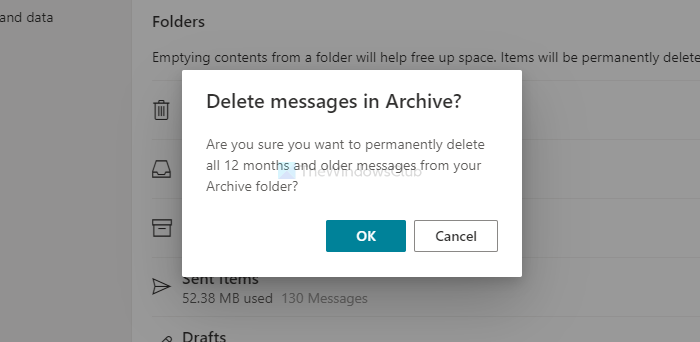
- Click the OK button to confirm.
To get started, open the official website of Outlook and log in to your email account. After signing in, click on the settings gear icon visible on the top menu bar. Then, click on the View all Outlook settings option visible at the bottom.

It will open a panel. Make sure you are in the General tab. If so, switch to the Storage tab.

Here you can see your current capacity and all the folders in your mailbox. Choose a folder you want to delete emails from. Following that, click on the associated Empty button and choose a time range. You have the following options-
- All
- 3 months and older
- 6 months and older
- 12 months and older
Choose an option according to your requirements. Then, it shows a popup window where you have to click the OK button to confirm the removal.

Once you do that, it will remove all the emails as per your selected option.
That’s all!


