How to enable or disable Snap Layouts on Windows 11
In this article, we will explain how you can enable or disable the Snap Layouts on Windows 11. Microsoft never stays behind the technological need of evolving world. Multitasking and increase work management raised the need of using multiple Windows simultaneously. Snap Layouts facilitate the ease of handling multiple Windows at a time.

Snap Layout and Snap Groups bring next-level Task Switching to Windows 11. This feature is smoothly managed by a snap navigator to navigate the tab of your choice. It shall also be noted that the Windows have to be resized manually while using the snap option.
How to Enable Snap Layouts on Windows 11
To disable or enable Snap Layout on Windows 11, follow these steps:
- Open the Windows Settings.
- Select System
- Go to Multitasking.
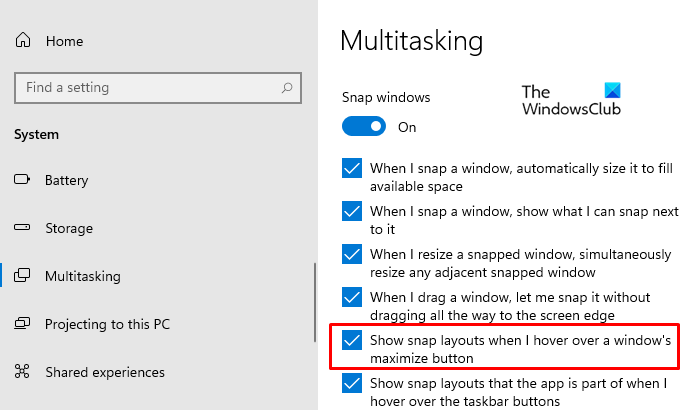
- Turn on the Show snap layouts when I hover over a window’s maximize button box.
Let’s now see the above steps in details:
To get started, open the Windows Settings first. For this, click on the Start button, type Settings, and press the Enter key.
Inside the Settings app, select the System Category and then click on the Multitasking tab, available in the left pane.
On the right, check the box next to the Show snap layouts when I hover over a window’s maximize button option.
Once you’re done, open the default browser and hover over the maximize button. You will see different layout technique options for arranging the current page with other apps.
Read: Windows 11 System Requirements.
In case you want to turn this feature off, simply open the Settings app. Now click on the System category and then select the Multitasking tab.
On the right pane, uncheck the box next to the Show snap layouts when I hover over a window’s maximize button option.
This way you can enable and disable Snap Layouts on your Windows 11 computer system.
Hope it helps!
Related: How to remove or disable Widgets on Windows 11 Taskbar.


