How to insert a Picture into a Shape in Word
What if you want to put a picture into a shape to create a collage or any other creation? Microsoft Word has tools that allow this to happen. Shapes in Microsoft Office are ready-made shapes offered by Office for users to use in their documents, such as circles, squares, and arrows. In this tutorial, we will explain how to:
- Inserting Pictures into shape.
- Crop the Picture inside the shape.
- Crop Picture into shape.
How to insert a Picture into a Shape in Word
Open Microsoft Word
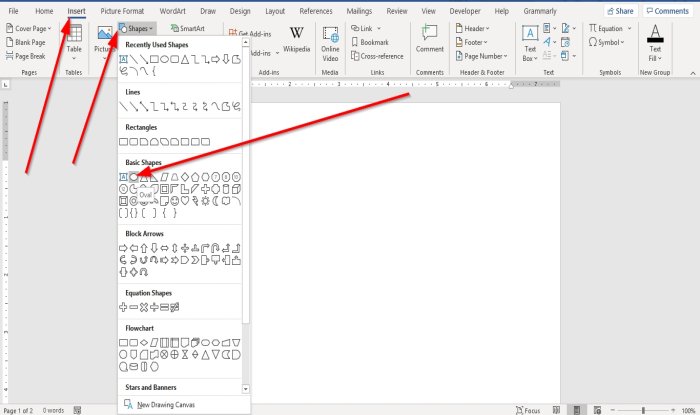
Go to the Insert tab in the Illustration group, select Shapes.
In the Shapes drop-down list, choose an oval or any other shape you desire.
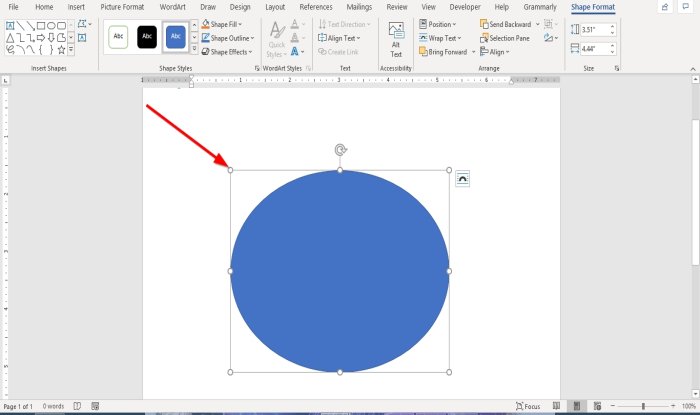
Now draw the shape into the document.
To make the shape bigger, drag the points on the end of the shape.
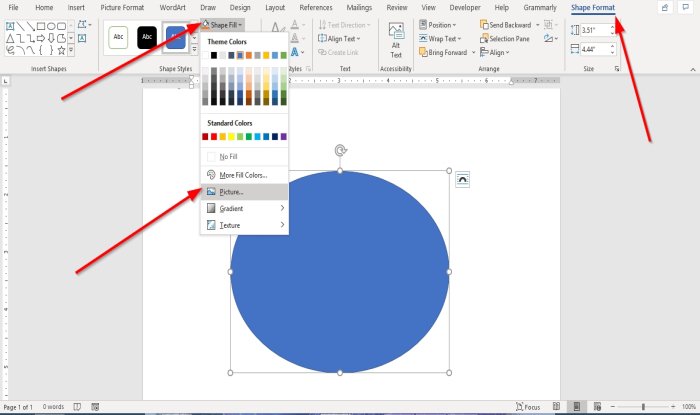
When a shape is drawn into the document, a Shape Format tab will appear.
Click the Shape Format tab.
On the Shape Format tab in the Shape Styles group, select the Shape Fill Tool.
In the Shape Fill, drop-down list, select Picture.
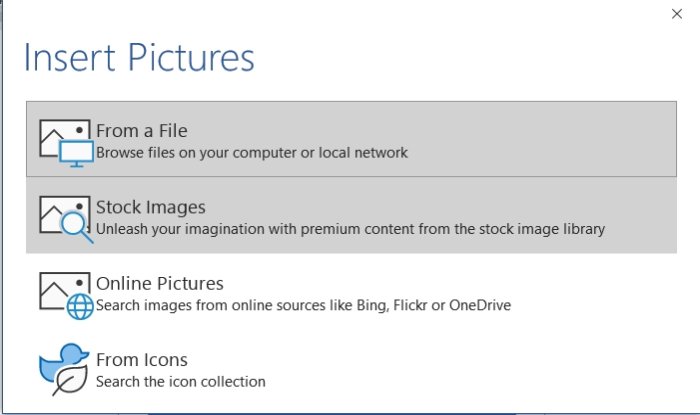
An Insert Picture dialog box will pop up.
Choose From a File.
When you select From a File, an Insert Picture window will appear, select your desired picture file and click Insert.
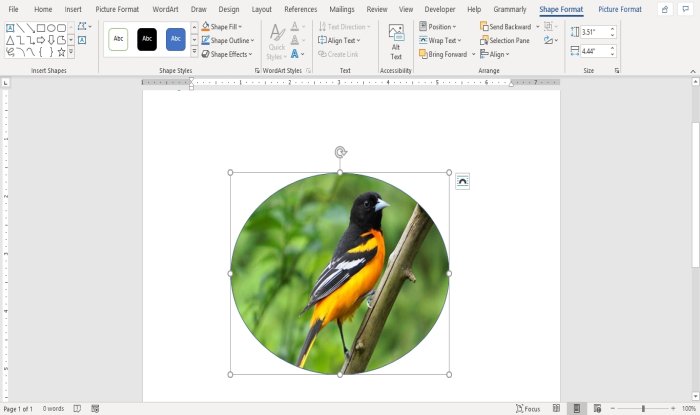
The picture is inserted into the shape.
Crop the Picture inside the shape

Click on the shape containing the picture.
Go to the Picture Format tab in the Size group and Click Crop.
In the Crop drop-down list, select Crop.
You will see pointers at the end of the image to crop the image.
Crop Picture into shape

Go to the Insert tab and click Pictures in the Illustration group.
In the Picture drop-down list, click This Device.
An Insert Picture window will open, choose your picture file and click Insert.
The picture is in the Document.

Click on the picture and go to The Picture Format tab.
On the Picture Format tab in the Size group, click Crop.
In the Crop drop-down list, click Crop to Shape.
In the Crop to Shape list, in the Basic Shapes group, select a teardrop.

You will see a teardrop shape with a picture inside it.
Now read: How to add Text Effects to WordArt in Office apps.


