How to install Kali Linux on VirtualBox on Windows (Update 2023)
How to install Kali Linux on VirtualBox on Windows (Update 2023)
Why Use Kali Linux on VirtualBox?
Running Kali Linux in a virtual machine is a smart and safe way to explore its capabilities without risking your main operating system. VirtualBox provides a sandboxed environment where you can experiment with Kali Linux, test security tools, and learn without impacting your primary system. It’s a great approach for both security professionals and beginners to gain hands-on experience without concerns about potential harm to their computers. Just remember to handle any tools or techniques ethically and responsibly!
System Requirements
The installation requirements for Kali Linux will vary depending on what you would like to install and your setup. For system requirements:
On the low end, you can set up Kali Linux as a basic Secure Shell (SSH) server with no desktop, using as little as 128 MB of RAM (512 MB recommended) and 2 GB of disk space.
On the higher end, if you opt to install the default Xfce4 desktop and the kali-linux-default metapackage, you should really aim for at least 2 GB of RAM and 20 GB of disk space.
When using resource-intensive applications, such as Burp Suite, they recommend at least 8 GB of RAM (and even more if it is a large web application!) or using simultaneous programs at the same time.
Install Kali Linux on VirtualBox on Windows
00:00 Intro
00:17 Download and install VirtualBox on Windows 11 (or 10).
00:30 Why Use Kali Linux on VirtualBox?
00:30 System Requirements
02:08 Download the Kali Linux ISO image file from the link .
02:59 Launch the application from Windows 11 start menu.
03:11 Create a new virtual machine.
03:19 Give any meaningful name to Virtual Machine.
03:29 Change the folder location
03:39 Browse the Kali Linux ISO file
03:52 Choose Type=Linux and Version=any 64-bit Linux.
04:02 Select the RAM you want for your virtual box.
04:15 Choose processor as 2 or 4.
04:38 Keep the file location unchanged on the Hard Disk section.
04:53 Click on Finish.
05:02 Normal start the virtual machine.
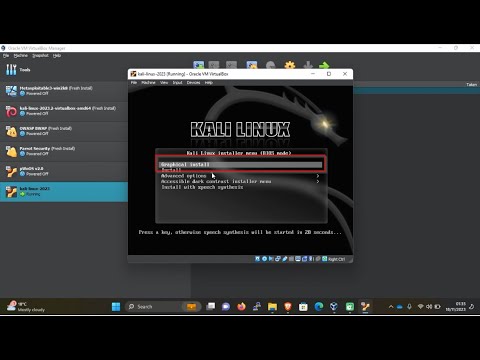
05:35 Graphical install
05:55 Select your preferred language.
06:00 Specify your geographic location.
06:21 Select your keyboard layout.
07:11 Add any hostname you want.
07:25 keep the domain name blank.
07:31 create the user account for the system.
08:04 set your time zone.
08:12 select “guided – use entire disk”.
08:27 Select the disk to be partitioned.
08:31 Select all files in one partition.
08:38 select finish partitioning and write changes to disk.
08:56 Continue with the installation as per the on-screen instructions.
09:50 select the Xfce desktop environment and key hacking tools.
10:27 confirm to install the GRUB boot loader.
10:50 Select the hard drive to install the GRUB bootloader on
11:38 click Continue to reboot into your new Kali Linux installation.
12:11 Use the user id and password to log in.
NOTE:
Below are some of the post-installation activities that need to be performed on the new kali environment. However, these will be covered in the next YouTube video.
From the application menu, open a terminal and run the following commands in sequence to keep your system updated.
sudo apt update -y
sudo apt update -y
sudo apt dist-upgrade -y
From the VirtualBox menu, select Devices – Insert Guest Additions CD Image. The necessary packages will be mounted inside Kali Linux.
Open the file manager and open the mounted folder as shown below. And then right-click – select open in terminal.
Then run the following command:
sudo ./VBoxLinuxAdditions.run
restart Kali Linux VM.
To enable the copy and paste between Windows and Kali Linus systems, select Devices – Shared Clipboard – Bi-directional from the menu.
Useful Links
Kali Linux Installation guide Blog Post: https://www.hezronchacha.com/how-to-install-kali-linux-on-virtualbox-on-windows-update-2023/
Virtual Installation Guide Youtube Video: https://www.youtube.com/watch?v=PGcIjxGtQLY&t=255s
Virtual Installation Guide Blog Post: https://www.hezronchacha.com/how-to-build-a-basic-free-cybersecurity-home-lab-setting-up-a-virtual-environment-using-oracle-virtual-box/
Kali Linux ISO Image Download link: https://www.virtualbox.org/wiki/Downloads
// Hezron Munge Chacha’s Social //
X: https://twitter.com/HezyChacha
Instagram: https://www.instagram.com/hezychacha/
LinkedIn: https://www.linkedin.com/in/hezronchacha/
Facebook: https://web.facebook.com/hezychacha
Website: https://www.hezronchacha.com/
Disclaimer: This video is for educational purposes only. I own all equipment used for this demonstration. No actual attack took place on any websites.
Please note that links listed may be affiliate links and provide me with a small percentage/kickback should you use them to purchase any of the items listed or recommended. Thank you for supporting me and this channel!
by Hezron Munge Chacha
linux web server


Thanks so much Hezron for the work you are putting in to get some of us started in Cyber Security. I will be following up on each episode. Your explanations and steps are easy to follow and understand.