How to Rename, Upgrade or Delete Hyper-V Virtual Machine
When optimizing your virtual space, it is essential to delete all redundant and not-in-use VMs, upgrade the outdated ones, and give them a recognizable name. That is why, in this article, we will walk through the process step-by-step to see how to rename, upgrade, and delete Hyper-V Virtual Machines.
Rename the Hyper-V Virtual Machine
If you are dealing with various virtual machines, it is essential to give all of them a correct name. But if you have not done that when creating the machine, you can rename them as well. However, do keep in mind that when you rename a Hyper-V virtual machine, it only changes its name in Hyper-V Manager. It does not change the name of the folder or virtual hard disk (.vhdx) file(s) for the virtual machine.
The Hyper-V Virtual Machine can be renamed using one of the following methods.
Using Hyper-V Manager

- Open the Hyper-V Manager and select the Hyper-V Virtual Machine.
- Now, click the F2 key or the Virtual Machine in the Name column. Users can also click on the Rename option in the Actions Pane or right-click the Virtual Machine and then tap the Rename button.
- Then, type in the new name for the Virtual Machine, and hit the Enter button.
Using Microsoft Powershell

First and foremost, we are going to run PowerShell with administrative rights. For that, go to the Search bar, type in PowerShell, and then click on the Run as administrator button, followed by accepting the prompts.
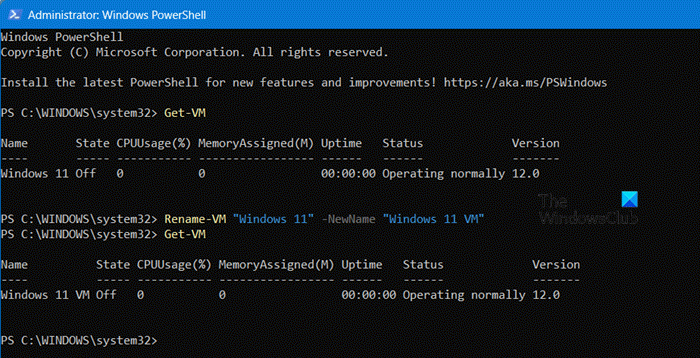
Once opened, type Get-VM in the command prompt, hit the Enter button, and check out the current name of the VM.
Now, run the following command, and hit the Enter button to change the name:
Rename-VM "<Current VM name>" -NewName "<New VM name>"
Note: Replace <Current VM name> and <New VM Name> with the particular parameters
Once done, close the PowerShell and the name will be changed.
Upgrade Configuration Version of a Hyper-V Virtual Machine

When you update the configuration version of a virtual machine, you change the file structure used to store its configuration and checkpoint files. This ensures compatibility with the version of Hyper-V running on the host. Upgrading the configuration version improves the efficiency of reading and writing virtual machine configuration data and reduces the risk of data corruption in case of a storage failure.
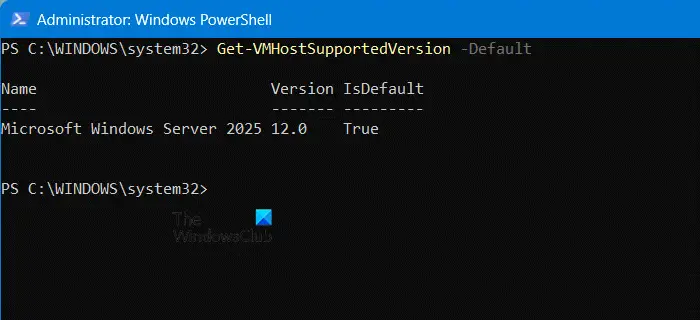
To check the current configuration version of a Hyper-V VM, you need to open PowerShell as an administrator and then run the following command.
Get-VMHostSupportedVersion -Default
Now, open Hyper-V, select the Hyper-V VM, and click on Upgrade Configuration Version from the Actions section. Click on Upgrade when the pop-up appears.
If the Upgrade Configuration Version action is not available, it means the virtual machine’s configuration version is at the maximum supported configuration version.
Delete a Hyper-V Virtual Machine

To delete a Hyper-V Virtual Machine, you can use either Hyper-V Virtual Machine or MS PowerShell. When you delete a virtual machine, only its configuration file is deleted; the virtual hard drives aren’t deleted. However, any checkpoints associated with the virtual machine are deleted and merged into the virtual hard disk files after the virtual machine is deleted. If you want to delete these manually, you can do so in File Explorer.
Using Hyper-V Virtual Manager
- Open Hyper-V Manager.
- Click on the virtual machine you want to delete, and then go to the Actions section.
- Click on the Delete button or just right-click on the Virtual Machine and hit the Delete button.
- Click on the Delete button when the popup to confirm the procedure will appear on the screen.
Using Microsoft PowerShell
Go to the Search Menu, search PowerShell, and then hit the Run as Admin option from the right pane to launch MS PowerShell with admin rights.
Now, run Get-VM by clicking the Enter key to know the details of the Virtual Machine that need to be deleted.
Run the following command and again click the Enter button:
Remove-VM "<VM name>" -Force
Make sure to replace the variables in the command.
That’s it!
Read: How to change Hyper-V Display Resolution in Windows?
How to Rename VHD file in Hyper-V?
A VHD or VHDX file can be renamed using a Virtual Machine through File Explorer. However, to start this process, we have to turn off the VM and ensure that there are no existing checkpoints. Once done, turn off the VM, and then go to File Explorer. Locate where the file is stored, right-click on the file select Rename. Give it a new name, and start the VM. Now, launch the Hyper-V Manager, find and select the VM associated with the renamed VHDX file, and right-click on it. Click on Settings, go to the Storage section, and modify the path to point to the newly renamed files.
Read: How to enable or disable Nested Virtualization for VMs in Hyper-V
How do I Rename a Hyper-V virtual machine?
Hyper-V Virtual Machine can be renamed using two methods: using the MS PowerShell or using the Hyper-V manager. As for that latter, right-click on the VM, and select Rename.


