How to Set Up a Static IP Address
How to Configure a Static IP Address
Ever wondered how to gain more control over your device’s connection? Buckle up because we’re about to dive deep. In a world where every byte counts, mastering the art of static IP configuration can be a game-changer.
Join me as we unlock the secrets to seamless networking and take control of our digital domains. Let’s learn!
1. Type CMD in the Windows search bar at the bottom left.
2. Right-click on the Command Prompt from the search result, and click on the Run as administrator.
3. Type ipconfig in the command prompt window, and press the Enter key on your keyboard.
4. Take a moment to note down your IP address, subnet mask, default gateway, and DNS server. It’s crucial information for later steps.
5. Click on the Start Windows icon, and then click on the Settings.
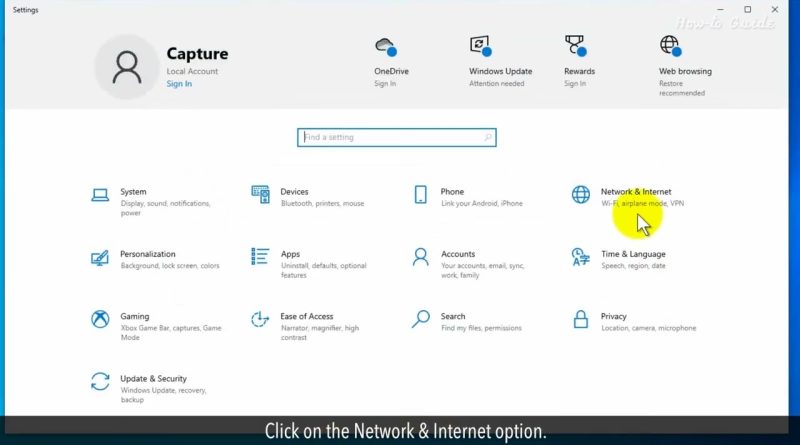
6. Click on the Network & Internet option.
7. In the Status window, and under the Advanced Network Settings option, click on the Change adapter options.
8. Right-click on the Ethernet or Wi-Fi, and click on the Properties.
9. Locate the Internet Protocol Version 4 entry and double-click on it. We’re getting closer to setting up that static IP.
10. It’s time to make the change. Select “Use the following IP address” and input your preferred details.
11. Don’t forget to include the Subnet Mask, Gateway, and DNS server you noted down earlier. These are essential for a smooth connection.
12. Finally, click OK to finalize your settings. Voila! You’ve successfully set up a static IP address.
#tutorials #ipaddress
So, there you have it, folks! Setting up a static IP address isn’t as daunting as it may seem.
Wasn’t that quick and easy? Thanks for watching!
Please like and subscribe to our channel and
Press the bell icon to get new video updates.
ipv4


