How to stabilize Shaky Video Footage in Adobe Premiere Pro
Travel has become a good enjoyment in our lives. We travel whenever we need to feel free, and adventurous. We visit new places and make memories. Those memories are stored in the form of pictures or videos. There is a great chance that we mess up videos as we are not professional videographers.
Most of the footage we shoot on our cameras feels shaky as we walk or the bad choice of lenses. We do not need to go to a professional to make the videos look right or stabilize them. With a few clicks in Adobe Premiere Pro on your computer, you can stabilize shaky videos at your home itself.
Stabilize Shaky Video Footage in Premiere Pro
Open Adobe Premiere Pro on your PC and follow the below steps to stabilize a shaky video:
- Create New Project
- Import video file and add it to timeline
- Open Effects panel
- Search for Warp Stabilizer and drag it on to the video in the timeline
To get into the details, click on New Project once you have opened Premiere Pro.

It will open a New Project dialog box. Name the file or leave it as it is. Click on OK at the bottom of the dialog box to create a new project.
Now, import the video you want to stabilize. To do that, click on File in the menu and select Import from the options.
Select the file you want to import and click import in the explorer window.
After the import, You will see a video file in the Project panel. Drag it to the right side onto the timeline.
Your video will now be added to the timeline. You will also see the video in the preview panel above.
Click on the double arrow button at the top-right of the project panel and select Effects to open the effects panel.
Search for Warp Stabilizer in the search box of the Effects panel. You will find it under Distort. Click on it and drag it on to the video in the timeline.
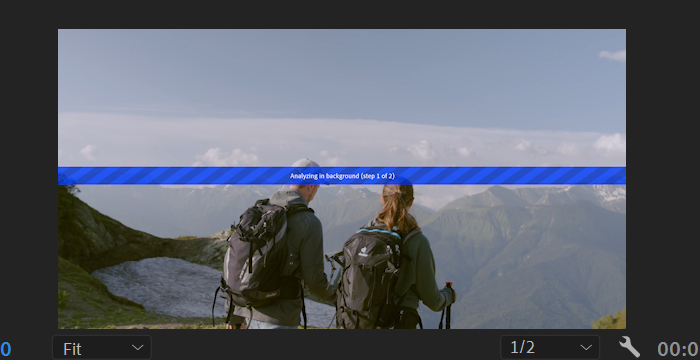
It will add the warp stabilizer effect to the video. Warp Stabilizer will analyze the background and foreground of the footage and stabilizes it in the best way possible. It will take a couple of minutes based on your PC’s RAM and the length and quality of the footage. You have to wait until it is done.
After the stabilization process is done, the video will look normal without the shaky effects. You can now save the video.
To save the video, click on File in the menu and select Export from the options. Then, select Media from the export options. It will open an export dialog box. Set the desired quality of the video based on the original video quality and the location to save the video. Then, click on Export.
Your video will be saved in the location you chose in a couple of minutes or after some time based on your PC configuration and video length and quality.
Stabilizing a video in Premiere Pro is a simple process, as you have seen in the guide. If you have any doubts or suggestions on the same, do comment below and let me know.
Read: How to Undo and Redo changes in Photoshop.


