Keyboard not working after Windows 11 Update
Windows Update is essential to install on a Windows computer. However, sometimes, problems occur after installing a certain Windows Update. Some users have faced this issue, where their keyboards stop working after installing a Windows Update. If your keyboard is not working after the Windows 11 Update, you can use these suggestions to fix this issue.

Keyboard not working after Windows 11 Update
If your keyboard is not working after the Windows 11 Update, use the following suggestions. Before proceeding, I suggest you connect your keyboard to another USB port and check.
- Roll Back your keyboard driver
- Uninstall and reinstall the keyboard driver
- Install another compatible version of the keyboard driver
- Reinstall the USB Controller driver
- Perform System Restore
- Reset your PC or perform a Repair Upgrade
I have explained all these fixes in detail below:
1] Roll Back your keyboard driver
If the Windows Update has caused your keyboard to fail, the Roll Back option for the key keyboard driver may be available in the Device Manager. Check this and install the previous version of the keyboard driver.

The following instructions will help you:
- Open the Device Manager.
- Expand the Keyboards branch.
- Double-click on your keyboard driver to open its Properties.
- Select the Driver tab.
- Check if the Roll Back Driver option is available. If yes, click on it and follow the on-screen prompts to Roll Back your keyboard driver.
The above steps will install the previous version of your keyboard driver. After doing this, check if the problem persists.
2] Uninstall and reinstall the keyboard driver
If the Roll Back driver option is greyed out or if rolling back the keyboard driver does not work, uninstalling and reinstalling the keyboard driver can fix the issue.

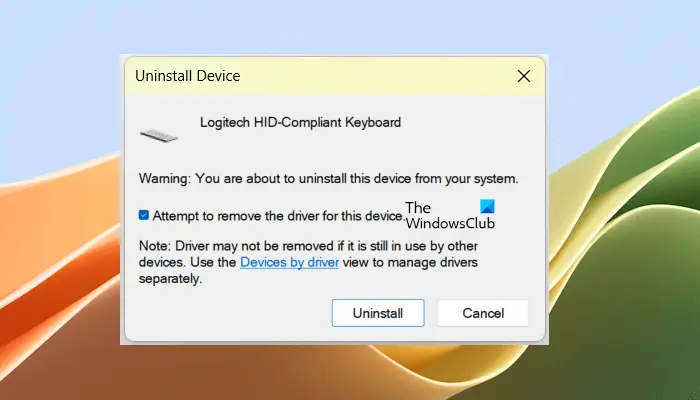
In the Device Manager, right-click on your keyboard driver and select Uninstall device. While uninstalling the keyboard driver, select the following checkbox (if available) to completely remove the keyboard driver from your computer.
Attempt to remove the driver for this device.
After uninstalling the keyboard driver, restart your computer or perform a scan for hardware changes. This step will reinstall the missing or uninstalled drivers.
3] Install another compatible version of the keyboard driver
You can also try installing another compatible version of your keyboard driver. The following steps will guide you on this. Before you proceed, create a system restore point.

- Open the Device Manager and expand the Keyboards branch.
- Right-click on your keyboard driver and select Update driver.
- Select Browse my computer for drivers.
- Now, select the Let me pick from a list of available drivers on my computer option.
- Select the Show compatible hardware checkbox.
- Now, select another available for your keyboard driver and click Next to install it.
Now, check if the issue persists.
4] Reinstall the USB Controller driver
You can also try to reinstall the USB Controller driver. The process is simple but before you proceed, create a System Restore Point. Open the Device Manager and expand the Universal Serial Bus Controllers branch. Now, right-click on each USB Host Controller driver and select Uninstall device.

After uninstalling the USB Controller driver, restart your computer or scan your system for hardware changes.
5] Perform System Restore
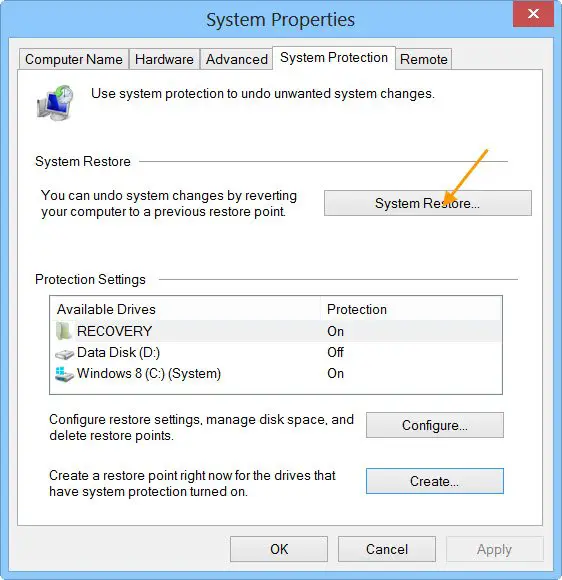
System Restore will take your system to the previous working state. I suggest you perform this action, as it will restore all the previously installed device drivers. Hence, this step can fix the issue.

While performing the System Restore, select the restore point before which your keyboard was working perfectly. If you do not know the exact date, select the restore point that was created before installing the problematic Windows Update.

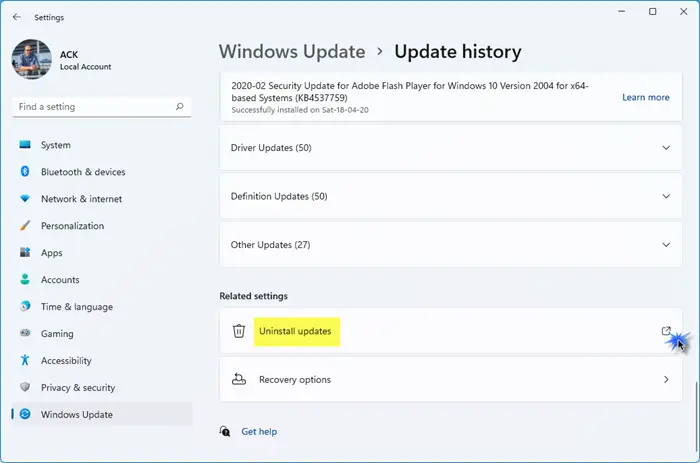
If the restore point does not exist, you can uninstall the Windows Update that has caused this problem. This should fix the problem.
6] Reset your PC or perform a Repair Upgrade
If nothing helps, you can reset your computer to the factory default settings. Windows computers have the following two options when it comes to factory reset:
- Keep my files
- Remove everything

The first option does not delete your data. Select the Keep my files option to perform a factory reset without deleting your data. However, from a safe point of view, I suggest you backup your data before performing a factory reset.
You can also perform a Repair Upgrade of Windows 11. A Repair Upgrade does not delete data.
That’s it. I hope this helps.
Read: How to reinstall Windows 11 using Windows Update
How do I fix an unresponsive keyboard in Windows 11?
An unresponsive keyboard problem is usually associated with a corrupt keyboard driver. Check the status of the keyboard driver in the Device Manager. Usually, in such types of cases, uninstalling and reinstalling the keyboard driver fixes the problem.
How do I reset my keyboard on Windows 11?
If some of your keyboard keys are functioning differently or if your keyboard is not working properly, you can reset it to the default. To reset your keyboard settings to the default, move your preferred language to the top.
Read next: Keyboard making clicking noise and not typing in Windows.


