Remove Rotate Left and Rotate Right from Context Menu for Images
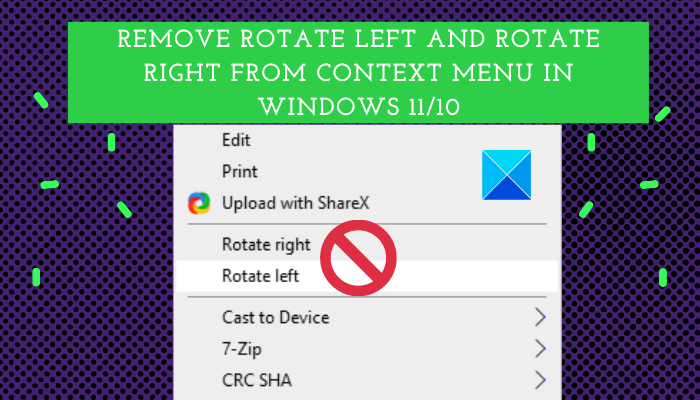
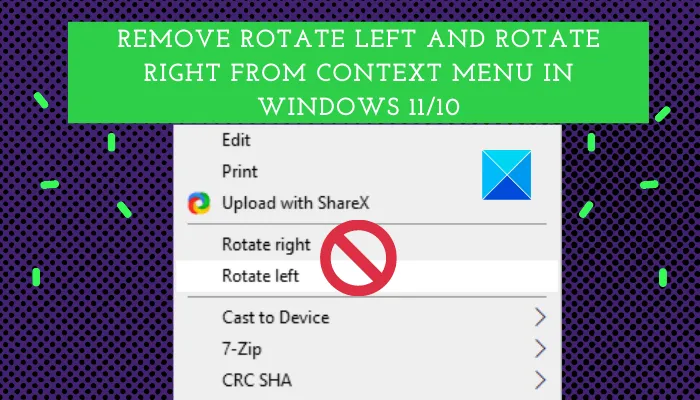
Here is a tutorial for you to remove Rotate Left and Rotate Right from the context menu of Windows 11/10. By default, both these rotate options are added to images saved on your Windows 11/10 PC. But, if you don’t really use these options and want to clear up your context menu, you can remove Rotate Left and Rotate Right options from the right-click context menu. In this article, we are going to share a simple Registry tweak to remove these options from the context menu.
Before you begin, we recommend you to backup Registry just to be on a safer side – or create a system restore point first.
Remove Rotate Left & Rotate Right from Images Context Menu
You can remove Rotate Left and Rotate Right from the right-click context menu in Windows 11/10 using Registry Editor. Here are the main steps to do so:
- Open the Registry Editor app.
- Go to the ContextMenuHandlers key.
- Select the ShellImagePreview subkey.
- Right-click on the ShellImagePreview subkey.
- Choose the Delete option to remove ShellImagePreview subkey.
- Go to the images and right-click on them to check that Rotate Left and Rotate Right options are gone.
Let us discuss these steps in detail!
Before I start with steps, do remember that you will have to manually tweak Registry keys for each and every file format individually. Here, I am going to mention steps to remove Rotate Left and Rotate Right from the context menu of JPG images. You can follow similar steps for other image formats. Let’s elaborate on the above steps for JPG images now!
Firstly, open the Registry Editor app and then navigate to the following address:
HKEY_CLASSES_ROOTSystemFileAssociations.jpgShellExContextMenuHandlers
At this location, you will find a subkey named ShellImagePreview.
Right-click on the ShellImagePreview subkey and from the context menu, press the Delete option.
Next, close Registry Editor and then go to the JPG image and right-click on it. You will no longer see Rotate Left and Rotate Right options in the context menu.
Now that you have removed Rotate Left and Rotate Right options from the context menu of JPG images, you can follow the same steps to do so for other images like PNG, BMP, TIFF, GIF, etc. Just go to the following address for the respective image format:
HKEY_CLASSES_ROOTSystemFileAssociations.bmp
HKEY_CLASSES_ROOTSystemFileAssociations.dib
HKEY_CLASSES_ROOTSystemFileAssociations.gif
HKEY_CLASSES_ROOTSystemFileAssociations.heic
HKEY_CLASSES_ROOTSystemFileAssociations.heif
HKEY_CLASSES_ROOTSystemFileAssociations.ico
HKEY_CLASSES_ROOTSystemFileAssociations.jfif
HKEY_CLASSES_ROOTSystemFileAssociations.jpe
HKEY_CLASSES_ROOTSystemFileAssociations.jpeg
HKEY_CLASSES_ROOTSystemFileAssociations.png
HKEY_CLASSES_ROOTSystemFileAssociations.rle
HKEY_CLASSES_ROOTSystemFileAssociations.tif
HKEY_CLASSES_ROOTSystemFileAssociations.tiff
HKEY_CLASSES_ROOTSystemFileAssociations.webp
Read: Free Context Menu Editors for Windows PC.
How to remove Rotate Left and Rotate Right from the context menu of multiple images at once
You can also remove Rotate Left and Rotate Right from the right-click context menu of multiple images at once. For that, you will gave to create a registry file and then run it. Here are the basic steps to do so:
- Open Notepad.
- Write command with respective keys, subkeys, and values for one image file type.
- Repeat step (2) for other image file formats.
- Go to the File > Save as option.
- Save the file with the .reg file extension.
- Run the created Registry file.
Let me explain the above steps now!
Firstly, you need to open Notepad on your PC. After that, write the following command to remove Rotate Left and Rotate Right from the context menu of BMP images:
Windows Registry Editor Version 5.00
[-HKEY_CLASSES_ROOTSystemFileAssociations.bmpShellExContextMenuHandlersShellImagePreview]
Now, you need to repeat the above command for other image file types. So, write the below commands repeatedly for JPG, PNG, GIF, TIFF, and other images:
[-HKEY_CLASSES_ROOTSystemFileAssociations.ddsShellExContextMenuHandlersShellImagePreview]

[-HKEY_CLASSES_ROOTSystemFileAssociations.dibShellExContextMenuHandlersShellImagePreview]

[-HKEY_CLASSES_ROOTSystemFileAssociations.gifShellExContextMenuHandlersShellImagePreview]

[-HKEY_CLASSES_ROOTSystemFileAssociations.heicShellExContextMenuHandlersShellImagePreview]

[-HKEY_CLASSES_ROOTSystemFileAssociations.heifShellExContextMenuHandlersShellImagePreview]

[-HKEY_CLASSES_ROOTSystemFileAssociations.icoShellExContextMenuHandlersShellImagePreview]

[-HKEY_CLASSES_ROOTSystemFileAssociations.jfifShellExContextMenuHandlersShellImagePreview]

[-HKEY_CLASSES_ROOTSystemFileAssociations.jpeShellExContextMenuHandlersShellImagePreview]

[-HKEY_CLASSES_ROOTSystemFileAssociations.jpegShellExContextMenuHandlersShellImagePreview]

[-HKEY_CLASSES_ROOTSystemFileAssociations.jpgShellExContextMenuHandlersShellImagePreview]

[-HKEY_CLASSES_ROOTSystemFileAssociations.jxrShellExContextMenuHandlersShellImagePreview]

[-HKEY_CLASSES_ROOTSystemFileAssociations.pngShellExContextMenuHandlersShellImagePreview]

[-HKEY_CLASSES_ROOTSystemFileAssociations.rleShellExContextMenuHandlersShellImagePreview]

[-HKEY_CLASSES_ROOTSystemFileAssociations.tifShellExContextMenuHandlersShellImagePreview]

[-HKEY_CLASSES_ROOTSystemFileAssociations.tiffShellExContextMenuHandlersShellImagePreview]

[-HKEY_CLASSES_ROOTSystemFileAssociations.wdpShellExContextMenuHandlersShellImagePreview]

[-HKEY_CLASSES_ROOTSystemFileAssociations.webpShellExContextMenuHandlersShellImagePreview]
You can write similar command for other images, just mention the extension before ShellEx. After writing the commands, go to the File menu and click on the Save as option. Then while saving the file, select Save as type to All Files and then mention filename followed by the .reg file extension. At last, press the Save button to save the Registry file.
Go to the created Registry file and double-click on it to merge it. You will need administrator privilege to run the file. As you run the file, it will remove the Rotate Left and Rotate Right options from the context menu of multiple image formats at once.
Read: How to Add or Remove Pin to Start from Context Menu.
How to Add Rotate Left and Rotate Right back to the Context Menu in Windows 11/10
If you want to add Rotate Left and Rotate Right options back to the context menu of images, what to do? Well, no worries. Simply follow the below steps for JPG files:
Open Registry Editor.
Go to the below address:
HKEY_CLASSES_ROOTSystemFileAssociations.jpgShellExContextMenuHandlers
Right-click on it and select the new option. This will create a new sub-key.
Rename the newly created sub-key as ShellImagePreview.
Double-click on it from the right panel and enter {FFE2A43C-56B9-4bf5-9A79-CC6D4285608A} in its Value data field.
Press the Ok button and close Registry Editor.
Performing the above steps will restore Rotate Left and Rotate Right options back to the context menu. You can do the same for other image formats.
If you want to add both the options back to multiple images at once, create a Registry file as we did to remove Rotate Left and Rotate Right for multiple images at once. Just make the change to the command; write the below commands:
Windows Registry Editor Version 5.00

[HKEY_CLASSES_ROOTSystemFileAssociations.bmpShellExContextMenuHandlersShellImagePreview]
@="{FFE2A43C-56B9-4bf5-9A79-CC6D4285608A}"

[HKEY_CLASSES_ROOTSystemFileAssociations.ddsShellExContextMenuHandlersShellImagePreview]
@="{FFE2A43C-56B9-4bf5-9A79-CC6D4285608A}"

[HKEY_CLASSES_ROOTSystemFileAssociations.dibShellExContextMenuHandlersShellImagePreview]
@="{FFE2A43C-56B9-4bf5-9A79-CC6D4285608A}"

[HKEY_CLASSES_ROOTSystemFileAssociations.gifShellExContextMenuHandlersShellImagePreview]
@="{FFE2A43C-56B9-4bf5-9A79-CC6D4285608A}"

[HKEY_CLASSES_ROOTSystemFileAssociations.heicShellExContextMenuHandlersShellImagePreview]
@="{FFE2A43C-56B9-4bf5-9A79-CC6D4285608A}"

[HKEY_CLASSES_ROOTSystemFileAssociations.heifShellExContextMenuHandlersShellImagePreview]
@="{FFE2A43C-56B9-4bf5-9A79-CC6D4285608A}"

[HKEY_CLASSES_ROOTSystemFileAssociations.icoShellExContextMenuHandlersShellImagePreview]
@="{FFE2A43C-56B9-4bf5-9A79-CC6D4285608A}"

[HKEY_CLASSES_ROOTSystemFileAssociations.jfifShellExContextMenuHandlersShellImagePreview]
@="{FFE2A43C-56B9-4bf5-9A79-CC6D4285608A}"

[HKEY_CLASSES_ROOTSystemFileAssociations.jpeShellExContextMenuHandlersShellImagePreview]
@="{FFE2A43C-56B9-4bf5-9A79-CC6D4285608A}"

[HKEY_CLASSES_ROOTSystemFileAssociations.jpegShellExContextMenuHandlersShellImagePreview]
@="{FFE2A43C-56B9-4bf5-9A79-CC6D4285608A}"

[HKEY_CLASSES_ROOTSystemFileAssociations.jpgShellExContextMenuHandlersShellImagePreview]
@="{FFE2A43C-56B9-4bf5-9A79-CC6D4285608A}"

[HKEY_CLASSES_ROOTSystemFileAssociations.jxrShellExContextMenuHandlersShellImagePreview]
@="{FFE2A43C-56B9-4bf5-9A79-CC6D4285608A}"

[HKEY_CLASSES_ROOTSystemFileAssociations.pngShellExContextMenuHandlersShellImagePreview]
@="{FFE2A43C-56B9-4bf5-9A79-CC6D4285608A}"

[HKEY_CLASSES_ROOTSystemFileAssociations.rleShellExContextMenuHandlersShellImagePreview]
@="{FFE2A43C-56B9-4bf5-9A79-CC6D4285608A}"

[HKEY_CLASSES_ROOTSystemFileAssociations.tifShellExContextMenuHandlersShellImagePreview]
@="{FFE2A43C-56B9-4bf5-9A79-CC6D4285608A}"

[HKEY_CLASSES_ROOTSystemFileAssociations.tiffShellExContextMenuHandlersShellImagePreview]
@="{FFE2A43C-56B9-4bf5-9A79-CC6D4285608A}"

[HKEY_CLASSES_ROOTSystemFileAssociations.wdpShellExContextMenuHandlersShellImagePreview]
@="{FFE2A43C-56B9-4bf5-9A79-CC6D4285608A}"

[HKEY_CLASSES_ROOTSystemFileAssociations.webpShellExContextMenuHandlersShellImagePreview]
@="{FFE2A43C-56B9-4bf5-9A79-CC6D4285608A}"
Run the created Registry file and it will restore the rotate options to your images.
So, this is how you can remove Rotate Left and Rotate Right from the context menu using Registry Editor.
Now read: How to Remove Move to OneDrive from Context Menu.

