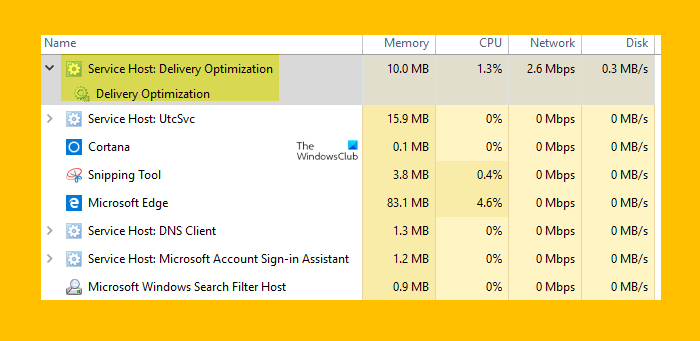
Service Host Delivery Optimization High Network, Disk or CPU usage
Service Host Delivery Optimization Service is used to optimize the delivery of services and increases the speed of updates. In addition, you can also use this service to decrease bandwidth issues while updating. However, some users reported that Service Host Delivery Optimization results in high Network, Disk or CPU usage. In case you are experiencing the same issue, please keep reading this post for helpful solutions.
It would be good to restart your computer before attempting any of the suggested troubleshooting procedures. Performing this action refreshes the operating system and deletes corrupted temporary data that might be the reason to occur this problem.
What does Service Host Delivery Optimization do?

The name of the Windows Service is Delivery Optimization (DoSvc). It performs content delivery optimization tasks and is used during the Windows Update process. The path to its executable is:
C:WINDOWSSystem32svchost.exe -k NetworkService -p
Service Host Delivery Optimization Network, Disk or CPU usage
Follow the below suggestions to fix this problem:
- Run System File Checker
- Turn off Allowing downloads from other PCs
- Disable automatic updates in Microsoft Store
- Modify Network bandwidth for BITS
- Modify the Group Policy or Registry to disable WUDO.
Let’s now see them in detail:
1] Run System File Checker
Since is a Windows OS process you need to make sure that a potential corruption is not causing this issue. So the first thing you could do is to run the System File Checker tool to replace such bad files.
2] Turn off allowing downloads from other PCs
As the first step in this situation, you will have to disable the Delivery Optimization setting that allows your computer to download the update from multiple Network computers types.
- Press the Windows key + I keyboard shortcut to open the Settings app.
- Click on the Update & Security section.
- Go to the Delivery Optimization tab from the left pane.
- Turn off the toggle for Allow downloads from other PCs.
- Now restart your computer and try to check if this problem still occurs.
3] Disable automatic updates in Microsoft Store
Microsoft Store can sometimes cause this problem when it downloads updates for certain applications installed on your computer. If the above method does not resolve the problem, disable automatic updates in the Microsoft Store app and check if it works
- Search for the Store app and then open it.
- Go to the top-right corner of the application, click on the See more (three dots) button.
- Select the Settings option from the menu list.
- Under the App updates section, turn off the toggle for the Update apps automatically option.
- Restart your computer and see if it works.
4] Modify Network bandwidth for BITS
To do this using Group Policy Editor, follow the steps below:
- Click on the Start button, type gpedit.msc, and press Enter.
- On the next page, go to the following location: Computer Configuration > Administrative Templates > Windows Components > Delivery Optimization.
- Now go to the right side of the window and double click on the Download Mode option.
- When the Download Mode page appears, select the Enabled checkbox.
- Under the Options section, click on the drop-down menu next to the Download Mode and select the Simple (99) option.
- Click on Apply > OK to apply the changes.
- Returning to the Local Group Policy window, navigate to this location: Computer Configuration > Administrative Templates > Network > Background Intelligent Transfer Service (BITS).
- Right-click on the Limit the maximum network bandwidth for BITS background transfers option and select the Edit option.
- On the next screen, select the Enabled option.
- Under the Options section, make sure the Limit background transfer rate (Kbps) is set to 10.
- Click on Apply > OK to apply the changes.
- Restart your computer and see if it works.
Once you have made the required changes, close the group policy window and restart your computer. Check if the problem is now resolved.
5] Modify the Group Policy or Registry to disable WUDO
Alternatively, you could try adjusting the delivery optimization settings in the Registry or Group Policy.
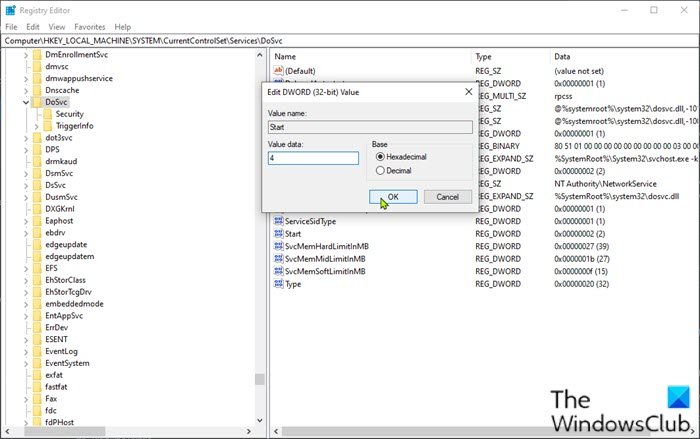
Here’s how you do it using the Windows Registry.
ComputerHKEY_LOCAL_MACHINESYSTEMCurrentControlSetServicesDoSvc
- At the location, on the right pane, double-click the Start entry to modify it.
- Type 4 in the Value data box.
- Click OK to save the change.
- Close the Registry Editor window.
- Reboot your computer to save the changes.
Should I disable Delivery Optimization?
Delivery optimization is a built-in Windows feature that is designed to ensure your Windows PC downloads Windows updates and apps from other PCs on your local network, instead of using the internet. It allows Windows 10 to share data with other PCs on the same local network, which can be useful for peer-to-peer updates.
So should you disable delivery optimization in Windows? Yes, you could safely disable it!
When you disable delivery optimization, you will have less protection against malware, and some features may not function properly. For example, if you unplug your Ethernet cable after disabling delivery optimization, OneDrive will not be able to sync your files.
You might have noticed that Delivery Optimization is on by default in your Windows. This can help reduce the amount of time it takes to download an app or any file that is shared with you from another computer.
However, there may be instances where this feature can cause problems with how Windows functions, such as a slow internet connection or performance issues while downloading files from another computer on the network. If you’re encountering these types of issues, you should disable the Delivery Optimization option on your computer.
Related: Connected Devices Platform Service (CDPSvc) High Disk Usage – Can you disable it?


