The application was unable to start correctly (0xc000007b) on Windows 10
The 0x000007b error usually indicates a conflict from the software with incompatible architecture. For example, attempting to use 32-bit software on a 64-bit system. You can, however, run 32-bit programs on a 64-bit computer.
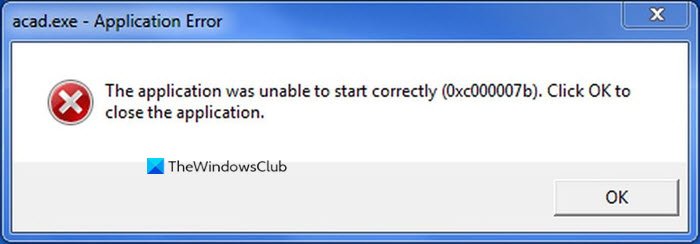
This error could also show up when you use an outdated .NET Framework, Direct X, a Driver, or corruption in your system files. It may also appear when there’s an issue with your hard drive.
The application was unable to start correctly (0xc000007b)
Having an idea of what causes the 0x000007b error, you’re much better equipped to resolve the issue. Here are the fixes that we’ll explore in this section:
- Launch the app in compatibility mode.
- Enable the .NET Framework.
- Update DirectX.
- Reinstall Visual C++.
- Reinstall the application.
- Use the CHKDSK utility.
Next, we’ll get to the details of the above fixes as well as the necessary steps to carry them out successfully.
1] Launch the app in compatibility mode
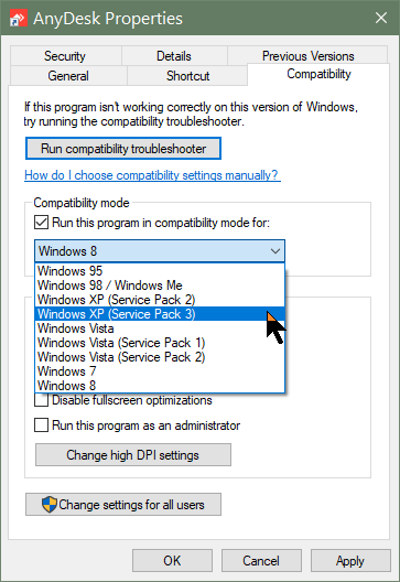
The compatibility mode is useful for running programs that aren’t compatible with your system. If you suspect that an application’s compatibility is the cause of the error, right-click on the shortcut and go to Properties.
Switch over to the Compatibility tab of the Properties window and if you know an earlier Windows version that handled the program correctly, check the Run this program in compatibility mode for option.
Alternatively, click on Run compatibility troubleshooter. Next, select the stable Windows edition from the Compatibility mode dropdown, and hit the OK button.
2] Enable the .NET Framework
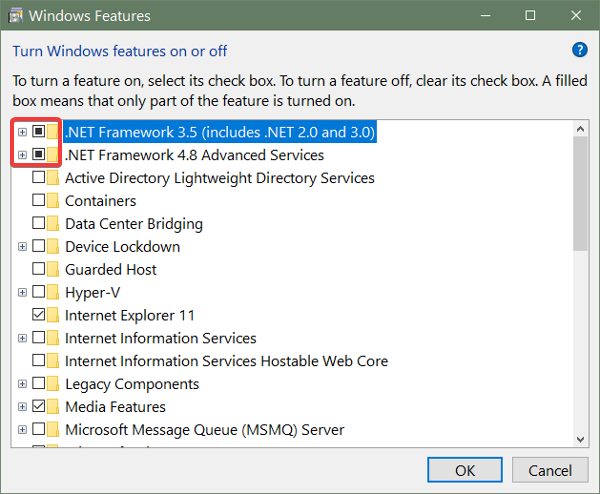
The most common cause of the 0x000007b error code in Windows 10 is that the system disables the .NET Framework by default. You must get this enabled to use Origin.
To enable the .NET Framework on your computer, press the Windows key and search for Control Panel. Launch Control Panel.
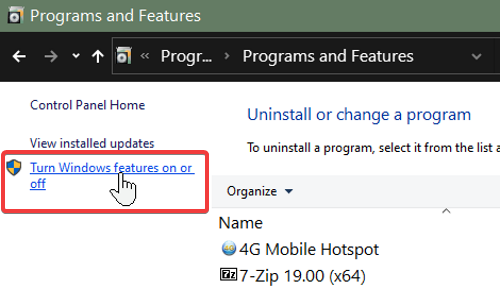
Change Control Panel to the Category view from the link in the top right-hand corner and then click on Uninstall a program Under programs. Here, select the Turn Windows features on or off link in the left-hand pane.
Mark all the checkboxes for .NET Framework. They should be at the top of the list. After enabling the .NET Framework, click on the OK button. This stops the 0x000007b error.
3] Update DirectX
We’ve identified an outdated Direct X as a factor that can cause the error with the code 0x000007b. Updating Direct X will improve your gaming and system performance also. To update it, visit the Microsoft DirectX website and download the latest version.
After downloading the Direct X setup file, double-click on it to begin the installation. In severe cases of the 0x000007b error, the Direct X installation may fail.
4] Reinstall Visual C++
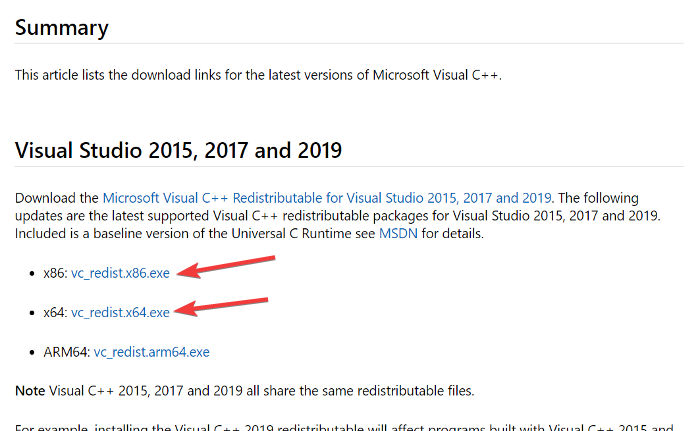
If you still notice the issue after the first fix, reinstall Visual C++ Redistribution.
First, you have to uninstall what you have already.
Search for Add or remove programs in the Start menu and select it. Click on all the Visual C++ versions on this list and uninstall them.
After uninstalling various VC++ software, open the linked web page and scroll down to the first section after Summary. This should be the latest version.
Here, click on the links beside x86 and x64 if your computer is 64-bit because you have to download both the 64-bit and 32-bit versions. Systems on the 32-bit architecture need to download only x86.
5] Reinstall the application
With VC++ reinstalled and the .NET Framework enabled, the final step is to uninstall Origin from your PC if you have it. Right-click on the Windows button and select Run.
Enter appwiz.cpl and press ENTER. Find and right-click on the name of the application. Select Uninstall to get rid of the program.
Next, download the latest version of the program and install it manually. Make sure you right-click on the installer and run it as an Administrator.
6] Use the CHKDSK utility
The CHKDSK utility is handy for finding and fixing hard drive issues. It’s a command-line tool that you can use without additional software or hardware. Search for cmd in the Start menu and right-click on Command Prompt. Select the Run as administrator option.
Input the below command in the Command Prompt window and press the ENTER key.
chkdsk /f /r
Command Prompt may now ask you if you want to scan your system on your next restart. Hit the Y key to accept this and press ENTER. Your computer will now restart and begin to scan and repair problems on your hard drive.
Hope something helped.


