Where are System Restore Points stored? How to view Restore Points?
System Restore Points contains the necessary information needed to restore your system to the chosen state. Restore points are automatically generated when you install a new app, driver, or Windows update, and generated when you create a restore point manually. In this post, we look at where system restore points are stored on a Windows 10 device, and how you can view these restore points.
Where are System Restore Points stored?

Restore points are stored in the hidden protected OS System Volume Information folder in the root directory of each drive you have system protection turned on.
This folder is invisible and inaccessible to all users without making a few configuration changes from an Administrator account.
How to view Restore Points in Windows 10?
We can view restore points in Windows 10 in 3 quick and easy ways. We’ll explore this under the methods outlined below in this section.
1] Via System Restore GUI
To view restore points via the System Restore GUI in Windows 10, do the following:
- Press Windows key + R to invoke the Run dialog.
- In the Run dialog box, type rstrui and hit Enter to open System Restore.
- On the System Restore window that opens, click/tap on Next.
- All current restore points will now be listed with a Date and Time created, Description, and Type of restore point for each.
- You can check the Show more restore points box (if available) at the bottom left corner to see any older restore points (if available) not currently listed. You can also click/tap on the Scan for affected programs button to see which installed programs will be affected by the currently selected restore point.
- Once you’re done reviewing your restore points, you can exit System Restore window.
2] Via Command Prompt
To view restore points via Command Prompt in Windows 10, do the following:
- Press Windows key + R to invoke the Run dialog.
- In the Run dialog box, type cmd and then press CTRL + SHIFT + ENTER to open Command Prompt in admin/elevated mode.
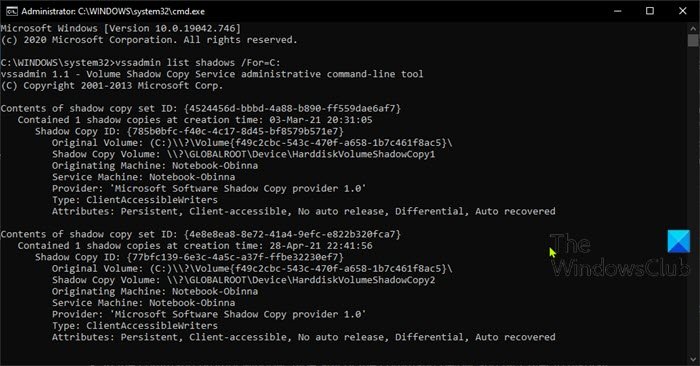
- In the command prompt window, type any of the commands below and hit Enter for what you want to view. Substitute <drive letter> placeholder in the command with the actual drive letter (ex: “C”) of the drive that has saved restore points on you want to see a list of.
Note: The output of any of the commands will list all shadow copies (restore points) on all or specific drives. You will see the volume drive letter and shadow copy ID number for each one.
- To view all available restore points for all drives, run the command below:
vssadmin list shadows- To list all available restore points for all drives to a text file on desktop, run the command below:
vssadmin list shadows >"%userprofile%DesktopRestore Points.txt"
- To list all available restore points for a specific drive, run the command below:
vssadmin list shadows /For=<drive letter>:
- To list all available restore points for the specific drive to a text file on the desktop, run the command below:
vssadmin list shadows /For=<drive letter>: >"%userprofile%DesktopRestore Points.txt"
- Exit CMD prompt when done reviewing.
2] Via PowerShell
To view restore points via PowerShell in Windows 10, do the following:
- Press Windows key + X to open Power User Menu.
- Tap A on the keyboard to launch PowerShell in admin/elevated mode.
- In the PowerShell console, type or copy and paste any of the command below and hit Enter for what you want to view.
- To list all available restore points for all drives, run the command below:
Get-ComputerRestorePoint | Format-Table -AutoSize
- To list all available restore points for all drives to text file on desktop, run the command below:
Get-ComputerRestorePoint | Format-Table -AutoSize | Out-File -filepath "$Env:userprofileDesktopRestore Points.txt"
- To list all available restore points for all drives with more details, run the command below:
Get-ComputerRestorePoint | Format-List
- To list all available restore points for all drives with more details to text file on desktop, run the command below:
Get-ComputerRestorePoint | Format-List | Out-File -filepath "$Env:userprofileDesktopRestore Points.txt"
- Exit PowerShell when done reviewing.
That’s it!
Related post: How to use ShadowExplorer to access & restore Shadow Copies.


