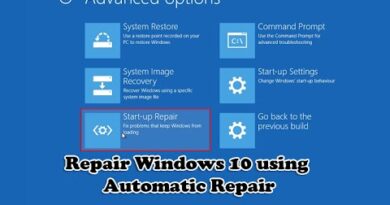
Windows 10/11/7: How To Fix Startup Repair/Automatic Repair Couldn't Repair your Pc
how to fix startup repair couldn’t repair your pc Windows 10/11/7 || Startup Repair-Automatic Repair
Startup Repair Couldn’t Repair Your PC” in Windows 10/11/7 – Fixing Startup Repair and Automatic Repair Issues
Introduction:
Are you encountering the frustrating error message “Startup Repair Couldn’t Repair Your PC” on your Windows 10, 11, or 7 system? Don’t worry, as this comprehensive guide is here to walk you through the steps to resolve this issue and get your system back up and running smoothly. We’ll cover both Startup Repair and Automatic Repair, providing detailed insights into the troubleshooting process.
Section 1: Understanding the Issue
The “Startup Repair Couldn’t Repair Your PC” error usually indicates a critical issue preventing your Windows operating system from booting successfully. This can be caused by corrupted system files, faulty hardware, or other factors. Before diving into solutions, it’s crucial to understand the root cause to implement the most effective fix.
Section 2: Preparatory Steps
Start by ensuring that all external devices, such as USB drives and external hard disks, are disconnected. Also, make a note of any recent changes or updates to your system, as they may have contributed to the problem. Having this information will be valuable during the troubleshooting process.
Section 3: Booting into Safe Mode
Attempting to boot into Safe Mode can be a useful first step. This can be done by restarting your computer and pressing the F8 key (or Shift + F8 in Windows 10/11) during the boot process. Once in Safe Mode, you can uninstall recent updates or drivers that might be causing the issue.
Section 4: Utilizing System Restore
Windows provides a built-in feature called System Restore that allows you to revert your system to a previous state. Access System Restore from the Advanced Startup Options menu and choose a restore point before the issue occurred.
Section 5: Running CHKDSK
Corrupted disk sectors can lead to startup problems. Run the CHKDSK utility to scan and repair disk errors. Open the Command Prompt from the Advanced Startup Options and type ‘chkdsk /f /r’ to initiate the scan.
Section 6: Repairing Windows Boot Configuration Data (BCD)
Issues with the Boot Configuration Data can result in startup problems. Use the Command Prompt to rebuild the BCD by executing commands such as ‘bootrec /scanos’, ‘bootrec /rebuildbcd’, and ‘bootrec /fixmbr’.
Section 7: Checking for Hardware Issues
Faulty hardware, such as a failing hard drive or RAM module, can trigger startup repair problems. Perform hardware diagnostics using tools like Windows Memory Diagnostic and check the integrity of your storage devices.
Section 8: Reinstalling Windows
If all else fails, consider reinstalling Windows. This step should be a last resort, as it involves wiping your system and reinstalling the operating system. Ensure that you back up your important data before proceeding.
Conclusion:
By following this comprehensive guide, you should be able to troubleshoot and resolve the “Startup Repair Couldn’t Repair Your PC” issue in Windows 10, 11, or 7. Remember to proceed with caution, back up your data, and seek professional assistance if needed. With persistence and the right steps, you can successfully revive your system and enjoy a seamless computing experience once again.
Copver Topics:-
startup repair couldnt repair your pc
startup repair cannot repair this computer automatically windows
startup repair is checking your system for problems
startup repair couldnt repair your pc windows 11
startup repair couldnt repair your pc windows 10
startup repair couldnt repair your pc windows 7
automatic repair loop
automatic repair couldnt repair your pc
windows 10 automatic repair loop
automatic repair couldnt repair your pc windows 10
startup repair
how to repair windows 7


Full Video Link:-
https://youtu.be/ZwpeG8dDrYo?si=Kfp63HU9SE6NeCPD
Azeemi sahb ko video bhijoon
❤❤❤❤❤