Wireless Adapter Settings missing in Advanced Power Settings
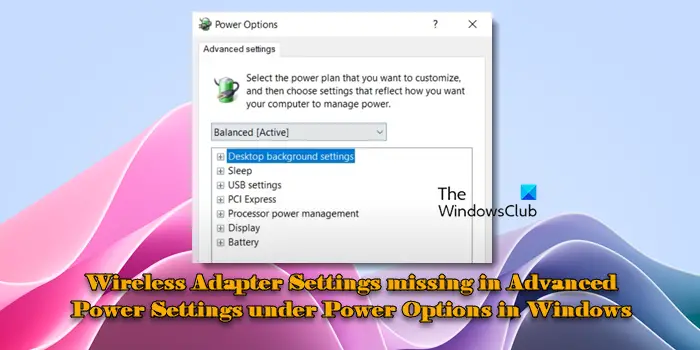
If the Wireless Adapter Settings option is missing in the Advanced Power Settings under Power Options in your Windows 11/10 PC, read this post to learn how to fix the issue.

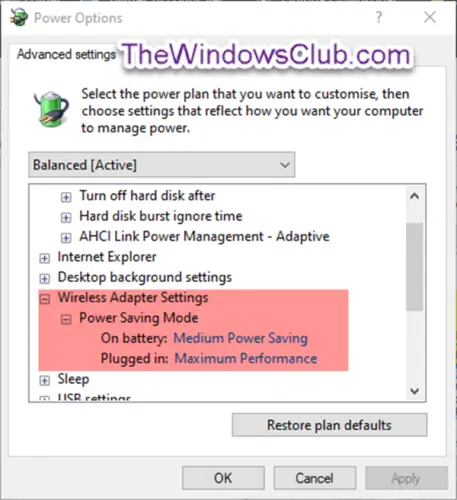
The Wireless Adapter Settings option allows you to manage your wireless network adapter’s power consumption and customize its behavior under different power states, such as when it’s plugged in or running on battery. If the option is unavailable under Power Options, it might limit your ability to control your network adapter’s power settings and troubleshoot power or network performance-related issues.
Fix Wireless Adapter Settings missing in Advanced Power Settings under Power Options in Windows 11/10
To add the missing Wireless Adapter Settings option in Advanced Power Settings under Power Options on your Windows 11/10 PC, use these fixes:
- Run the Power Troubleshooter
- Modify the Power Plan settings
- Re-install Network Adapter driver
- Edit the Registry
Let us see this in detail.
1] Run the Power Troubleshooter

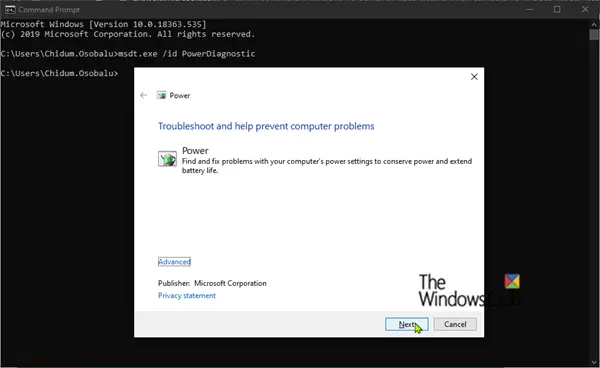
The Power Troubleshooter scans a system for power-related configuration issues and resets power settings to their default values, which may bring back missing options like the Wireless Adapter Settings.
You can find the Power Troubleshooter in the Windows Settings app and run it from there (Win +I > System > Troubleshoot > Other troubleshooters).
Once the troubleshooter runs, follow the on-screen instructions and see if it helps restore the missing Wireless Adapter Settings option.
2] Modify the Power Plan settings

Modifying the Power Plan settings helps adjust the power state and performance characteristics of PCIe devices (found under advanced power settings in Windows Power Options), potentially bringing back any missing options.
Open an elevated command prompt and execute the following command:
- powercfg -attributes 19cbb8fa-5279-450e-9fac-8a3d5fedd0c1 12bbebe6-58d6-4636-95bb-3217ef867c1a -ATTRIB_HIDE
Now restart your PC and see if the Wireless Adapter Settings option is restored under Power Options.
3] Re-install Network Adapter driver

Reinstalling the network adapter driver returns its configuration settings to their default state and addresses common driver-related issues, such as missing or corrupted files. This helps re-establishing standard options and functionalities that may have gone altered or hidden due to previous driver issues.
Press Win + X and select Device Manager from the menu. Expand Network adapters. Find your wireless network adapter and right-click on it. Select Uninstall device, check the box that says ‘Delete the driver software for this device’ in the confirmation dialogue and click Uninstall.
After the uninstallation process is complete, restart your computer. Windows will automatically reinstall the driver for your network adapter. If you want to ensure you have the latest driver version, you can download the same from the manufacturer’s website and install it manually.
4] Edit the Registry

If none of the above solutions work, use this registry tweak.
Note: Before making any changes, it’s crucial to create a backup of the Registry. This allows you to restore it to its original state if something goes wrong.
Press Win + R, type regedit in the Run dialog, and press Enter. Click Yes in the User Account Control prompt.
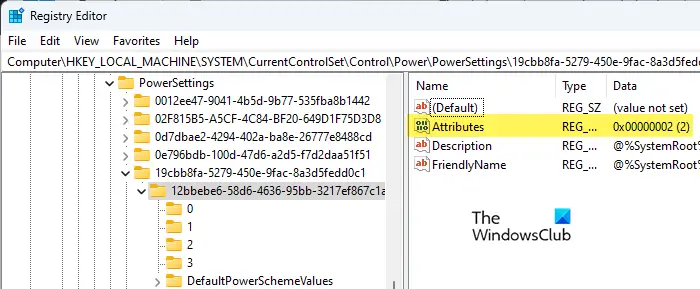
Navigate to the following key in the Registry Editor window:
HKEY_LOCAL_MACHINESYSTEMCurrentControlSetControlPowerPowerSettings238C9FA8-0AAD-41ED-83F4-97BE242C8F2012BBEBE6-58D6-4636-95BB-3217EF867C1A
In the right panel, double-click on Attributes and set the Value data to 2. If you can’t find the key, right-click in the empty area and select New > DWORD (32-Bit) Value. Rename the key as ‘Attributes’ and set its value to ‘2’ (keeping Base as Hexadecimal).
This will show the Wireless Adapter Settings in Power Options.
I hope this helps.
Read: How to configure hidden Power Options in Windows.
How do I enable advanced power options in Windows 11?
To enable the hidden or missing advanced power options in Windows 11, sign in as an administrator and add the required setting using the powercfg command. PowerCFG is the main command-line tool for managing power settings in Windows. It allows you to configure power plans, set power policies, reset power schemes to default, control various power-related configurations, and enable specific power settings using their GUIDs (Globally Unique Identifier).
How to change Power settings for Network adapter in Windows 11?
Press Win + X and select Device Manager from the menu. In the Device Manager window, expand the ‘Network adapters‘ section. Right-click on the network adapter you want to configure and select Properties. Switch to the Power Management tab in the network adapter’s properties window. You will see two options: ‘Allow the computer to turn off this device to save power‘ and ‘Allow this device to wake the computer‘. Check or uncheck these options as desired. Click OK to apply the changes.
TIP: If the Power Management tab is missing in your Device Manager, you may add it by modifying the registry.
Read Next: System Cooling Policy missing in Power Options of Windows.


