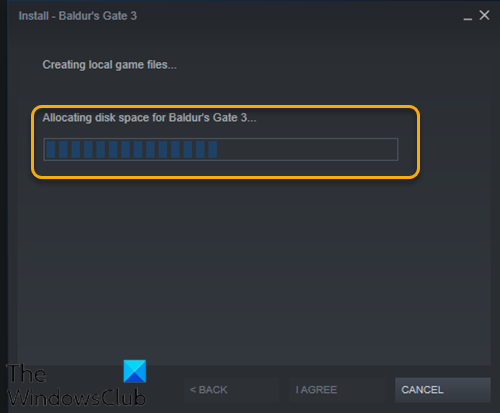
Fix Steam stuck on Allocating disk space on Windows 10
Some PC users when installing a game through the Steam client on their Windows 10 device, may notice they are stuck on the Allocating disk space screen. If you are experiencing a similar issue as well, you can try the solutions provided in this post to promptly resolve the issue.

The potential culprits to this error include:
- Stuck download cache.
- The download server is full or not working.
- Blocked by a firewall.
- Overclocking.
Steam stuck on Allocating disk space

If you’re faced with this issue, you can try our recommended solutions below in no particular order and see if that helps to resolve the issue.
- Restart computer
- Run Steam client as Administrator
- Clear Steam Download cache
- Change Download Server
- Refresh Steam installation files
- Temporarily disable Windows Defender Firewall
- Stop Overclocking (if applicable)
Let’s take a look at the description of the process involved concerning each of the listed solutions.
1] Restart the computer
If you’re experiencing this issue on your Windows 10 device, you can simply restart the computer and then re-launch Steam and install the game again.
2] Run Steam client as Administrator
This solution requires you to kill the Steam process in Task Manager and then re-launch the Steam client with admin privileges.
3] Clear Steam Download cache
To manually clear the Steam download cache, do the following:
- Launch Steam in admin mode.
- Once in the client, click on Steam at the top left corner of the screen.
- From the drop-down box, click on Settings.
- Once in the Settings, navigate to the Downloads tab.
- Click the Clear Download Cache option.
- Click OK on the prompt to confirm your action. Wait for the process to complete.
- When done, save changes and exit the client.
If the issue persists, try the next solution.
4] Change Download Server
If the server you’re currently downloading Steam games is full or under maintenance, you could encounter this issue. In this case, you can try changing the download server. Here’s how:
- Launch Steam client in admin mode.
- Once in the client, click on Steam at the top left corner of the screen.
- From the drop-down box, click on Settings.
- Once in the Settings, navigate to the Downloads tab.
- Click the drop-down menu under the Download Region.
- Choose a different server to download from.
- Exit the Steam client.
Re-launch the Steam client and proceed with the game download/install. The issue should be resolved now. If not, try the next solution.
5] Refresh Steam installation files
To refresh the Steam files, do the following:
Note: Any interruption during the copy process will corrupt the files and you will have to re-download the entire content over again. Only proceed with the procedure if you are sure that your computer won’t be interrupted.
- Kill Steam process in Task Manager.
- Navigate to your default Steam directory as shown below:
C:/Program Files (x86)/Steam
- Inside the Steam folder, select everything except the steamapps folder and the Steam.exe executable file.
- Tap the Delete key on your keyboard.
After the deletion, re-launch Steam with admin privileges and try the game installation again and see if the issue is resolved. If not, continue with the next solution.
FIX: Not enough disk space Steam error.
6] Temporarily disable Windows Defender Firewall
This solution requires you to temporarily disable Windows Defender Firewall and then kill the Steam client process in Task Manager, re-launch Steam with admin privileges and then, try the game installation again. This time it should complete without issues. Otherwise, try the next solution.
7] Stop Overclocking (if applicable)
If you have overclocked your PC, you can simply reverse the change. The steps you will need to take depends on the overclocking software. Launch the software and look for the option to stop the overclocking. Once done, restart your computer, rerun the game installation.
Hope this helps!
Related post: Steam games stuck on ‘Preparing to Launch.


