Hide or Show Windows Ink Workspace Button on Taskbar in Windows 10
For PC users who have a device with an active pen like the Surface Pro 4 or Surface Book – Windows Ink Workspace is enabled by default and accessible via the pen button in the notification area of your taskbar. You won’t see this button if your device does not have an active pen paired with it. PC users who don’t have a device with an active pen can still try out Windows Ink Workspace by manually enabling the Windows Ink Workspace button. In this post, we will show you how to hide or show the Windows Ink Workspace button on the taskbar notification area (system tray) for your account in Windows 10.
Hide or Show Windows Ink Workspace Button on Taskbar
You can hide or show Windows Ink Workspace Button on Taskbar in Windows 10 3 ways, viz;
- Via Taskbar Context Menu
- Via Settings app
- Via Registry Editor
Let’s take a look at the description of the step-by-step process in relation to each of the methods.
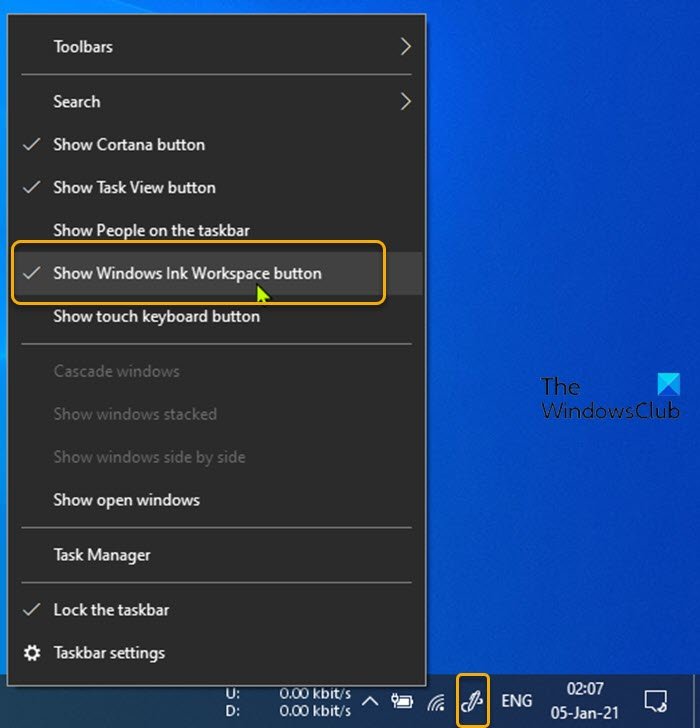
1] Hide or Show Windows Ink Workspace Button via Taskbar Context Menu

Do the following:
- Right-click or press and hold on the taskbar.
- Click/tap on Show Windows Ink Workspace button to toggle it to show (checked) or hide (unchecked).
2] Hide or Show Windows Ink Workspace Button via Settings app

Do the following:
- Right-click or press and hold on the taskbar.
- Select Taskbar settings from the context menu.
- In the window that opens, on the right pane, scroll down and click Turn system icons on or off link.
- In the window that opens, locate the Windows Ink Workspace option and toggle the button to On or Off.
3] Hide or Show Windows Ink Workspace Button via Registry Editor

Since this is a registry operation, it is recommended that you back up the registry or create a system restore point as necessary precautionary measures. Once done, you can proceed as follows:
ComputerHKEY_CURRENT_USERSOFTWAREMicrosoftWindowsCurrentVersionPenWorkspace
- At the location, on the right pane, double-click the PenWorkspaceButtonDesiredVisibility entry to edit its properties.
- In the properties window, set the Value data to 0 to Hide (Off) or 1 to Show (On).
- Click OK to save changes.
- Exit Registry Editor.
That’s it on the three ways to hide or show Windows Ink Workspace Button on Taskbar in Windows 10.
Windows Ink puts the power of Windows in the tip of your pen, enabling you to write on your device as you do on paper, creating sticky notes, drawing on a whiteboard, and easily sharing your analog thoughts in the digital world. Windows Ink is also integrated into apps like Maps, Microsoft Edge, and Office.
Let us know in the comments section below if you use Windows Ink Workspace and what your experience has been so far.
Related post: How to disable Windows Ink Workspace in Windows 10.