How to convert Dynamic IP Address to Static IP Address
===To view written instruction click “show more” down below===
This video covers the steps to convert your dynamic IP address to Static IP.
This step is required to setup FTP Scan from either Xerox or Canon.
Please follow the step by step instructions below.
1. Click “Start”
2. Select “Control Panel”
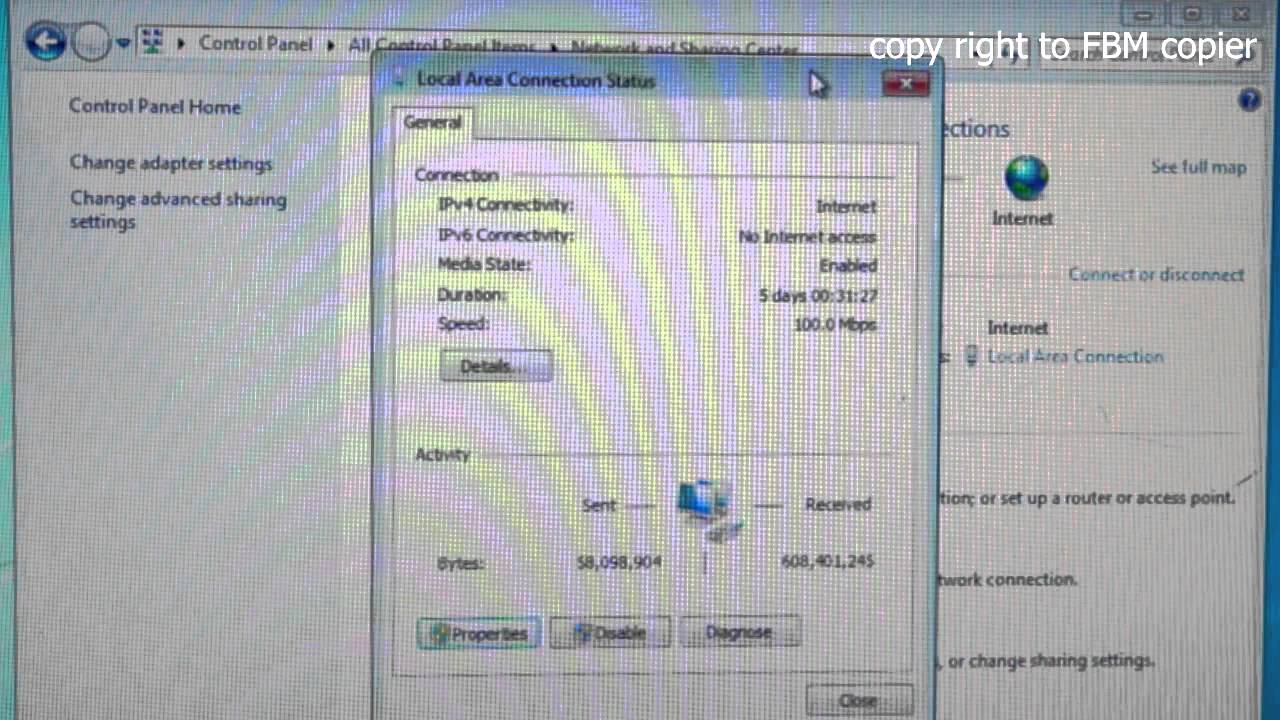
3. Select “Network and Sharing Center”
4. Click “Local Area Connection” if the computer is connected directly with ethernet cable or Click “Wifi” if you are connect wirelessly.
5. Click “Properties”
6. Select “Details” and please make a note of (IP Address, Subnet Mask, Default Gateway, and DNS Server)
7. After you have made the notes click “Close”
8. Click “Properties”
9. Highlight “Internet Protocol Version 4 (TCP/IPv4)
10. Select “Use the following IP Address” and fill in the following fields(IP address, Subnet mask, Default Gateway, and Preferred DNS server) these are the information that you made a note of.
11. Click “Ok” and “Close” and “Close”
Now the IP address on your computer is fixed meaning the router won’t change the address unless changed manually. The copier and the computer will be able to communicate using the FTP Utility when scanning documents.
ip address