How to create an animated picture frame in PowerPoint
[ad_1]
Wouldn’t it be cool to have an animated picture frame in your PowerPoint presentation? Just imaging a picture frame or Shape on your slide automatically showcasing different pictures in it. This tutorial will explain the steps to create an animated picture frame in your PowerPoint slide. In Microsoft PowerPoint, there are features to animate pictures and objects to make them look lively in your presentation.
How to make an animated picture frame in PowerPoint
Open Microsoft PowerPoint.
Ensure that your slide is in a Blank layout.
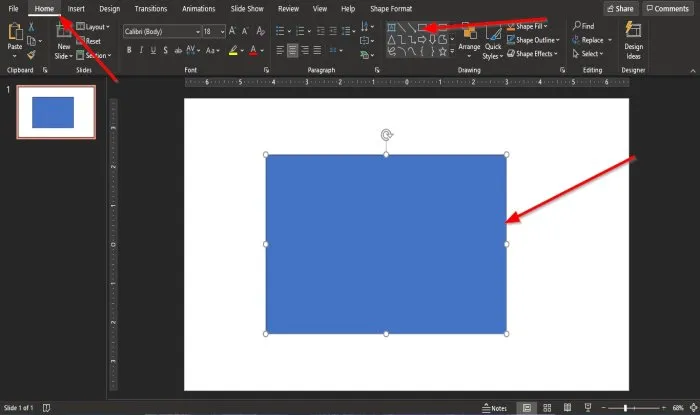
On the Home tab in the Drawing group, choose a rectangle from the list box.
Draw the rectangle into the slide.
Now, we will create copies of the rectangle by pressing Ctrl-D on the keyboard to make copies of the rectangle.
We will place a picture into the rectangle.

Right-click the rectangle and select Format Shape.
A Format Shape pane will open on the right.

Ensure that it is on the Fill and Line page.
On the Fill and Line page, click the Fill option.
In the list, click Picture or Texture Fill.
On the section Picture Source, click Insert.

An Insert Picture dialog box will pop up.
Click From a File.
An Insert Picture dialog box will pop, select a file and click Open.
The picture will be inserted into the shape.
Copy the rectangle two more times and insert pictures into them.
Place the pictures over each other.
To align the pictures properly.

On the Home tab in the Drawing group, click Arrange.
In the drop-down list in the Position Objects section, click Align, then Align Center.

Then click Arrange again, and in the drop-down list in the Position Objects section, click Align, then Align Middle.
Now we want to change the position of the shape.
Because pictures are added to the shapes, the Shape Format pane will change to the Picture Format pane.

On the Format Picture pane on the right, click Effects, an icon shape like a hexagon.
On the Effects page, click 3-D Rotation.
In the 3-D Rotation list in the section Preset, click the preset drop-down arrow, you can add a 3-D effect to the pictures if you want.
In this tutorial, we select Oblique: Top left.
Add this 3-D Rotation to each picture.
Now we want to increase the width of the pictures

Click the File and Line button on the Picture Format pane.
Click the Line option.
Then click Solid Line under the Line option.
You can use the arrows to increase the Width size or type into the box the width you want in the section width.
You can even add color to the shape’s outline by clicking the Outline Color list box and choosing a color.
Add color and width to each picture
We will close the Format Picture pane.
Now we are going to add some animation to the pictures.

Click the Animation tab and click the Animation Pane button in the Advanced Animation group.
The Animation Pane is where the effects will be displayed.
Click the rectangle with the picture, then go to the Animation list box.
Now we are going to select an animation from the Animation list box in the Animation group
In the drop-down list, click the Fade Effect in the Exit section.
Do the same to the other pictures.
On the Animation Pane, you will see the display of the pictures that has the animation effect.
If you want to extend the animation time, on the Animation tab in the Timing group, enter the Duration time you want.
Go back to the Animation Pane and play the video by clicking the Play Button.
The pictures will play automatically in the frame.
We hope this tutorial helps you understand how to create an animated picture frame in PowerPoint.
If you have questions about the tutorial, let us know in the comments.
Read next: How to make Animated Greeting Cards using PowerPoint.