Screen or images showing Artifacts or Distortion in Windows 10
[ad_1]
At times it has been reported that the monitor displays distortion, images appear wavy with horizontal lines, and videos showing frames at incorrect positions. It happens because of the wrong monitor refresh rate where the display driver is not able to put the frames on the screen properly. Then there are hardware limitation issues known as artifacts. We have already seen how to fix Screen Tearing issues, now let us look at the various methods to fix thisArtifacts or Distortion problem on Windows 10.

What are Tearing/Distortion/Horizontal Lines/Artifacts?
Tearing is a video artifact in which a series of horizontal lines appear to be move across the screen, thus creating a tearing (tearing apart) effect.
They are more noticeable during animations, such as when you are moving a window around on your screen. Or when you are doing a screen recording. Or when you are playing a game.
This adds on when you have two monitors, and there is a substantial difference between the refresh rate. It is possible the issue may occur only on one of the monitors.
Tearing or artifacts in the screen are also caused by a poor video driver or a sync issue between drawing on the monitor and data sent to the graphics driver.
PC Screen showing Artifacts or Distortion
You can follow these suggestions to fix this issue on your monitor.
- Enable Hardware Acceleration in Windows
- Update Graphics Driver in Windows 10
- Remote Desktop Issue
- Nearby magnetic field
- Reset GPU settings to default
For some of the methods, you will need an administrator account on your Windows 10 PC.
1] Enable Hardware Acceleration in Windows
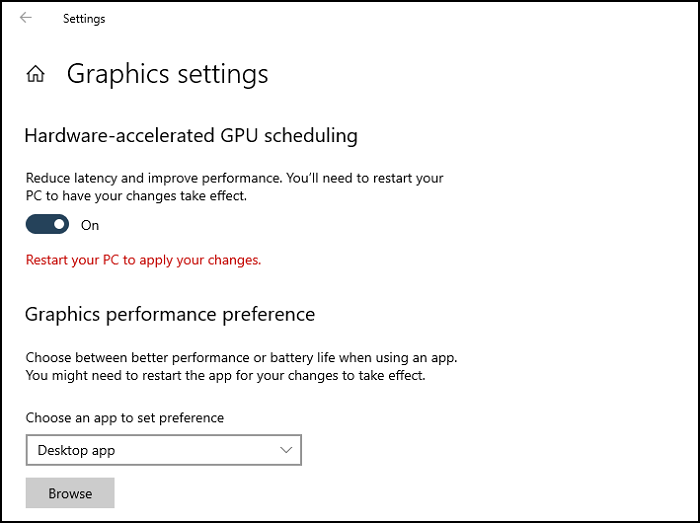
Enabling hardware acceleration can help to fix the distortions and artifacts on your screen. To fix the problem, follow the below steps:
- Open Windows 10 Settings
- Navigate to System > Display
- Click on the Graphics Settings link
- Turn on the “Hardware-accelerated GPU scheduling” option
Restart your computer, and check for the issue.
Read: White dots appearing all over the screen.
2] Update Graphics Driver in Windows 10
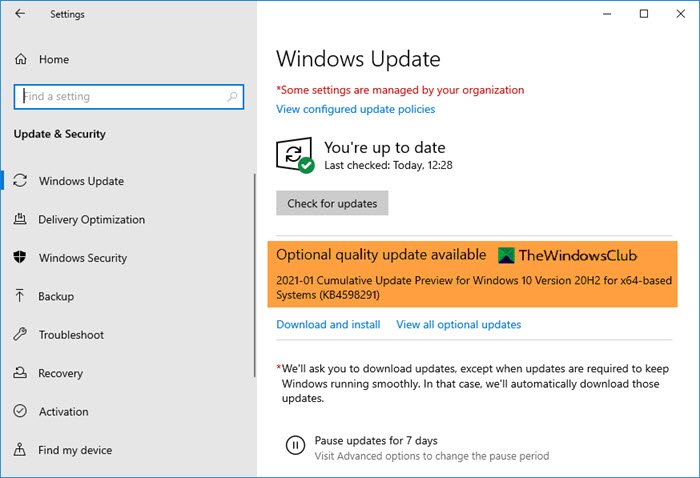
Check if there is an update for your Graphics Driver. You can do it in two ways. The first is checking on the OEM website, and the second is through Optional Windows Update.
Go to Windows 10 Settings > Update and Security > View Optional Update (under update button). Locate if there is a driver update available. Even if you check through the Device manager, the screen will bring you here. If there is an update, check the box and update.
Be aware that it may not always be a graphics card issue, and everything works fine when playing games and without any distortion. You will notice it only when using File Explorer, images, desktop wallpaper; the cursor might disappear, and images and text might appear fuzzy. You may also observe a pink-purple tint.
Related: Screen goes black when Scrolling with Mouse.
3] Remote Desktop Issue

Some users have reported that these lines and patches occur when they connect to another PC using a remote desktop. In this case, you can enable hardware acceleration.
- Open Group Policy Editor by typing gpedit.msc in the Run prompt (Win + R), and press the Enter key.
- Navigate to the following path
Computer Configuration > Administrative Templates > Windows Components > Remote Desktop Services > Remote Desktop Connection Client.
- Locate and open the policy— Do not allow hardware-accelerated decoding. Please set it to Enable.
This policy setting specifies whether the Remote Desktop Connection can use hardware acceleration if supported hardware is available.
If this is enabled, the Remote Desktop Connection software will only use software decoding. Once enabled or left unconfigured Remote Desktop client will use hardware-accelerated decoding if supported hardware is available.
If it is already enabled or not configured, you can disable it and check if the issue is resolved. Hardware acceleration may or may not help, but toggling the setting helps to understand if this has an impact. Reconnect to the remote desktop, and check if you experience the same problem.
Related: Windows computer screen brightness flickering or flashing.
4] Nearby Magnetic Field
Magnets are known to cause distortion in display screens, and it has been observed that magnetic fields generated by speakers can also distort images. It could be possible that the speakers are generating magnetic fields.
Figure out the devices around the monitor, and check if any of them has magnets or electromagnets. Speakers are usually kept on both sides of the monitor. Turn them off, and check if the issue persists.
Read: Computer Monitor has a Yellow tint on screen.
5] Reset GPU settings to default
Most OEMs offer GPU software that allows you to reconfigure the settings to default, with the optimal setting for your GPU and display. You can download the latest GPU software from the OEM’s support website. Once installed, open and apply the default or balance settings.
I hope the post was easy to follow, and you were able to resolve the issue where the PC screen was showing artifacts or distortion. If nothing has worked for you, it’s time to get in touch with the Hardware support team and ask for help. It is possible that you have to return the hardware or the laptop for repair if nothing helps.
Read next: How to clear the Display cache in Windows 10.